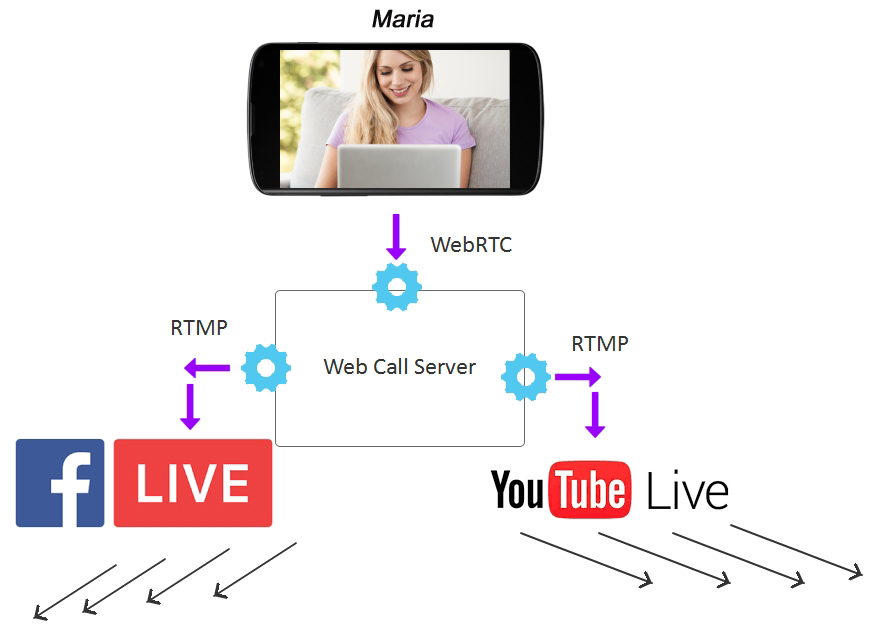
Both Facebook and YouTube offer broadcasting capabilities that allow live broadcasting of a video stream to wide audience of spectators. In this article we will tell how to capture a video stream from the web page using the WebRTC technology and send this video stream to Facebook and YouTube simultaneously, that is run live broadcasting in both services at once.
Before we begin broadcasting, let’s find out what RTMP endpoints Facebook and YouTube offer for streaming. Then, we need to send video streams to these RTMP addresses.
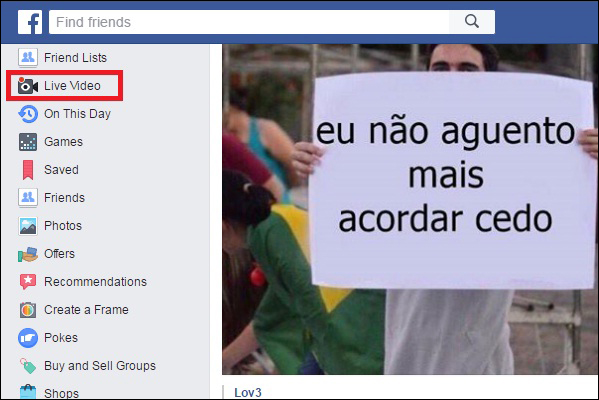
Facebook is a good place to start. First of all, look for the Live video button. The button could look like this
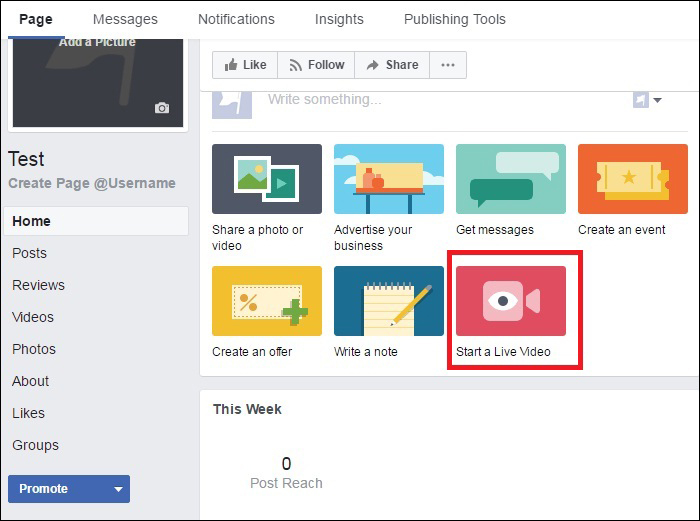
Or this:
Then click the Go Live button again.
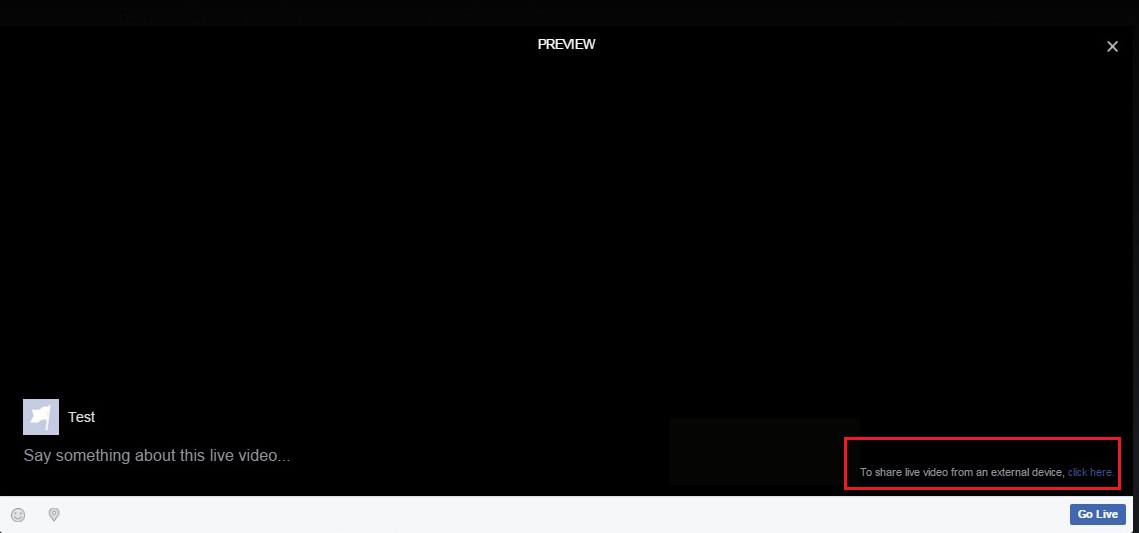
Click the Click here link to broadcast from external devices, not from Facebook.
Then click Create stream

As a result, Facebook provides the data of the RTMP stream:
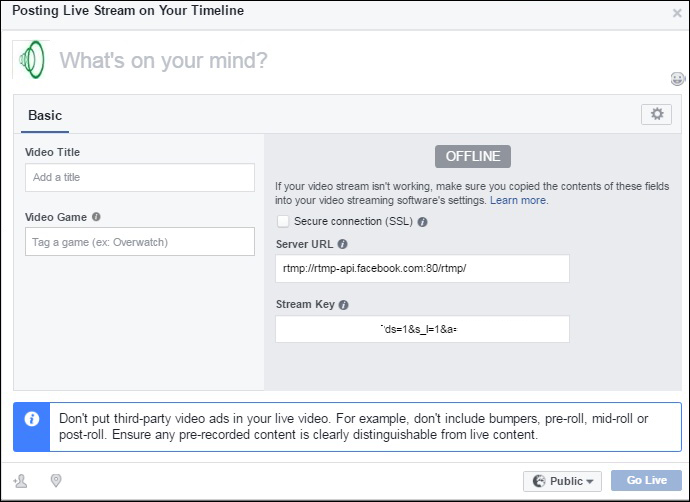
On the screenshot you can see that the address of the server is: rtmp://rtmp-api.facebook.com:80/rtmp/
And the name of the RTMP stream is the unique string:
1489000000111961?ds=1&s_l=1&a=ATj9giGjaTTfgpNHBP
These two parameters are what we need for our broadcast. But let’s wait for a while and find out the RTMP data for YouTube as well.
YouTube
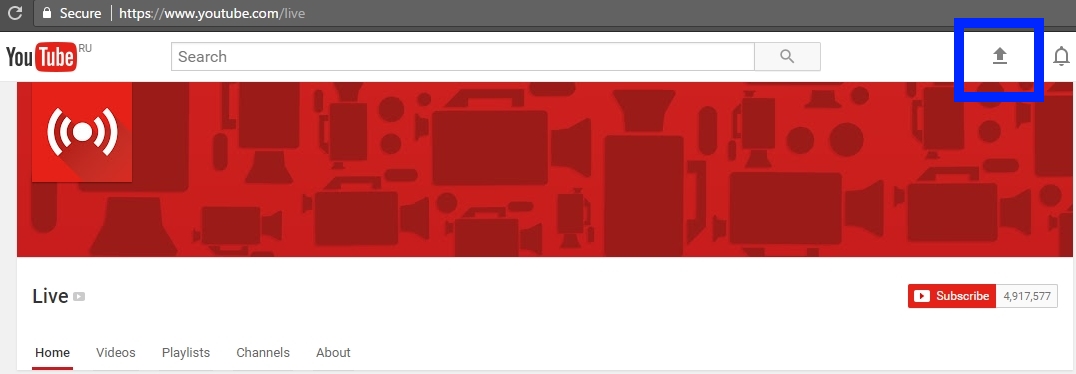
To start streaming on YouTube, open https://youtube.com/live and click Upload
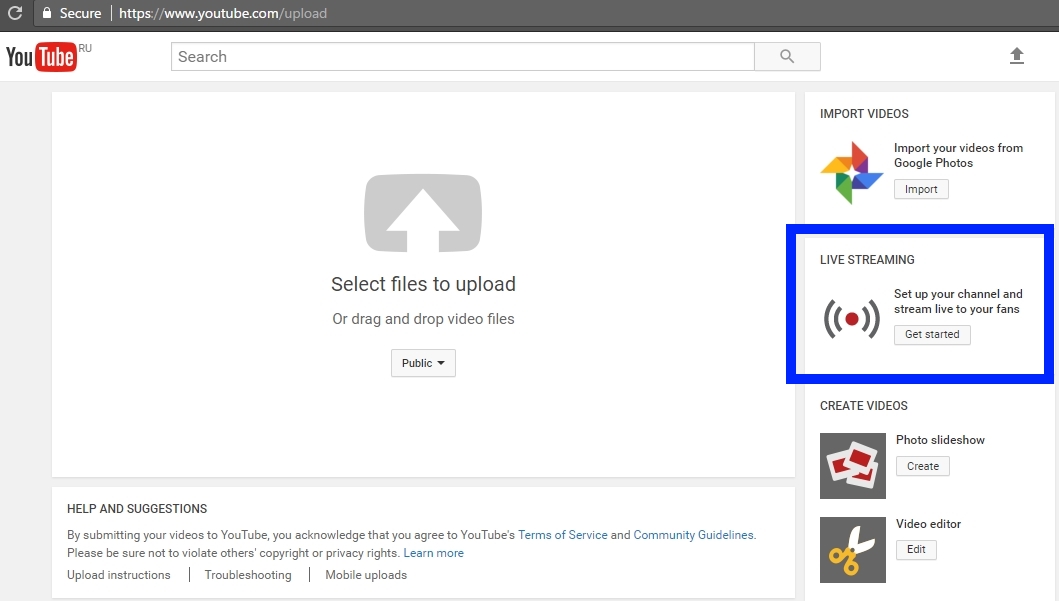
Then select Live Streaming and click Get Started.
You should see streaming panel, the player and RTMP settings:
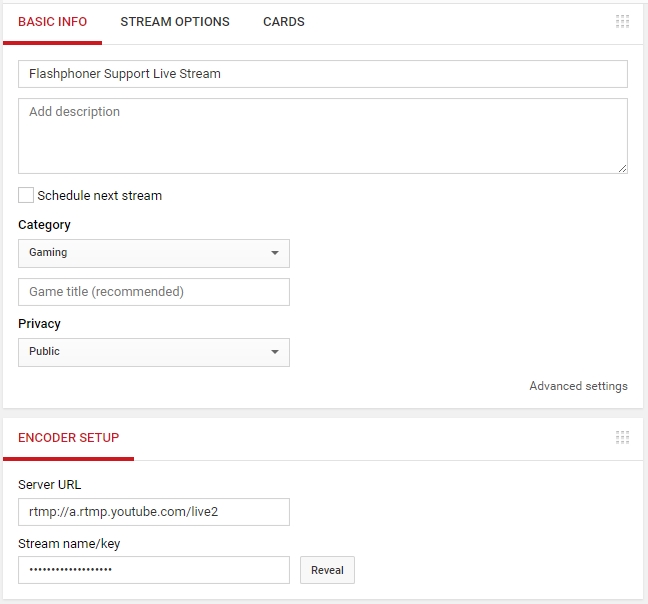
From the settings we can find out that the RTMP address of the server is rtmp://a.rtmp.youtube.com/live2, and the name of the stream is hidden and is revealed when you click the Reveal button.
The name of the RTMP stream for YouTube look like this: 8r0t-z4d-9xyj-2bcd
Finally, we know where we should send our RTMP streams to:
| YouTube | ||
| RTMP-address | rtmp://rtmp-api.facebook.com:80/rtmp/ | rtmp://a.rtmp.youtube.com/live2 |
| Stream name | 1489000000111961?ds=1&s_l=1&a=ATj9giGjaTTfgpNHBP | 8r0t-z4d-9xyj-2bcd |
Web Call Server
The server is responsible for receiving a video stream from the web camera via WebRTC and delivering it to Facebook and YouTube via RTMP.
Step one
At first, we send a video stream from the web camera to the server from the Google Chrome browser.
For that purpose you can download an example HTML page and the streaming script from here and deploy on your web server these three files from that archive:
- streamer.html
- streamer.js
- flashphoner.js
flashphoner.js – is API. The latest version can be downloaded as a part of the Web SDK.
The code of the standard demo example of streaming is available here. Let’s suppose we opened a demo. Then, connect to the server and send to the WebRTC server the stream named 5dfd. This works as follows:
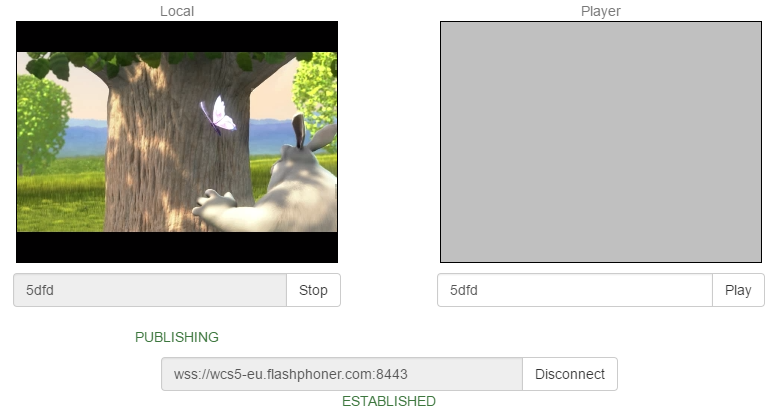
The video is captured from the browser’s camera (virtual in this specific case), and goes to the WCS5 server via WebRTC encoded to VP8+Opus or H.264+Opus depending on the device and the browser version.
Then, we should redirect this stream to Facebook.
Step two
Web Call Server has its REST API that allows redirecting a WebRTC video stream to RTMP as long as the name of that stream is known.
To do this, send the following REST / HTTP request to the server:
| URL |
https://wcs5-eu.flashphoner.com:8888/rest-api/push/startup |
| Content-Type | application/json |
| Method | POST |
| Body |
{
   streamName: "5dfd",
   rtmpUrl: "rtmp://rtmp-api.facebook.com:80/rtmp/1489000000111961?ds=1&s_l=1&a=ATj9giGjaTTfgpNHBP"
}
|
Such a request can be tested using this tool: Advanced REST Console, that looks like this:
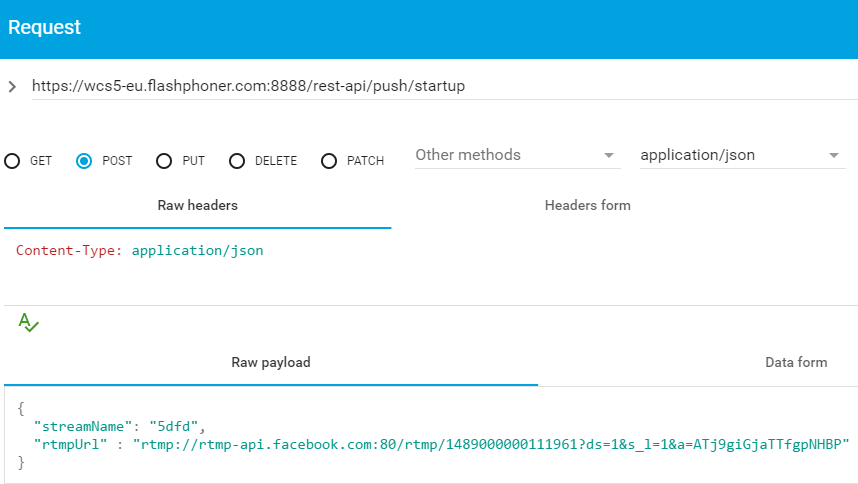
As a result, WCS redirect the WebRTC video stream to Facebook at long URL:
rtmp://rtmp-api.facebook.com:80/rtmp/1489000000111961?ds=1&s_l=1&a=ATj9giGjaTTfgpNHBP
This address combines the RTMP URL and the name of the video stream.
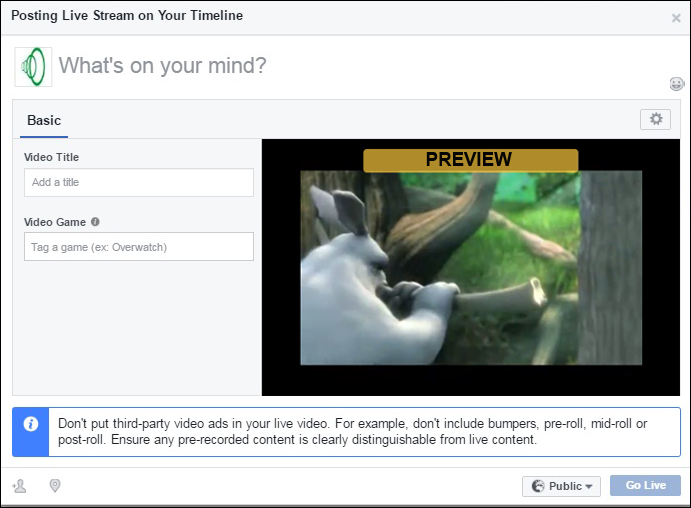
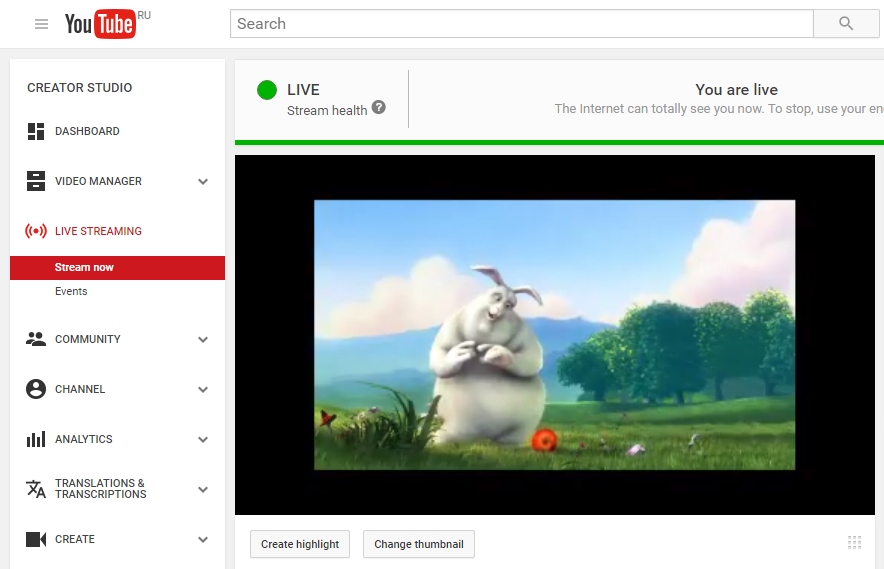
In a few seconds, the video appears in Facebook:
Step three
Sending a similar request to YouTube
| URL |
https://wcs5-eu.flashphoner.com:8888/rest-api/push/startup |
| Content-Type | application/json |
| Method | POST |
| Body |
{
   streamName: "5dfd",
   rtmpUrl: "rtmp://a.rtmp.youtube.com/live2/8r0t-z4d-9xyj-2bcd"
}
|
Or using the REST console:

The server returns 200 OK and transfers the stream to YouTube:
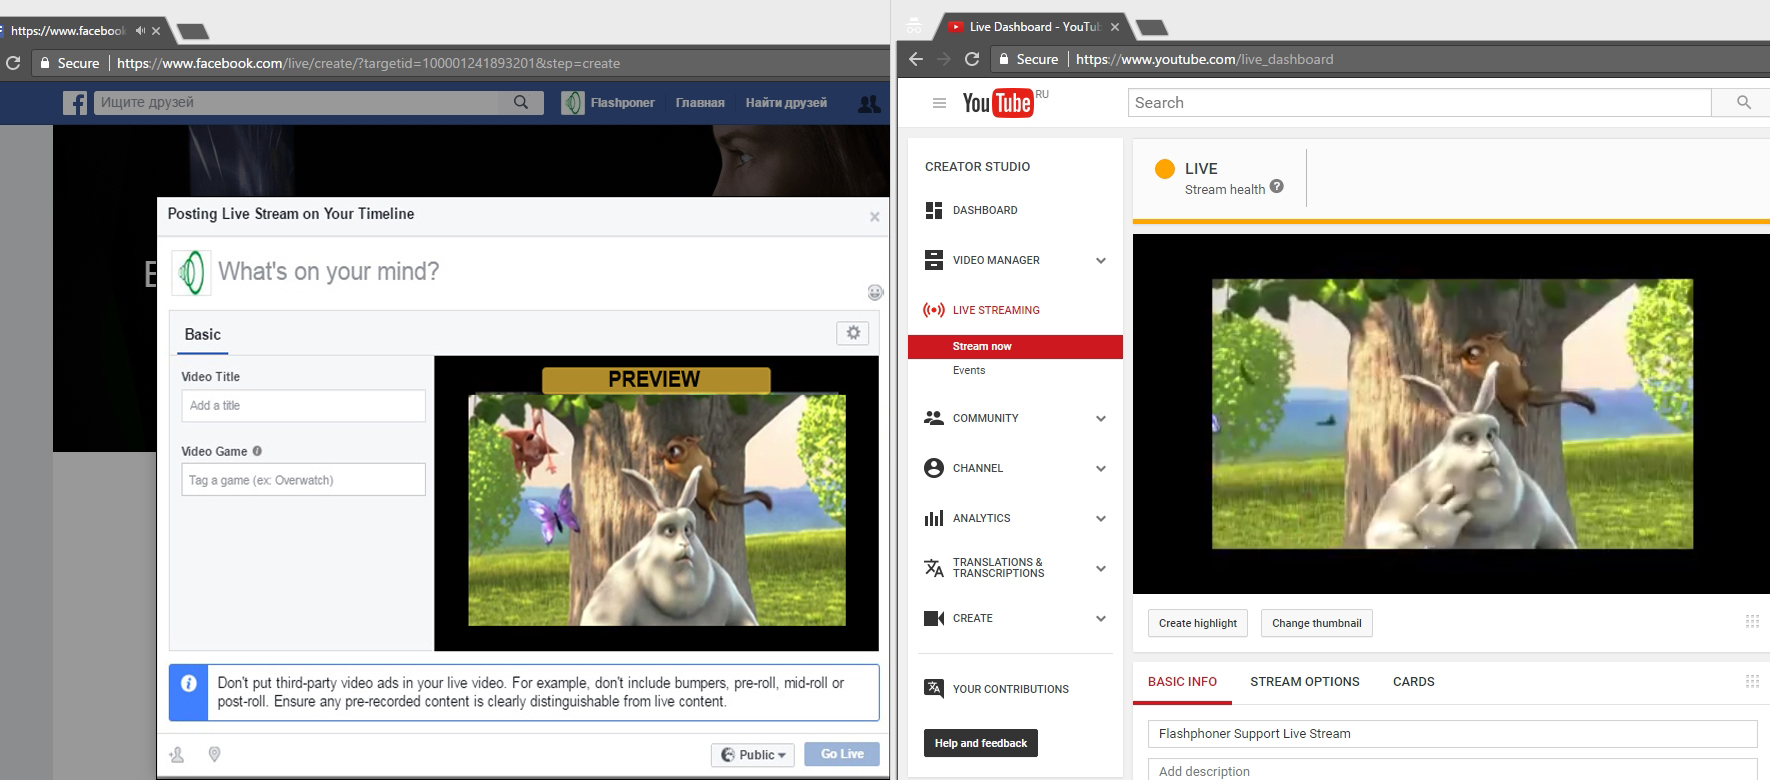
Finally we see that the stream is broadcast on two services simultaneously: Facebook and YouTube.
Now, we can request the list of all broadcast streams using the same REST API:
| URL |
https://wcs5-eu.flashphoner.com:8888/rest-api/push/find_all |
| Content-Type | application/json |
| Method | POST |
| Body |
{}
|
The server returns the list of streams that are being broadcast to Facebook and YouTube:

We can stop rebroadcasting by calling /push/terminate twice
Disconnecting from Facebook:
| URL |
https://wcs5-eu.flashphoner.com:8888/rest-api/push/terminate |
| Content-Type | application/json |
| Method | POST |
| Body |
{
   "mediaSessionId": "8omef99f40674tcfi4pm87npbb"
}
|
Disconnecting from YouTube:
| URL |
https://wcs5-eu.flashphoner.com:8888/rest-api/push/terminate |
| Content-Type | application/json |
| Method | POST |
| Body |
{
   "mediaSessionId": "e13p1gc10bgsk3me49cest9gv2"
}
|
So, in the end we have organized a broadcast from a web page via the WebRTC technology to the Web Call Server 5 server, then we have used the first REST query /push/startup to rebroadcast the video stream to Facebook and then the second REST query /push/startup to rebroadcast the stream to YouTube Live. After that we have tested video streams playback using standard players of each service and acquired the list of rebroadcast streams with the query /push/find_all. We have finished the test and stopped active broadcasts with two queries /push/terminate.
Writing JavaScript / HTML code
It would not be a big stretch to say that almost every developer had a chance to work with REST API. So we omit the code implementing sending of REST/HTTP queries.
Instead, we describe how the video stream from the web page and the web camera comes to the server.
As mentioned above, to create a minimum client that captures video we need three scripts:
- streamer.html
- streamer.js
- flashphoner.js
flashphoner.js – is a part of the Web SDK build, so there is no need to give a thorough description of it.
streamer.html
This page contains a div element, localVideo, that displays video captured from the web camera, and the Start button to begin broadcasting.
streamer.js
<html>
<head>
    <script language="javascript" src="https://flashphoner.com/downloads/builds/flashphoner_client/wcs_api-2.0/current/flashphoner.js"></script>
    <script language="javascript" src="streamer.js"></script>
</head>
<body onLoad="init()">
<h1>The streamer</h1>
<div id="localVideo" style="width:320px;height:240px;border: 1px solid"></div>
<input type="button" value="start" onClick="start()"/>
<p id="status"></p>
</body>
</html>
The broadcasting script works with four main API functions:
- Flashphoner.init(); //initializes the API.
- Flashphoner.createSession(); //established a connection to the server
- session.createStream(); //creates a video stream
- session.createStream().publish(); //publishes a video stream
As a result, we established a connection to the server via Websockets, captured the video from the web camera of the browser and sent the video to the server via WebRTC.
var localVideo;

function init(){
    Flashphoner.init();
    localVideo = document.getElementById("localVideo");
}

function start() {
    Flashphoner.createSession({urlServer: "wss://wcs5-eu.flashphoner.com:8443"}).on(Flashphoner.constants.SESSION_STATUS.ESTABLISHED, function (session) {
        //session connected, start streaming
        startStreaming(session);
    }).on(Flashphoner.constants.SESSION_STATUS.DISCONNECTED, function () {
        setStatus("DISCONNECTED");
    }).on(Flashphoner.constants.SESSION_STATUS.FAILED, function () {
        setStatus("FAILED");
    });
}

function startStreaming(session) {
    session.createStream({
        name: "stream222",
        display: localVideo,
        cacheLocalResources: true,
        receiveVideo: false,
        receiveAudio: false
    }).on(Flashphoner.constants.STREAM_STATUS.PUBLISHING, function (publishStream) {
        setStatus(Flashphoner.constants.STREAM_STATUS.PUBLISHING);
    }).on(Flashphoner.constants.STREAM_STATUS.UNPUBLISHED, function () {
        setStatus(Flashphoner.constants.STREAM_STATUS.UNPUBLISHED);
    }).on(Flashphoner.constants.STREAM_STATUS.FAILED, function () {
        setStatus(Flashphoner.constants.STREAM_STATUS.FAILED);
    }).publish();
}

function setStatus(status) {
    document.getElementById("status").innerHTML = status;
}
You can download the archive with streamer.html and streamer.js scripts here.
To make broadcasting work in Google Chrome, the broadcasting scripts must be deployed to a web hosting working via https.
Web Call Server can be installed on a separate Linux host. You can download the server for testing here. After the server is installed and running, it will accept incoming websockets connections at ws://host:8080 и wss://host:8443
In conclusion, here we have demonstrated how to capture a video from the web camera and deliver the video stream to the server using three scripts. If everything is done properly, the script should display the PUBLISHING status. This means the WebRTC stream is successfully published to the server and can be rebroadcast to YouTube or Facebook using REST API.

References
Web Call Server – WebRTC server that allows rebroadcasting to YouTube and Facebook
Web SDK – JavaScript API to embed the code for broadcasting to a web page.
REST API – managing rebroadcasting of WebRTC video streams
Source – the source code of the example broadcasting of a stream from the web page to the server.
YouTube Live – YouTube live broadcasting service
Facebook Live – Facebook live broadcasting service