
Let’s imagine a situation: Oleg is a full-stack developer working with Windows and his new task is to develop a client-server application for streaming… For catching the RTSP cameras, to be exact. Of course, he can use a cloud server but then a debug of problems with the channel is added to the debug of possible problems with the client code or server settings, so testing on a local network is more convenient, in particular because it’s free. Or he can use Docker but here are the other problems come up: due to network problems, Docker on Windows is unusable, and the workaround – running Docker in a virtual machine – complicates the work too much.
What should he do in this case? The best option is to use WSL, but exactly how, we will tell you (and show) using the example of a Web Call Server (WCS), which will help to convert RTSP streams to WebRTC.
WCS is installed only on a Linux system and if we were testing on Linux, the scheme would look like this:

But in the case of Windows and WSL, the scheme will look like this:

How Windows started to be friends with Linux

In 2016, the world got acquainted with the Windows Subsystem for Linux, or simply – WSL. The first version wasn’t particularly liked by users, because the principle of operation was to emulate Linux Kernel calls by including a special layer that transformed Linux system calls into Windows system calls in real time, which led to some difficulties (for example, everything that was tied to POSIX real-time timers didn’t work. The second version was liked by the public more: it has become a full-fledged virtual machine with a Linux Kernel. This is what we will use next.
Installing the WSL
To install WSL 2, you must be running Windows 10 version 2004 and higher (build 19041 and higher) or Windows 11.
First, let’s check which distributions are available. Open the command line as an administrator and run the following command:
wsl --list --online

Ubuntu 20.04 is installed by default and if you are satisfied with this, you can simply enter:
wsl --install
In our case, we will install Ubuntu 18.04:
wsl --install -d Ubuntu 18.04

In case of successful installation, you need to set a username and password, then restart the system:

After restarting the PC, log in and update the installed packages:
sudo apt-get update
sudo apt-get upgrade -y
Installing the JDK

Any of the supported versions can be installed from repositories or manually, depending on whether packages are available in the distribution you are using or not. For example, in Ubuntu 18.04, JDK 8 is available in repositories:
sudo apt-get install –y openjdk-8-jdk

But with JDK 14 you’ll have to tinker and install it manually. Let’s start with downloading:
sudo rm -rf jdk*
curl -s https://download.java.net/java/GA/jdk14.0.1/664493ef4a6946b186ff29eb326336a2/7/GPL/openjdk-14.0.1_linux-x64_bin.tar.gz | tar -zx
[ ! -d jdk-14.0.1/bin ] && exit 1
Preparing the installation folder:
sudo mkdir -p /usr/java
[ -d /usr/java/jdk-14.0.1 ] && sudo rm -rf /usr/java/jdk-14.0.1
Moving the JDK files to the created folder:
sudo mv -f jdk-14.0.1 /usr/java
[ ! -d /usr/java/jdk-14.0.1/bin ] && exit 1
Creating a symlink /usr/java/default:
sudo rm -f /usr/java/default
sudo ln -sf /usr/java/jdk-14.0.1 /usr/java/default
And everything else:
sudo update-alternatives --install "/usr/bin/java" "java" "/usr/java/jdk-14.0.1/bin/java" 1
sudo update-alternatives --install "/usr/bin/jstack" "jstack" "/usr/java/jdk-14.0.1/bin/jstack" 1
sudo update-alternatives --install "/usr/bin/jcmd" "jcmd" "/usr/java/jdk-14.0.1/bin/jcmd" 1
sudo update-alternatives --install "/usr/bin/jmap" "jmap" "/usr/java/jdk-14.0.1/bin/jmap" 1
sudo update-alternatives --set "java" "/usr/java/jdk-14.0.1/bin/java"
sudo update-alternatives --set "jstack" "/usr/java/jdk-14.0.1/bin/jstack"
sudo update-alternatives --set "jcmd" "/usr/java/jdk-14.0.1/bin/jcmd"
sudo update-alternatives --set "jmap" "/usr/java/jdk-14.0.1/bin/jmap"

Checking:

Installing and running WCS

Download WCS:
wget https://flashphoner.com/download-wcs5.2-server.tar.gz -O- | tar -zx

And start the installation:
cd FlashphonerWebCallServer-*
sudo ./install.sh

Next, let’s get acquainted with the user agreement. You must press Enter until the following message appears:

Then activate the license:
cd /usr/local/FlashphonerWebCallServer/bin
sudo ./activation.sh

And wait for a message about the completion of activation:

Before work, you need to restart WCS:
cd /usr/local/FlashphonerWebCallServer/bin
sudo ./webcallserver set-permissions
sudo ./webcallserver start

Checking the status:
sudo ./webcallserver status
![]()
Testing
Follow the link https://localhost:8444/admin / and enter the username: demo, password: demo
Next, go to the “Player” tab:
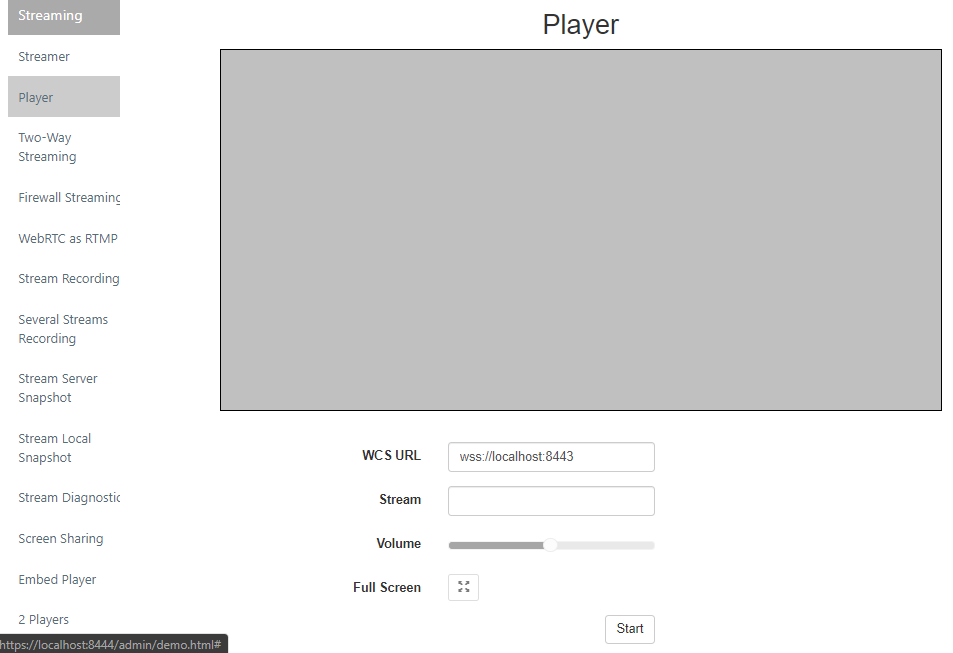
Try to publish the stream by inserting a link in the “Stream” field and clicking on the “Start” button. As a result , we get:
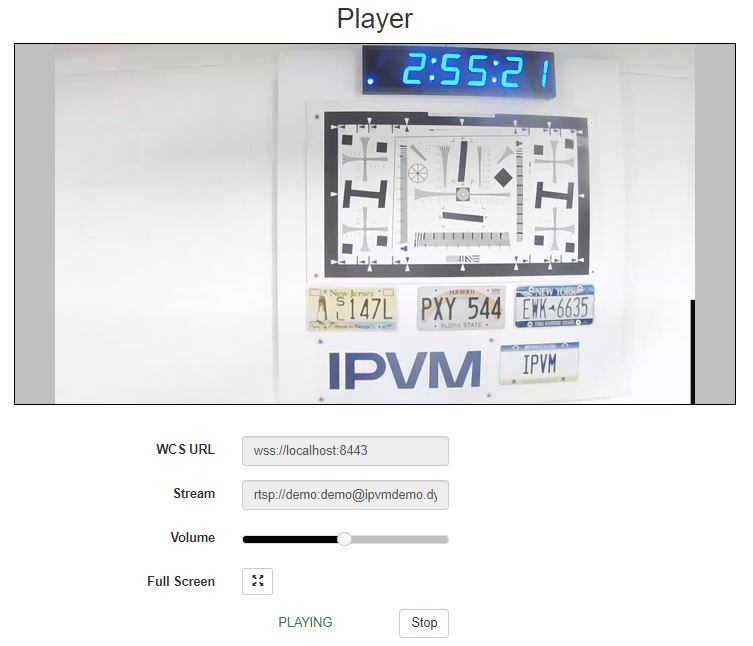
Done! You’re great. Now you don’t need to install a second operating system and suffer with virtual machines to use the Linux functionality under Windows.