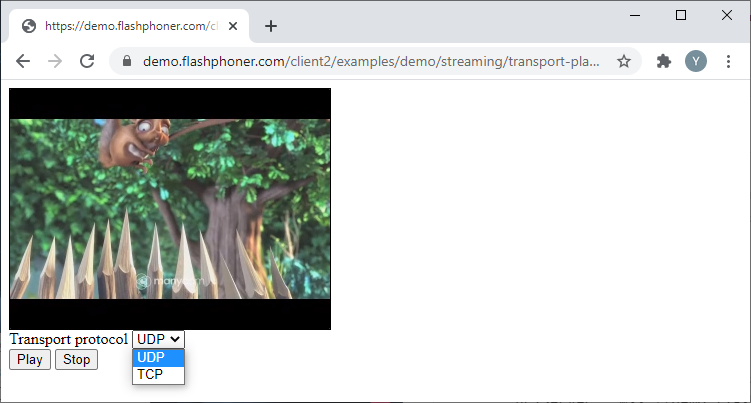
Внедрение управления камерой, микрофоном и параметрами потока
Ниже показано, как встроить код управления публикацией и воспроизведением потока в страницу вашего сайта или web-проекта
Содержание
- Управление параметрами потока при публикации
- Получение списка микрофонов и камер
- Тестирование микрофона и камеры
- Публикация в режиме «Только аудио» и «Только видео»
- Управление чувствительностью микрофона при захвате аудиопотока
- Управление параметрами аудиопотока при публикации
- Включение и отключение звука при публикации
- Публикация с указанием размеров видео, FPS и битрейта
- Включение и выключение видео при публикации
- Управление параметрами COD и CVO
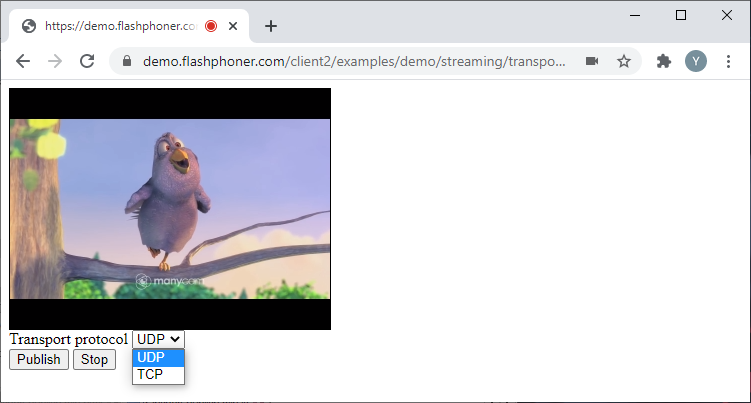
- Выбор протокола транспорта для публикации потока
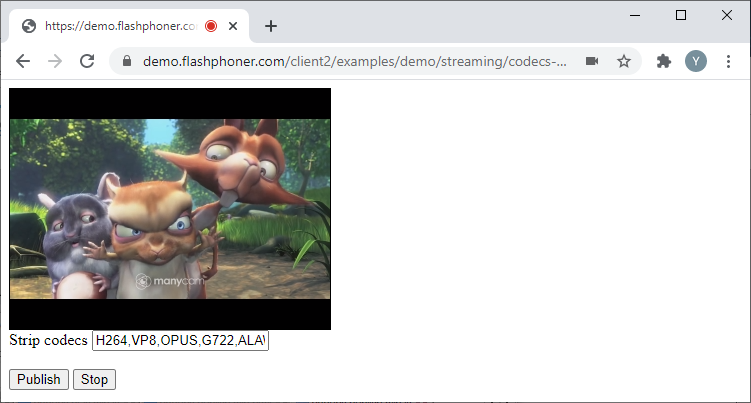
- Исключение кодеков при публикации потока
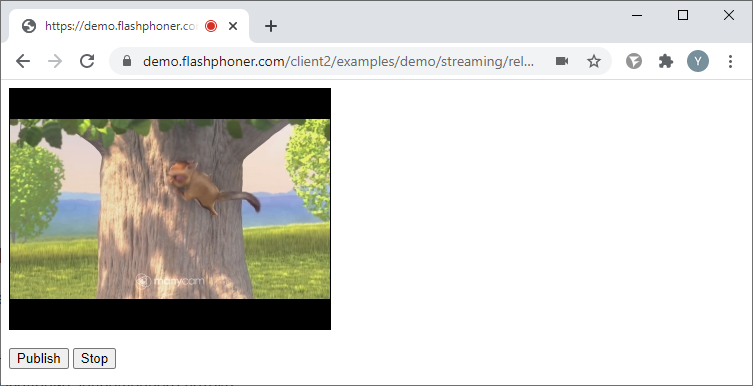
- Остановка публикации потока и «освобождение» камеры и микрофона
- Управление параметрами потока при воспроизведении
- Получение списка устройств воспроизведения
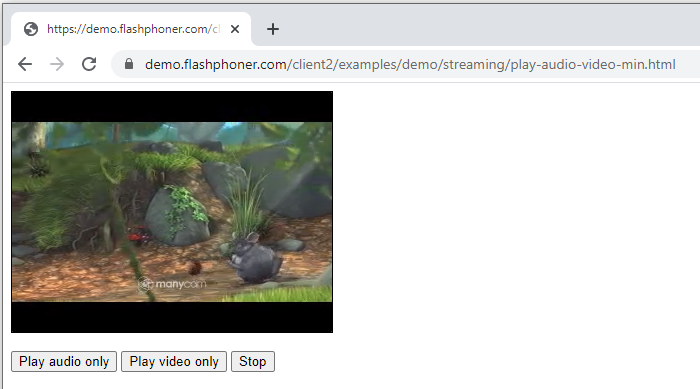
- Воспроизведение в режиме «Только аудио» и «Только видео»
- Управление уровнем громкости при воспроизведении
- Включение и отключение звука при воспроизведении
- Индикатор речи
- Воспроизведение с указанием размеров видео, битрейта и качества
- Выбор протокола транспорта для воспроизведения потока
- Исключение кодеков при воспроизведении потока
Управление параметрами потока при публикации
Для дальнейшего разбора примеров будет использоваться простая web-страница, на которой мы разместим div элемент и кнопки для управления публикацией. Для примеров с публикацией потоков в div элементе будет отображаться превью публикуемого потока.
В описаниях JS кода не будем останавливаться на объявлении констант и функциях подключения к WCS через WebSocket и остановки потока. Дополнительную информацию о них можно найти здесь.
Полный минимальный HTML код публикации потока:
publish-min.html
<!DOCTYPE html>
<html lang="en">
<head>
    <script type="text/javascript" src="https://flashphoner.com/downloads/builds/flashphoner_client/wcs_api-2.0/current/flashphoner.js"></script>
    <script type="text/javascript" src="publish-min.js"></script>
</head>
<body onload="init_api()">
    <div id="publish" style="width:320px;height:240px;border: solid 1px"></div>
    <br/>
    <button id="publishBtn">Publish</button>
    <button id="stopBtn">Stop</button>
</body>
</html>
JS код инициализации API и подключения к WCS через WebSocket. Так же при загрузке страницы назначаем исполняемые функции кнопкам:
function init_api() {
    Flashphoner.init({});
    session = Flashphoner.createSession({
        urlServer: "wss://demo.flashphoner.com:8443" //specify the address of your WCS
    }).on(SESSION_STATUS.ESTABLISHED, function(session) {
        console.log("ESTABLISHED");
    });
	publishBtn.onclick = publishStream;
    stopBtn.onclick = stopPublish;
JS код публикации потока:
function publishStream() {
    stream = session.createStream({
        name: "stream",
        display: document.getElementById("publish"),
    });
    stream.publish();
    console.log("Publish")
}
JS код остановки публикации потока:
function stopPublish() {
    stream.stop();
    console.log("Stop")
}
Полный JS код минимального паблишера:
publish-min.js
//Constants
var SESSION_STATUS = Flashphoner.constants.SESSION_STATUS;
var STREAM_STATUS = Flashphoner.constants.STREAM_STATUS;
var session;
var stream;

//Init Flashphoner API on page load & Connect to WCS server over webSockets
function init_api() {
    Flashphoner.init({});
    session = Flashphoner.createSession({
        urlServer: "wss://demo.flashphoner.com:8443" //specify the address of your WCS
    }).on(SESSION_STATUS.ESTABLISHED, function(session) {
        console.log("ESTABLISHED");
    });
	publishBtn.onclick= publishStream;
    stopBtn.onclick = stopPlay;
}

//Publish stream
function publishStream() {
    stream = session.createStream({
        name: "stream",
        display: document.getElementById("publish"),
    });
    stream.publish();
    console.log("Publish")
}

//Stopping stream
function stopPlay() {
    stream.stop();
    console.log("Stop")
}
Получение списка микрофонов и камер
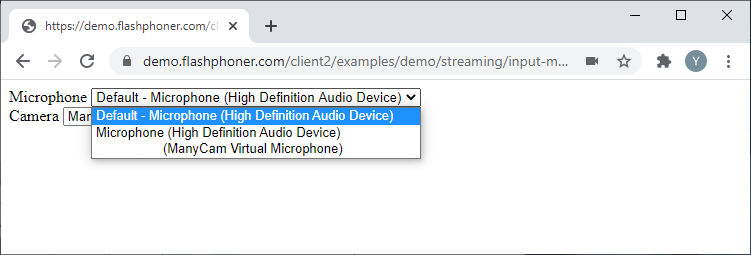
Рассмотрим пример минимального кода для получения списков микрофонов и камер, доступных на устройстве пользователя. Создадим два пустых файла input-media-device-min.html и input-media-device-min.js. в которых разместим код, описанный ниже.
На HTML-странице в этом примере будут два поля со списком в которых будут выведены списки микрофонов и камер. Полный код HTML-страницы:
input-media-device-min.html
<!DOCTYPE html>
<html lang="en">
<head>
    <script type="text/javascript" src="https://flashphoner.com/downloads/builds/flashphoner_client/wcs_api-2.0/current/flashphoner.js"></script>
    <script type="text/javascript" src="input-media-device-min.js"></script>
</head>
<body onload="init_api()">
    <label>Microphone</label>
    <select id="audioInput"></select>
	<br/>
	<label>Camera</label>
    <select id="videoInput"></select>
</body>
</html>
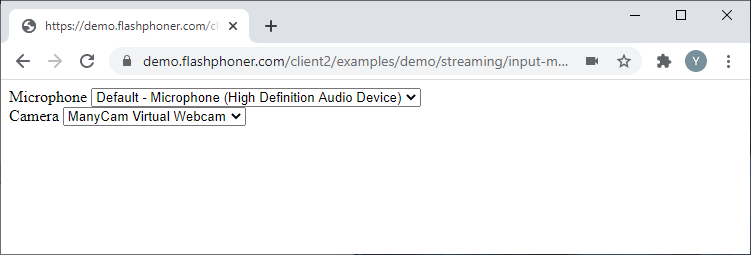
JavaScript
Получаем доступные микрофоны и камеры при помощи функции Flashphoner.getMediaDevices(), которая будет запущена при загрузке HTML-страницы.
Полный JS код примера:
input-media-device-min.js
//Init Flashphoner API on page load & get a list of available input devices
function init_api() {
    Flashphoner.init({});
    Flashphoner.getMediaDevices(null, true).then(function(list) {
        //Get a list of available Microphone
        list.audio.forEach(function(device) {
			//List filling
            var audio = document.getElementById("audioInput");
            var deviceInList = false;
            for (var i = 0; i < audio.options.length; i++) {
                if (audio.options[i].value === device.id) {
                    deviceInList = true;
                    break;
                }
            }
            if (!deviceInList) {
                var option = document.createElement("option");
                option.text = device.label || device.id;
                option.value = device.id;
                audio.appendChild(option);
            }
        });
        //Get a list of available Camera
        list.video.forEach(function(device) {
			//List filling
            var video = document.getElementById("videoInput");
            var deviceInList = false;
            for (var i = 0; i < video.options.length; i++) {
                if (video.options[i].value === device.id) {
                    deviceInList = true;
                    break;
                }
            }
            if (!deviceInList) {
                var option = document.createElement("option");
                option.text = device.label || device.id;
                option.value = device.id;
                if (option.text.toLowerCase().indexOf("back") >= 0 && video.children.length > 0) {
                    video.insertBefore(option, video.children[0]);
                } else {
                    video.appendChild(option);
                }
            }
        });
    });
};
Тестирование микрофона и камеры
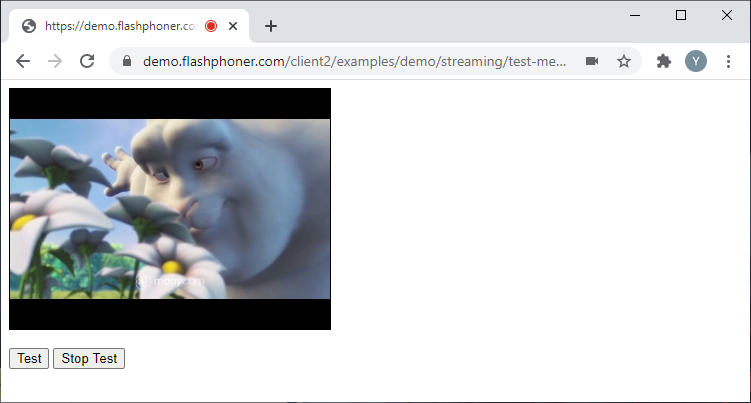
Тестирование проводится без создания потока и публикации его на сервер, локально, на уровне браузера.
Рассмотрим пример минимального кода для тестирования микрофона и камеры. Создадим два пустых файла test-media-device-min.html и test-media-device-min.js, в которых разместим следующий код.
Полный код HTML-страницы:
test-media-device-min.html
<!DOCTYPE html>
<html lang="en">
<head>
    <script type="text/javascript" src="https://flashphoner.com/downloads/builds/flashphoner_client/wcs_api-2.0/current/flashphoner.js"></script>
    <script type="text/javascript" src="test-media-device-min.js"></script>
</head>
<body onload="init_api()">
    <div id="testScreen" style="width:320px;height:240px;border: solid 1px"></div>
   	<br/>
	<button id="testBtn">Test</button>
	<button id="stopTestBtn">Stop Test</button>
</body>
</html>
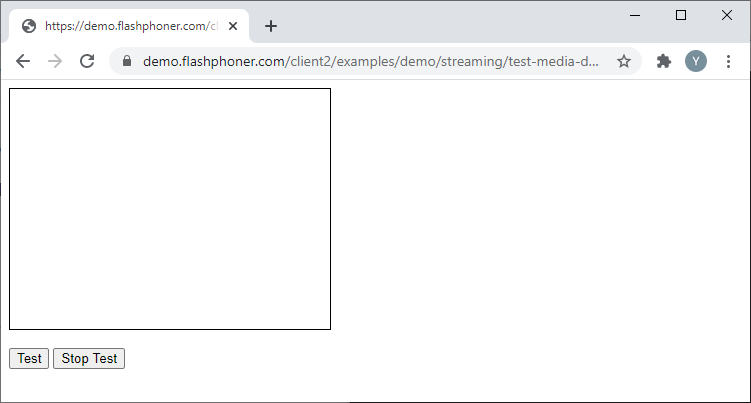
Полный JS код примера:
test-media-device-min.js
//Init Flashphoner API on page load
function init_api() {
    Flashphoner.init({});
    testBtn.onclick = startTest;
    stopTestBtn.onclick = stopTest;
}

//Test run
function startTest() {
    var constraints = {
        audio: true,
        video: true
    };
    var testScreen = document.getElementById("testScreen");
    Flashphoner.getMediaAccess(constraints, testScreen).then(function(disp) {
        testStarted = true;
    });
}

//Stopping testing
function stopTest() {
	testStarted = false;
	document.getElementById("testScreen").innerHTML = "";
}
Публикация в режиме «Только аудио» и «Только видео»
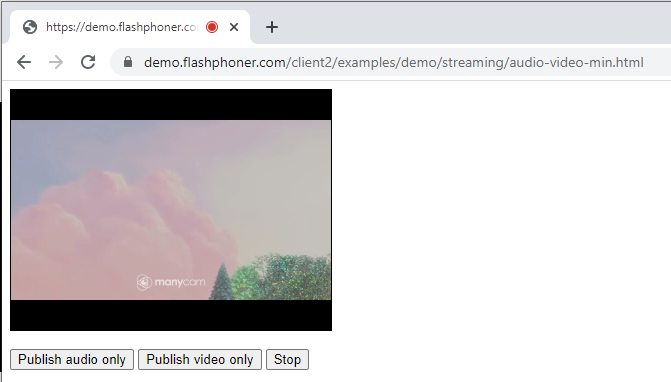
Рассмотрим пример минимального кода для встраивания публикации в режиме «Только аудио» и «Только видео». Создадим два пустых файла audio-video-min.html и audio-video-min.js, в которых разместим следующий код.
Полный код HTML-страницы:
audio-video-min.html
<!DOCTYPE html>
<html lang="en">
<head>
    <script type="text/javascript" src="https://flashphoner.com/downloads/builds/flashphoner_client/wcs_api-2.0/current/flashphoner.js"></script>
    <script type="text/javascript" src="audio-video-min.js"></script>
</head>
<body onload="init_api()">
    <div id="publish" style="width:320px;height:240px;border: solid 1px"></div>
   	<br/>
	<button id="publishAudio">Publish audio only</button>
	<button id="publishVideo">Publish video only</button>
	<button id="stopBtn">Stop</button>
</body>
</html>
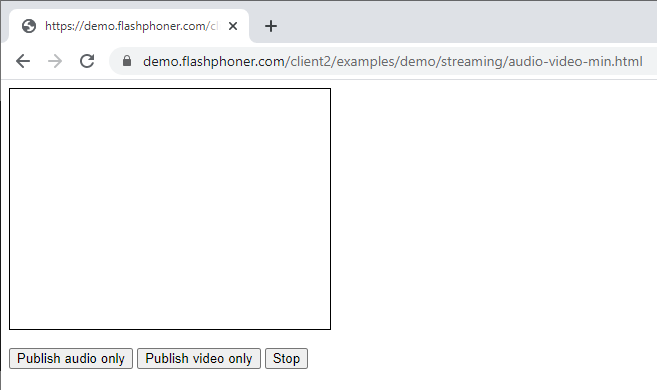
JavaScript
Создаем поток при помощи функции session.createStream() и передаем имя потока «stream» и HTML элемент «publish» в качестве параметров. Чтобы в потоке была только аудио составляющая указываем констрейнты следующим образом
constraints = {
	audio: true,
	video: false
};
Публикуем поток с этими параметрами
function publishStreamAudio() {
    constraints = {
	audio: true,
	video: false
	};
	stream = session.createStream({
        name: "stream",
        display: document.getElementById("publish"),
		constraints: constraints,
    });
    stream.publish();
    console.log("Publish audio");
}
Далее, создаем поток при помощи функции session.createStream() и передаем имя потока «stream» и HTML элемент «publish» в качестве параметров. Чтобы в потоке была только видео составляющая указываем констрейнты следующим образом:
constraints = {
	audio: false,
	video: true
};
Публикуем поток с этими параметрами.
function publishStreamVideo() {
    constraints = {
	audio: false,
	video: true
	};
	stream = session.createStream({
        name: "stream",
        display: document.getElementById("publish"),
		constraints: constraints,
    });
    stream.publish();
    console.log("Publish video");
}
Полный код JavaScript примера:
audio-video-min.js
//Constants
var SESSION_STATUS = Flashphoner.constants.SESSION_STATUS;
var STREAM_STATUS = Flashphoner.constants.STREAM_STATUS;
var session;
var stream;

//Init Flashphoner API on page load & Connect to WCS server over webSockets
function init_api() {
    Flashphoner.init({});
    session = Flashphoner.createSession({
        urlServer: "wss://demo.flashphoner.com:8443" //specify the address of your WCS
    }).on(SESSION_STATUS.ESTABLISHED, function(session) {
        console.log("ESTABLISHED");
    });
	publishAudio.onclick = publishStreamAudio;
	publishVideo.onclick= publishStreamVideo;
    stopBtn.onclick = stopPublish;
}

//Publish stream audio
function publishStreamAudio() {
    constraints = {
	audio: true,
	video: false
	};
	stream = session.createStream({
        name: "stream",
        display: document.getElementById("publish"),
		constraints: constraints,
    });
    stream.publish();
    console.log("Publish audio");
}

//Publish stream video
function publishStreamVideo() {
    constraints = {
	audio: false,
	video: true
	};
	stream = session.createStream({
        name: "stream",
        display: document.getElementById("publish"),
		constraints: constraints,
    });
    stream.publish();
    console.log("Publish video");
}

//Stopping stream
function stopPublish() {
    stream.stop();
    console.log("Stop")
}
Управление чувствительностью микрофона при захвате аудиопотока
Управление чувствительностью микрофона работает только в браузерах на движке Chromium.
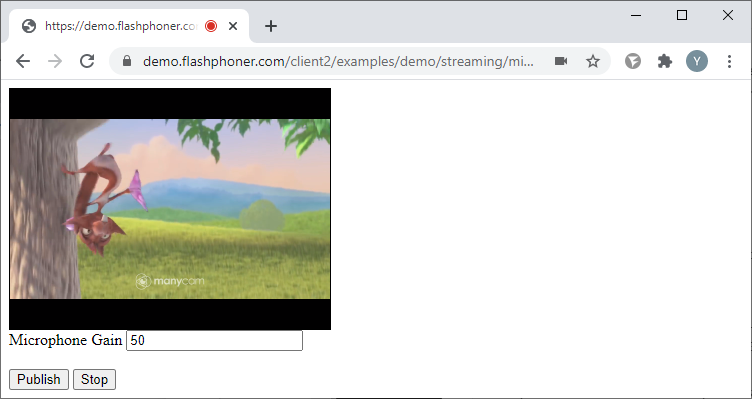
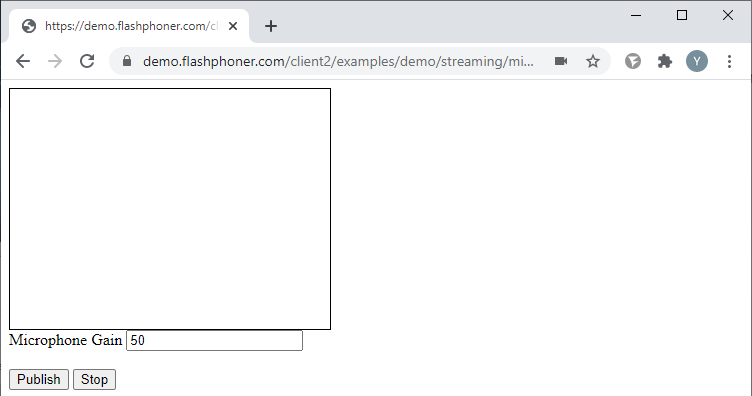
Рассмотрим пример минимального кода для управления чувствительностью микрофона при захвате аудиопотока. Создадим два пустых файла mic-gain-publish-min.html и mic-gain-publish-min.js, в которых разместим следующий код.
Полный код HTML-страницы:
mic-gain-publish-min.html
<!DOCTYPE html>
<html lang="en">
<head>
    <script type="text/javascript" src="https://flashphoner.com/downloads/builds/flashphoner_client/wcs_api-2.0/current/flashphoner.js"></script>
    <script type="text/javascript" src="mic-gain-publish-min.js"></script>
</head>
<body onload="init_api()">
    <div id="publish" style="width:320px;height:240px;border: solid 1px"></div>
    <label>Microphone Gain</label>
	<input id="sendGain" type="text" value="50"/><br/>
	<br/><button id="publishBtn">Publish</button>
	<button id="stopBtn">Stop</button>
</body>
</html>
JavaScript
Создаем поток при помощи функции session.createStream() и передаем имя потока «stream» и HTML элемент «publish» в качестве параметров. Получаем значение чувствительности микрофона. Для упрощения примера значение передаем в простом текстовом поле и для его изменения нужно будет перезапускать публикацию потока.
gainValue = document.getElementById("sendGain").value
Публикуем поток с этими параметрами. После успешной публикации потока устанавливаем значение чувствительности микрофона:
function publishStream() {
    gainValue = document.getElementById("sendGain").value
    stream = session.createStream({
        name: "stream",
        display: document.getElementById("publish"),
    }).on(STREAM_STATUS.PUBLISHING, function(stream) {
        stream.setMicrophoneGain(gainValue);
    });
    stream.publish();
    console.log("Publish")
}
Полный JS код примера:
mic-gain-publish-min.js
//Constants
var SESSION_STATUS = Flashphoner.constants.SESSION_STATUS;
var STREAM_STATUS = Flashphoner.constants.STREAM_STATUS;
var session;
var stream;

//Init Flashphoner API on page load & Connect to WCS server over webSockets
function init_api() {
    Flashphoner.init({});
    session = Flashphoner.createSession({
        urlServer: "wss://demo.flashphoner.com:8443" //specify the address of your WCS
    }).on(SESSION_STATUS.ESTABLISHED, function(session) {
        console.log("ESTABLISHED");
    });
    publishBtn.onclick = publishStream;
    stopBtn.onclick = stopPublish;

}

//Publish stream
function publishStream() {
    gainValue = document.getElementById("sendGain").value
    stream = session.createStream({
        name: "stream",
        display: document.getElementById("publish"),
    }).on(STREAM_STATUS.PUBLISHING, function(stream) {
        stream.setMicrophoneGain(gainValue);
    });
    stream.publish();
    console.log("Publish")
}

//Stopping stream
function stopPublish() {
    stream.stop();
    console.log("Stop")
}
Управление параметрами аудиопотока при публикации
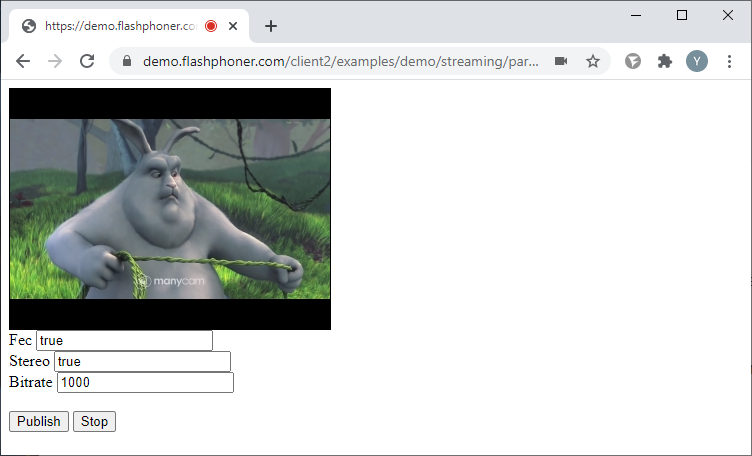
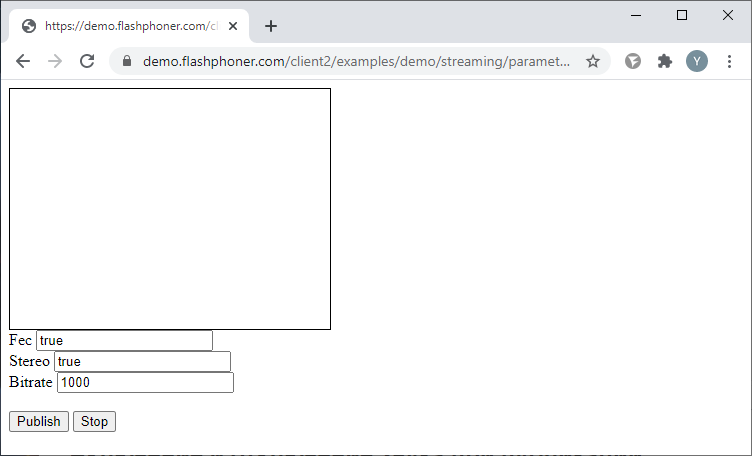
Рассмотрим пример минимального кода для управления параметрами аудио составляющей потока при публикации. Создадим два пустых файла parameters-audio-min.html и parameters-audio-min.js, в которых разместим следующий код.
Полный код HTML-страницы:
parameters-audio-min.html
<!DOCTYPE html>
<html lang="en">
<head>
    <script type="text/javascript" src="https://flashphoner.com/downloads/builds/flashphoner_client/wcs_api-2.0/current/flashphoner.js"></script>
    <script type="text/javascript" src="parameters-audio-min.js"></script>
</head>
<body onload="init_api()">
    <div id="publish" style="width:320px;height:240px;border: solid 1px"></div>
    <label>FEC</label>
	<input id="sendFec" type="text" value="true"/><br/>
	<label>Stereo</label>
	<input id="sendStereo" type="text" value="true"/><br/>
	<label>Bitrate</label>
	<input id="sendBitrate" type="text" value="1000"/><br/>
	<br/>
	<button id="publishBtn">Publish</button>
	<button id="stopBtn">Stop</button>
</body>
</html>
JavaScript
Создаем поток при помощи функции session.createStream() и передаем имя потока «stream» и HTML элемент «publish» в качестве параметров. Получаем значения констрейнтов для audio из полей на HTML странице.
Для захвата аудио доступны параметры:
- FEC — использование Opus кодека с коррекцией ошибок (работает только для Opus). Значение: true, false;
- Stereo — переключение стерео/моно режима. Значение: true, false;
- Bitrate — установка битрейта звука (в кбит/с)
constraints = {
        audio: {
            fec: document.getElementById("sendFec").value,
            stereo: document.getElementById("sendStereo").value,
            bitrate: document.getElementById("sendBitrate").value,
        },
		video: true,
    };
Публикуем поток с этими параметрами:
function publishStream() {
    constraints = {
        audio: {
            fec: document.getElementById("sendFec").value,
            stereo: document.getElementById("sendStereo").value,
            bitrate: document.getElementById("sendBitrate").value,
        },
		video: true,
    };
    stream = session.createStream({
        name: "stream",
        display: document.getElementById("publish"),
        constraints: constraints,
    });
    stream.publish();
    console.log("Publish")
}
Полный JavaScript код примера:
parameters-audio-min.js
//Constants
var SESSION_STATUS = Flashphoner.constants.SESSION_STATUS;
var STREAM_STATUS = Flashphoner.constants.STREAM_STATUS;
var session;
var stream;

//Init Flashphoner API on page load & Connect to WCS server over webSockets
function init_api() {
    Flashphoner.init({});
    session = Flashphoner.createSession({
        urlServer: "wss://demo.flashphoner.com:8443" //specify the address of your WCS
    }).on(SESSION_STATUS.ESTABLISHED, function(session) {
        console.log("ESTABLISHED");
    });
    publishBtn.onclick = publishStream;
    stopBtn.onclick = stopPublish;
}

//Publish stream
function publishStream() {
    constraints = {
        audio: {
            fec: document.getElementById("sendFec").value,
            stereo: document.getElementById("sendStereo").value,
            bitrate: document.getElementById("sendBitrate").value,
        },
		video: true,
    };
    stream = session.createStream({
        name: "stream",
        display: document.getElementById("publish"),
        constraints: constraints,
    });
    stream.publish();
    console.log("Publish")
}

//Stopping stream
function stopPublish() {
    stream.stop();
    console.log("Stop")
}
Включение и отключение звука при публикации
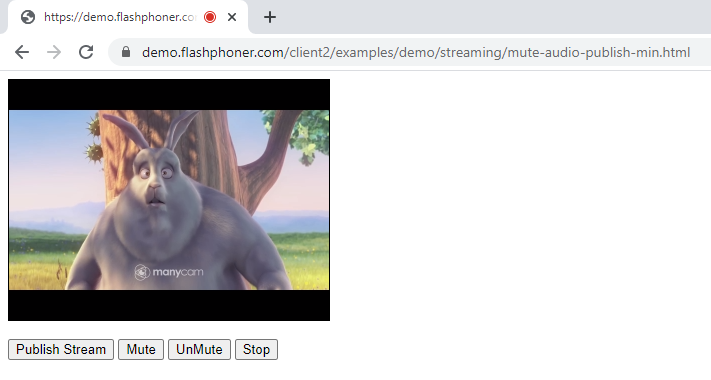
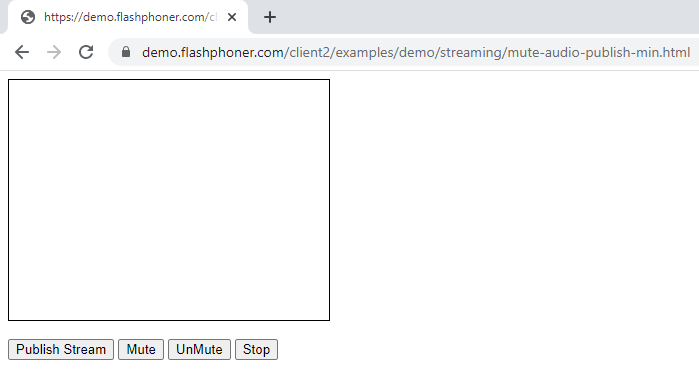
Функция «Mute» позволяет отключить микрофон, не останавливая поток. В поток, в качестве аудио составляющей, при этом транслируется тишина.
Рассмотрим пример минимального кода для включения и отключения звука при публикации. Создадим два пустых файла mute-audio-publish-min.html и mute-audio-publish-min.js, в которых разместим следующий код.
Полный код HTML-страницы:
mute-audio-publish-min.html
<!DOCTYPE html>
<html lang="en">
<head>
    <script type="text/javascript" src="https://flashphoner.com/downloads/builds/flashphoner_client/wcs_api-2.0/current/flashphoner.js"></script>
    <script type="text/javascript" src="mute-audio-publish-min.js"></script>
</head>
<body onload="init_api()">
    <div id="publish" style="width:320px;height:240px;border: solid 1px"></div>
   	<br/>
	<button id="publishBtn">Publish Stream</button>
	<button id="publishAudioMute">Mute</button>
	<button id="publishAudioUnMute">UnMute</button>
	<button id="stopBtn">Stop</button>
</body>
</html>
JavaScript
1. Функция отключения микрофона и остановки захвата аудио составляющей потока
function audioMute() {
	stream.muteAudio();
}
2. Функция включения микрофона и возобновления захвата аудио составляющей потока
function audioUnMute() {
	stream.unmuteAudio();
}
Полный код JavaScript примера:
mute-audio-publish-min.js
//Constants
var SESSION_STATUS = Flashphoner.constants.SESSION_STATUS;
var STREAM_STATUS = Flashphoner.constants.STREAM_STATUS;
var session;
var stream;

//Init Flashphoner API on page load & Connect to WCS server over webSockets
function init_api() {
    Flashphoner.init({});
    session = Flashphoner.createSession({
        urlServer: "wss://demo.flashphoner.com:8443" //specify the address of your WCS
    }).on(SESSION_STATUS.ESTABLISHED, function(session) {
        console.log("ESTABLISHED");
    });
	publishBtn.onclick = publishStream;
	publishAudioMute.onclick= audioMute;
	publishAudioUnMute.onclick= audioUnMute;
    stopBtn.onclick = stopPublish;
}

//Publish stream
function publishStream() {
    stream = session.createStream({
        name: "stream",
        display: document.getElementById("publish"),
    });
    stream.publish();
    console.log("Publish");
}

//Mute audio
function audioMute() {
	stream.muteAudio();
}

//UnMute audio
function audioUnMute() {
	stream.unmuteAudio();
}

//Stopping stream
function stopPublish() {
    stream.stop();
    console.log("Stop")
}
Публикация с указанием размеров видео, FPS и битрейта
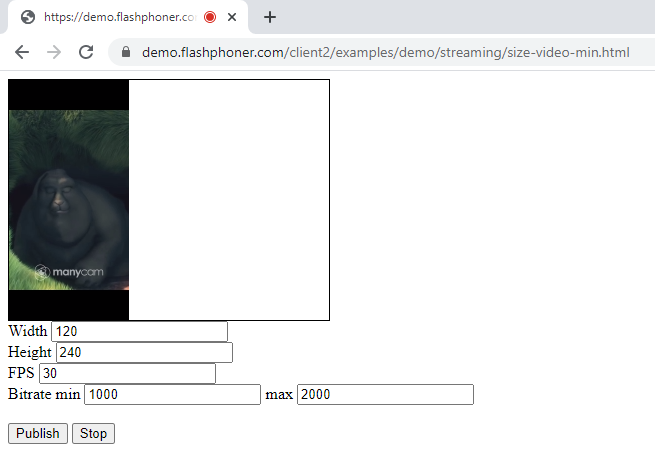
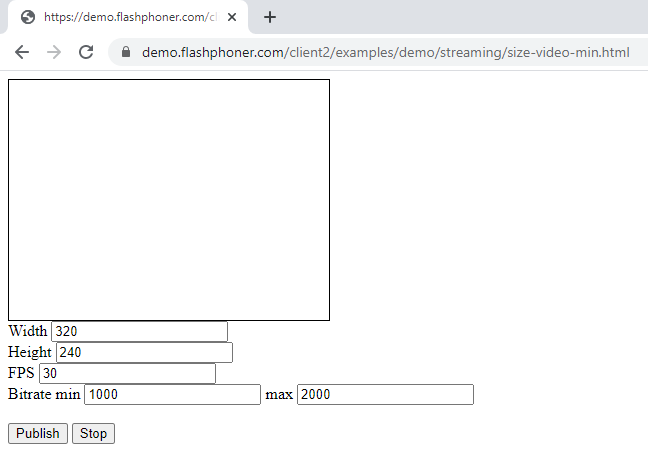
Рассмотрим пример минимального кода для публикации с указанием размеров видео, FPS и битрейта. Создадим два пустых файла size-video-min.html и size-video-min.js, в которых разместим следующий код.
Полный код HTML — страницы:
size-video-min.html
<!DOCTYPE html>
<html lang="en">
<head>
    <script type="text/javascript" src="https://flashphoner.com/downloads/builds/flashphoner_client/wcs_api-2.0/current/flashphoner.js"></script>
    <script type="text/javascript" src="size-video-min.js"></script>
</head>
<body onload="init_api()">
    <div id="publish" style="width:320px;height:240px;border: solid 1px"></div>
    <label>Width</label>
	<input id="sendWidth" type="text" value="320"/><br/>
	<label>Height</label>
	<input id="sendHeight" type="text" value="240"/><br/>
	<label>FPS</label>
	<input id="sendFPS" type="text" value="30"/><br/>
	<label>Bitrate min</label>
	<input id="sendBitrateMin" type="text" value="1000"/>
	<label>max</label>
	<input id="sendBitrateMax" type="text" value="2000"/>
	<br/>
	<br/><button id="publishBtn">Publish</button>
	<button id="stopBtn">Stop</button>
</body>
</html>
JavaScript
Создаем поток при помощи функции session.createStream() и передаем имя потока «stream» и HTML элемент «publish» в качестве параметров. Получаем значения констрейнтов из полей на HTML странице.
Для публикации видео потока доступны следующие параметры
- width— ширина кадра (в px);
- height — высота кадра (в px);
- minBitrate — минимальное значение битрейта (в кбит/с);
- maxBitrate — максимальное значение битрейта (в кбит/с);
- frameRate — кадров в секунду.
constraints = {
        audio: true,
        video: {
            width: document.getElementById("sendWidth").value,
            height: document.getElementById("sendHeight").value,
            minBitrate: document.getElementById("sendBitrateMin").value,
            maxBitrate: document.getElementById("sendBitrateMax").value,
            frameRate: document.getElementById("sendFPS").value,
        }
    };
Публикуем поток с этими параметрами.
function publishStream() {
    constraints = {
        audio: true,
        video: {
            width: document.getElementById("sendWidth").value,
            height: document.getElementById("sendHeight").value,
            minBitrate: document.getElementById("sendBitrateMin").value,
            maxBitrate: document.getElementById("sendBitrateMax").value,
            frameRate: document.getElementById("sendFPS").value,
        }
    };
    stream = session.createStream({
        name: "stream",
        display: document.getElementById("publish"),
        constraints: constraints,
    });
    stream.publish();
    console.log("Publish")
}
Полный код JavaScript примера:
size-video-min.js
//Constants
var SESSION_STATUS = Flashphoner.constants.SESSION_STATUS;
var STREAM_STATUS = Flashphoner.constants.STREAM_STATUS;
var session;
var stream;

//Init Flashphoner API on page load & Connect to WCS server over webSockets
function init_api() {
    Flashphoner.init({});
    session = Flashphoner.createSession({
        urlServer: "wss://p10.flashphoner.com:8443" //specify the address of your WCS
    }).on(SESSION_STATUS.ESTABLISHED, function(session) {
        console.log("ESTABLISHED");
    });
    publishBtn.onclick = publishStream;
    stopBtn.onclick = stopPublish;
}

//Publish stream
function publishStream() {
    constraints = {
        audio: true,
        video: {
            width: document.getElementById("sendWidth").value,
            height: document.getElementById("sendHeight").value,
            minBitrate: document.getElementById("sendBitrateMin").value,
            maxBitrate: document.getElementById("sendBitrateMax").value,
            frameRate: document.getElementById("sendFPS").value,
        }
    };
    stream = session.createStream({
        name: "stream",
        display: document.getElementById("publish"),
        constraints: constraints,
    });
    stream.publish();
    console.log("Publish")
}

//Stopping stream
function stopPublish() {
    stream.stop();
    console.log("Stop")
}
Включение и выключение видео при публикации
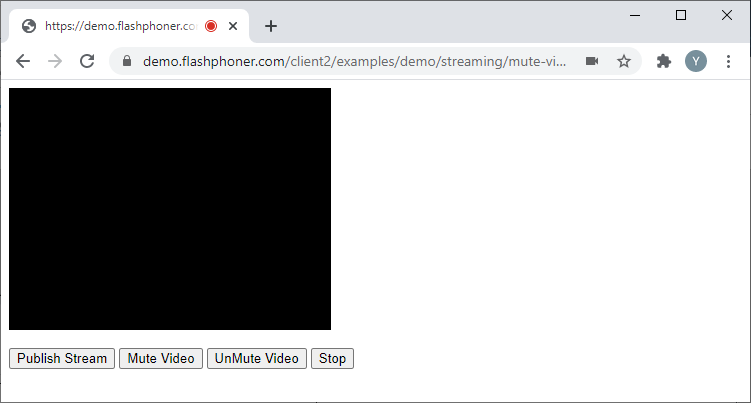
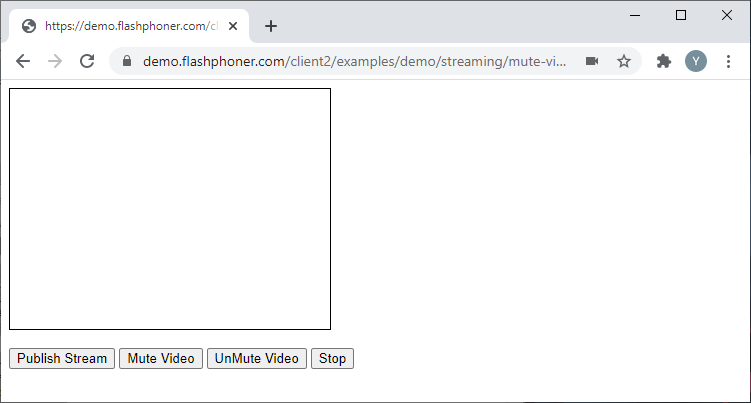
Функция «Mute» позволяет отключить камеру, не останавливая поток. В поток, в качестве видео составляющей, при этом транслируется черный экран.
Рассмотрим пример минимального кода для включения и выключения видео при публикации. Создадим два пустых файла mute-video-publish-min.html и mute-video-publish-min.js, в которых разместим следующий код.
Полный код HTML-страницы:
mute-video-publish-min.html
<!DOCTYPE html>
<html lang="en">
<head>
    <script type="text/javascript" src="https://flashphoner.com/downloads/builds/flashphoner_client/wcs_api-2.0/current/flashphoner.js"></script>
    <script type="text/javascript" src="mute-video-publish-min.js"></script>
</head>
<body onload="init_api()">
    <div id="publish" style="width:320px;height:240px;border: solid 1px"></div>
   	<br/>
	<button id="publishBtn">Publish Stream</button>
	<button id="publishVideoMute">Mute Video</button>
	<button id="publishVideoUnMute">UnMute Video</button>
	<button id="stopBtn">Stop</button>
</body>
</html>
JavaScript
1. Функция отключения камеры и остановки захвата видео составляющей потока
function videoMute() {
	stream.muteVideo();
}
2. Функция включения камеры и возобновления захвата видео составляющей потока
function videoUnMute() {
	stream.unmuteVideo();
}
Полный код JavaScript примера:
mute-video-publish-min.js
//Constants
var SESSION_STATUS = Flashphoner.constants.SESSION_STATUS;
var STREAM_STATUS = Flashphoner.constants.STREAM_STATUS;
var session;
var stream;

//Init Flashphoner API on page load & Connect to WCS server over webSockets
function init_api() {
    Flashphoner.init({});
    session = Flashphoner.createSession({
        urlServer: "wss://demo.flashphoner.com:8443" //specify the address of your WCS
    }).on(SESSION_STATUS.ESTABLISHED, function(session) {
        console.log("ESTABLISHED");
    });
	publishBtn.onclick = publishStream;
	publishVideoMute.onclick= videoMute;
	publishVideoUnMute.onclick= videoUnMute;
    stopBtn.onclick = stopPublish;
}

//Publish stream
function publishStream() {
    stream = session.createStream({
        name: "stream",
        display: document.getElementById("publish"),
    });
    stream.publish();
    console.log("Publish");
}

//Mute Video
function videoMute() {
	stream.muteVideo();
}

//UnMute Video
function videoUnMute() {
	stream.unmuteVideo();
}

//Stopping stream
function stopPublish() {
    stream.stop();
    console.log("Stop")
}
Управление параметрами COD и CVO
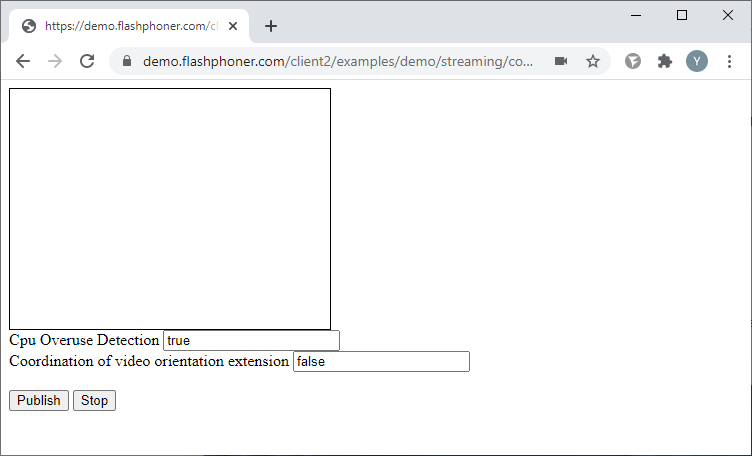
COD — Cpu Overuse Detection — отслеживает загрузку процессора и при достижении некоторого порога инициирует события, которые приводят к сбросу разрешения браузером Chrome.
CVO — Coordination of video orientation extension — признак ориентации картинки. При публикации WebRTC потока с мобильного устройства, ориентация изображения может быть изменена при повороте устройства.
Рассмотрим пример минимального кода для управления параметрами COD и CVO. Создадим два пустых файла cod-cvo-publish-min.html и cod-cvo-publish-min.js, в которых разместим следующий код.
Полный код HTML-страницы:
cod-cvo-publish-min.html
<!DOCTYPE html>
<html lang="en">
<head>
    <script type="text/javascript" src="https://flashphoner.com/downloads/builds/flashphoner_client/wcs_api-2.0/current/flashphoner.js"></script>
    <script type="text/javascript" src="cod-cvo-publish-min.js"></script>
</head>
<body onload="init_api()">
    <div id="publish" style="width:320px;height:240px;border: solid 1px"></div>
    <label>Cpu Overuse Detection</label>
	<input id="sendCod" type="text" value="true"/><br/>
	<label>Coordination of video orientation extension</label>
	<input id="sendCvo" type="text" value="false"/><br/>
	<br/><button id="publishBtn">Publish</button>
	<button id="stopBtn">Stop</button>
</body>
</html>
JavaScript
Создаем поток при помощи функции session.createStream() и передаем имя потока «stream» и HTML элемент «publish» в качестве параметров. Получаем параметры COD и CVO из полей на HTML странице
- COD — значения true, false;
- CVO — значения true, false.
googCpuOveruseDetection: document.getElementById("sendCod").value,
...
cvoExtension: document.getElementById("sendCvo").value,
Публикуем поток с этими параметрами
function publishStream() {
    mediaConnectionConstraints = {
        "mandatory": {
            googCpuOveruseDetection: document.getElementById("sendCod").value,
        }
    }
    stream = session.createStream({
        name: "stream",
        display: document.getElementById("publish"),
        mediaConnectionConstraints: mediaConnectionConstraints,
        cvoExtension: document.getElementById("sendCvo").value,
    });
    stream.publish();
    console.log("Publish")
}
Полный js код примера:
cod-cvo-publish-min.js
//Constants
var SESSION_STATUS = Flashphoner.constants.SESSION_STATUS;
var STREAM_STATUS = Flashphoner.constants.STREAM_STATUS;
var session;
var stream;

//Init Flashphoner API on page load & Connect to WCS server over webSockets
function init_api() {
    Flashphoner.init({});
    session = Flashphoner.createSession({
        urlServer: "wss://demo.flashphoner.com:8443" //specify the address of your WCS
    }).on(SESSION_STATUS.ESTABLISHED, function(session) {
        console.log("ESTABLISHED");
    });
    publishBtn.onclick = publishStream;
    stopBtn.onclick = stopPublish;
}

//Publish stream
function publishStream() {
    mediaConnectionConstraints = {
        "mandatory": {
            googCpuOveruseDetection: document.getElementById("sendCod").value,
        }
    }
    stream = session.createStream({
        name: "stream",
        display: document.getElementById("publish"),
        mediaConnectionConstraints: mediaConnectionConstraints,
        cvoExtension: document.getElementById("sendCvo").value,
    });
    stream.publish();
    console.log("Publish")
}

//Stopping stream
function stopPublish() {
    stream.stop();
    console.log("Stop")
}
Выбор протокола транспорта для публикации потока
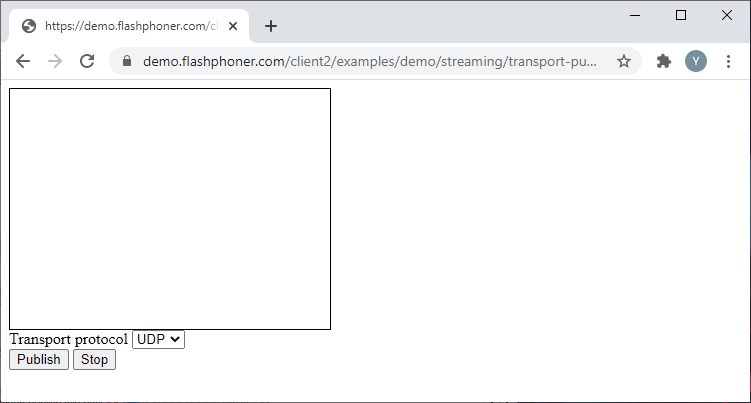
Рассмотрим пример минимального кода для выбора протокола транспорта при публикации потока. Создадим два пустых файла transport-publish-min.html и transport-publish-min.js, в которых разместим следующий код.
На HTML страницу добавляем элемент «select», с помощью которого можно выбрать протокол транспорта — UDP или TCP.
Полный код HTML-страницы:
transport-publish-min.html
<!DOCTYPE html>
<html lang="en">
<head>
    <script type="text/javascript" src="https://flashphoner.com/downloads/builds/flashphoner_client/wcs_api-2.0/current/flashphoner.js"></script>
    <script type="text/javascript" src="transport-publish-min.js"></script>
</head>
<body onload="init_api()">
    <div id="publish" style="width:320px;height:240px;border: solid 1px"></div>
    <label>Transport protocol</label>
	<select id="transportInput">
        <option value="UDP">UDP</option>
		<option value="TCP">TCP</option>
	</select>
	<br/><button id="publishBtn">Publish</button>
	<button id="stopBtn">Stop</button>
</body>
</html>
JavaScript
1. Создаем поток при помощи функции session.createStream() и передаем имя потока «stream» и HTML элемент «publish» в качестве параметров. Получаем значение протокола из элемента «select» на HTML странице:
transport:document.getElementById("transportInput").value,
Публикуем поток с этими параметрами:
function publishStream() {
    stream = session.createStream({
        name: "stream",
        display: document.getElementById("publish"),
		transport:document.getElementById("transportInput").value,
    });
    stream.publish();
    console.log("Publish")
}
Полный Js код примера:
transport-publish-min.js
//Constants
var SESSION_STATUS = Flashphoner.constants.SESSION_STATUS;
var STREAM_STATUS = Flashphoner.constants.STREAM_STATUS;
var session;
var stream;

//Init Flashphoner API on page load & Connect to WCS server over webSockets
function init_api() {
    Flashphoner.init({});
    session = Flashphoner.createSession({
        urlServer: "wss://demo.flashphoner.com:8443" //specify the address of your WCS
    }).on(SESSION_STATUS.ESTABLISHED, function(session) {
        console.log("ESTABLISHED");
    });
	publishBtn.onclick = publishStream;
    stopBtn.onclick = stopPublish;
}

//Publish stream
function publishStream() {
    stream = session.createStream({
        name: "stream",
        display: document.getElementById("publish"),
		transport:document.getElementById("transportInput").value,
    });
    stream.publish();
    console.log("Publish")
}

//Stopping stream
function stopPublish() {
    stream.stop();
    console.log("Stop")
}
Исключение кодеков при публикации потока
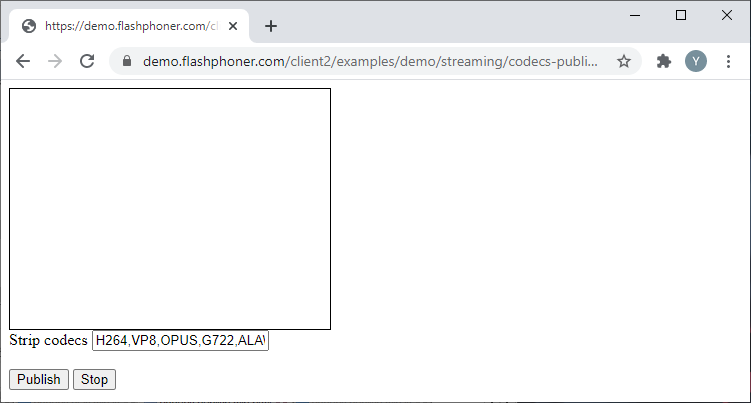
Рассмотрим пример минимального кода для исключения кодеков при публикации потока. Создадим два пустых файла codecs-publish-min.html и codecs-publish-min.js, в которых разместим следующий код.
Полный код HTML-страницы:
codecs-publish-min.html
<!DOCTYPE html>
<html lang="en">
<head>
    <script type="text/javascript" src="https://flashphoner.com/downloads/builds/flashphoner_client/wcs_api-2.0/current/flashphoner.js"></script>
    <script type="text/javascript" src="codecs-publish-min.js"></script>
</head>
<body onload="init_api()">
    <div id="publish" style="width:320px;height:240px;border: solid 1px"></div>
    <label>Strip codecs</label>
	<input id="sendCodecs" type="text" value="H264,VP8,OPUS,G722,ALAW,ULAW"/><br/>
	<br/><button id="publishBtn">Publish</button>
	<button id="stopBtn">Stop</button>
</body>
</html>
JavaScript
Создаем поток при помощи функции session.createStream() и передаем имя потока «stream» и HTML элемент «publish» в качестве параметров. Получаем список кодеков из поля на HTML странице:
stripCodecs:document.getElementById("sendCodecs").value,
Публикуем поток с этими параметрами:
function publishStream() {
    stream = session.createStream({
        name: "stream",
        display: document.getElementById("publish"),
		stripCodecs:document.getElementById("sendCodecs").value,
    });
    stream.publish();
    console.log("Publish")
}
Полный js код примера:
codecs-publish-min.js
//Constants
var SESSION_STATUS = Flashphoner.constants.SESSION_STATUS;
var STREAM_STATUS = Flashphoner.constants.STREAM_STATUS;
var session;
var stream;

//Init Flashphoner API on page load & Connect to WCS server over webSockets
function init_api() {
    Flashphoner.init({});
    session = Flashphoner.createSession({
        urlServer: "wss://demo.flashphoner.com:8443" //specify the address of your WCS
    }).on(SESSION_STATUS.ESTABLISHED, function(session) {
        console.log("ESTABLISHED");
    });
	publishBtn.onclick = publishStream;
    stopBtn.onclick = stopPublish;

}

//Publish stream
function publishStream() {
    stream = session.createStream({
        name: "stream",
        display: document.getElementById("publish"),
		stripCodecs:document.getElementById("sendCodecs").value,
    });
    stream.publish();
    console.log("Publish")
}

//Stopping stream
function stopPublish() {
    stream.stop();
    console.log("Stop")
}
Остановка публикации потока и «освобождение» камеры и микрофона
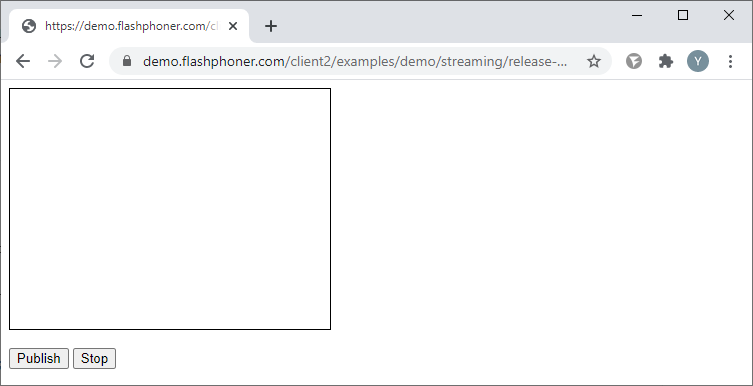
Рассмотрим пример минимального кода для остановки публикации потока и «освобождения» захваченных микрофона и камеры. Создадим два пустых файла release-media-device-min.html и release-media-device-min.js, в которых разместим следующий код.
Полный код HTML-страницы:
release-media-device-min.html
<!DOCTYPE html>
<html lang="en">
<head>
    <script type="text/javascript" src="https://flashphoner.com/downloads/builds/flashphoner_client/wcs_api-2.0/current/flashphoner.js"></script>
    <script type="text/javascript" src="release-media-device-min.js"></script>
</head>
<body onload="init_api()">
    <div id="publish" style="width:320px;height:240px;border: solid 1px"></div>
    <br/>
    <button id="publishBtn">Publish</button>
    <button id="stopBtn">Stop</button>
</body>
</html>
JavaScript
После нажатия кнопки «Stop» последовательно вызываются событие «stop» для публикуемого потока и функция API «Flashphoner.releaseLocalMedia()», которая «отпускает» захваченные микрофон и камеру.
function stopPlay() {
    stream.stop();
	Flashphoner.releaseLocalMedia();
    console.log("Stop")
}
Полный js код примера:
release-media-device-min.js
//Constants
var SESSION_STATUS = Flashphoner.constants.SESSION_STATUS;
var STREAM_STATUS = Flashphoner.constants.STREAM_STATUS;
var session;
var stream;

//Init Flashphoner API on page load & Connect to WCS server over webSockets
function init_api() {
    Flashphoner.init({});
    session = Flashphoner.createSession({
        urlServer: "wss://demo.flashphoner.com:8443" //specify the address of your WCS
    }).on(SESSION_STATUS.ESTABLISHED, function(session) {
        console.log("ESTABLISHED");
    });
	publishBtn.onclick= publishStream;
    stopBtn.onclick = stopPlay;
}

//Publish stream
function publishStream() {
    stream = session.createStream({
        name: "stream",
        display: document.getElementById("publish"),
    });
    stream.publish();
    console.log("Publish")
}

//Stopping stream & Release local media device
function stopPlay() {
    stream.stop();
	Flashphoner.releaseLocalMedia();
    console.log("Stop")
}
Управление параметрами потока при воспроизведении
Для тестирования этих примеров, опубликуйте на вашем WCS сервере видеопоток с именем «stream» любым удобным способом. Например, при помощи встроенного демо-примера «Two-way streaming».
При дальнейшем разборе примеров будет использоваться простая web-страница, на которой мы разместим div элемент и кнопки для управления воспроизведением. В div элементе будет отображаться воспроизведение запрошенного потока.
В описаниях JS кода не будем останавливаться на объявлении констант и функциях подключения к WCS через WebSocket и остановки потока. Дополнительную информацию о них можно найти здесь.
Полный HTML код минимального плеера:
play-min.html
<!DOCTYPE html>
<html lang="en">
<head>
    <script type="text/javascript" src="https://flashphoner.com/downloads/builds/flashphoner_client/wcs_api-2.0/current/flashphoner.js"></script>
    <script type="text/javascript" src="play-min.js"></script>
</head>
<body onload="init_api()">
    <div id="myPlayer" style="width:320px;height:240px;border: solid 1px"></div>
   	<br/>
   	<button id="playBtn">Play</button>
	<button id="stopBtn">Stop</button>
</body>
</html>
JS код инициализации API и подключения к WCS через WebSocket. Так же при загрузке страницы назначаем исполняемые функции кнопкам.
function init_api() {
    Flashphoner.init({});
    session = Flashphoner.createSession({
        urlServer: "wss://demo.flashphoner.com:8443" //specify the address of your WCS
    }).on(SESSION_STATUS.ESTABLISHED, function(session) {
        console.log("ESTABLISHED");
    });
	playBtn.onclick = playStream;
    stopBtn.onclick = stopPlay;
}
JS код воспроизведения потока
function playStream() {
    stream = session.createStream({
        name: "stream",
        display: document.getElementById("myPlayer"),
    });
    stream.play();
    console.log("Play")
}
JS код остановки воспроизведения потока
function stopPublish() {
    stream.stop();
    console.log("Stop")
}
Полный JS код минимального плеера
play-min.js
//Constants
var SESSION_STATUS = Flashphoner.constants.SESSION_STATUS;
var STREAM_STATUS = Flashphoner.constants.STREAM_STATUS;
var session;
var stream;

//Init Flashphoner API on page load & Connect to WCS server over webSockets
function init_api() {
    Flashphoner.init({});
    session = Flashphoner.createSession({
        urlServer: "wss://demo.flashphoner.com:8443" //specify the address of your WCS
    }).on(SESSION_STATUS.ESTABLISHED, function(session) {
        console.log("ESTABLISHED");
    });
	playBtn.onclick= playStream;
    stopBtn.onclick = stopPlay;
}

//Play stream
function playStream() {
	stream = session.createStream({
        name: "stream",
        display: document.getElementById("myPlayer"),
    });
    stream.play();;
    console.log("Play");
}

//Stopping stream
function stopPlay() {
    stream.stop();
    console.log("Stop")
}
Получение списка устройств воспроизведения
Получение списка устройств воспроизведения работает в браузерах Chrome и MS Edge.
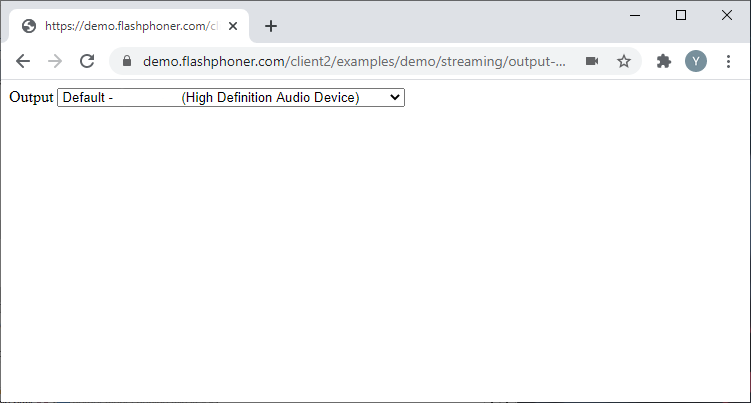
Рассмотрим пример минимального кода для получения списка устройств воспроизведения. Создадим два пустых файла output-media-device-min.html и output-media-device-min.js, в которых разместим следующий код.
На HTML-странице для этого примера разместим поле со списком, в котором будет выведен список устройств воспроизведения.
Полный код HTML-страницы:
output-media-device-min.html
<!DOCTYPE html>
<html lang="en">
<head>
    <script type="text/javascript" src="https://flashphoner.com/downloads/builds/flashphoner_client/wcs_api-2.0/current/flashphoner.js"></script>
    <script type="text/javascript" src="output-media-device-min.js"></script>
</head>
<body onload="init_api()">
    <label>Output</label>
    <select id="audioOutput"></select>
</body>
</html>
JavaScript
Получаем доступные устройства воспроизведения при помощи функции Flashphoner.getMediaDevices(), которая будет запущена при загрузке HTML страницы.
Полный JS код примера:
output-media-device-min.js
//Constants
var MEDIA_DEVICE_KIND = Flashphoner.constants.MEDIA_DEVICE_KIND;

//Init Flashphoner API on page load & get a list of available output devices
function init_api() {
    Flashphoner.init({});
	//Get a list of available output devices
    Flashphoner.getMediaDevices(null, true, MEDIA_DEVICE_KIND.OUTPUT).then(function (list) {
        list.audio.forEach(function (device) {
            var audio = document.getElementById("audioOutput");
            var deviceInList = false;
            for (var i = 0; i < audio.options.length; i++) {
                if (audio.options[i].value === device.id) {
                    deviceInList = true;
                    break;
                }
            }
            if (!deviceInList) {
                var option = document.createElement("option");
                option.text = device.label || device.id;
                option.value = device.id;
                audio.appendChild(option);
            }
        });
    });
};
Воспроизведение в режиме «Только аудио» и «Только видео»
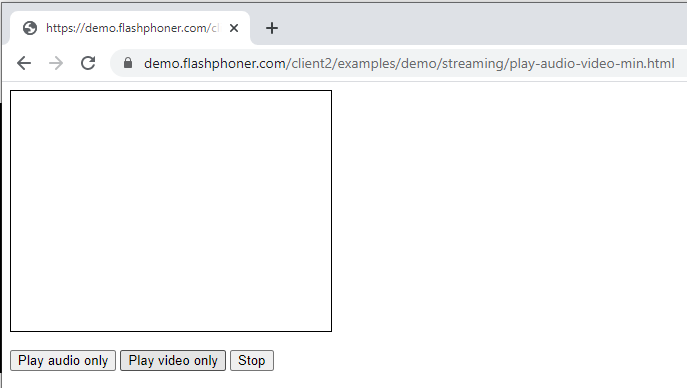
Рассмотрим пример минимального кода для воспроизведения потока в режиме «Только аудио» и «Только видео». Создадим два пустых файла play-audio-video-min.html и play-audio-video-min.js, в которых разместим следующий код.
Полный код HTML-страницы:
play-audio-video-min.html
<!DOCTYPE html>
<html lang="en">
<head>
    <script type="text/javascript" src="https://flashphoner.com/downloads/builds/flashphoner_client/wcs_api-2.0/current/flashphoner.js"></script>
    <script type="text/javascript" src="play-audio-video-min.js"></script>
</head>
<body onload="init_api()">
    <div id="myPlayer" style="width:320px;height:240px;border: solid 1px"></div>
   	<br/>
	<button id="playAudio">Play audio only</button>
	<button id="playVideo">Play video only</button>
	<button id="stopBtn">Stop</button>
</body>
</html>
JavaScript
1. Создаем поток для воспроизведения при помощи функции session.createStream() и передаем имя потока «stream» и HTML элемент «myPlayer» в качестве параметров. Чтобы из потока воспроизводилось только аудио указываем констрейнты
constraints = {
	audio: true,
	video: false
};
Воспроизводим поток с этими параметрами.
function playStreamAudio() {
    constraints = {
		audio: true,
		video: false
	};
	stream = session.createStream({
        name: "stream",
        display: document.getElementById("myPlayer"),
		constraints: constraints,
    });
    stream.play();;
    console.log("Play audio");
}
2. Далее создаем поток для воспроизведения при помощи функции session.createStream() и передаем имя потока «stream» и HTML элемент «myPlayer» в качестве параметров. Чтобы из потока воспроизводилось только видео указываем констрейнты следующим образом
constraints = {
	audio: false,
	video: true
};
Воспроизводим поток с этими параметрами
function playStreamVideo() {
    constraints = {
		audio: false,
		video: true
	};
	stream = session.createStream({
        name: "stream",
        display: document.getElementById("myPlayer"),
		constraints: constraints,
    });
    stream.play();
    console.log("Play video");
}
Полный код JavaScript примера:
play-audio-video-min.js
//Constants
var SESSION_STATUS = Flashphoner.constants.SESSION_STATUS;
var STREAM_STATUS = Flashphoner.constants.STREAM_STATUS;
var session;
var stream;

//Init Flashphoner API on page load & Connect to WCS server over webSockets
function init_api() {
    Flashphoner.init({});
    session = Flashphoner.createSession({
        urlServer: "wss://demo.flashphoner.com:8443" //specify the address of your WCS
    }).on(SESSION_STATUS.ESTABLISHED, function(session) {
        console.log("ESTABLISHED");
    });
	playAudio.onclick = playStreamAudio;
	playVideo.onclick= playStreamVideo;
    stopBtn.onclick = stopPlay;
}

//Play stream audio
function playStreamAudio() {
    constraints = {
		audio: true,
		video: false
	};
	stream = session.createStream({
        name: "stream",
        display: document.getElementById("myPlayer"),
		constraints: constraints,
    });
    stream.play();;
    console.log("Play audio");
}

//Play stream video
function playStreamVideo() {
    constraints = {
		audio: false,
		video: true
	};
	stream = session.createStream({
        name: "stream",
        display: document.getElementById("myPlayer"),
		constraints: constraints,
    });
    stream.play();
    console.log("Play video");
}

//Stopping stream
function stopPlay() {
    stream.stop();
    console.log("Stop")
}
Управление уровнем громкости при воспроизведении
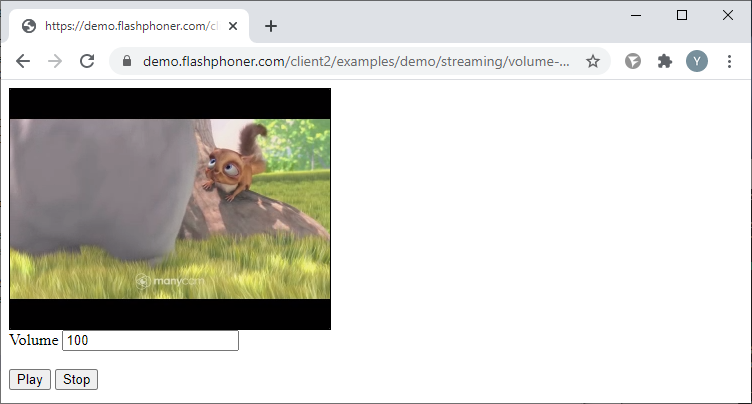
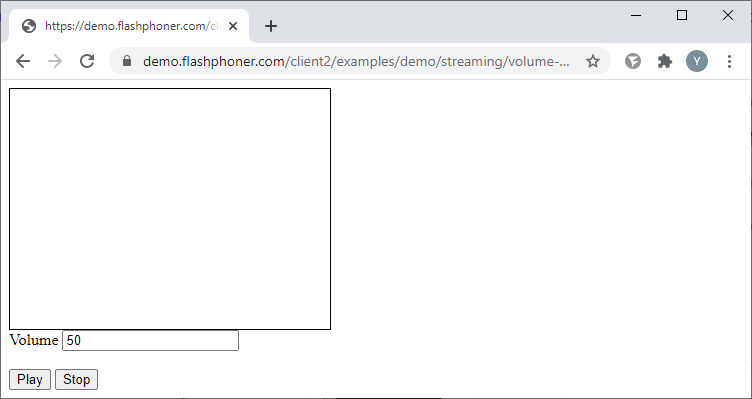
Рассмотрим пример минимального кода для управления уровнем громкости при воспроизведении потока. Создадим два пустых файла volume-play-min.html и volume-play-min.js, в которых разместим следующий код..
Полный код HTML-страницы:
volume-play-min.html
<!DOCTYPE html>
<html lang="en">
<head>
    <script type="text/javascript" src="https://flashphoner.com/downloads/builds/flashphoner_client/wcs_api-2.0/current/flashphoner.js"></script>
    <script type="text/javascript" src="volume-play-min.js"></script>
</head>
<body onload="init_api()">
    <div id="myPlayer" style="width:320px;height:240px;border: solid 1px"></div>
    <label>Volume</label>
	<input id="playVolume" type="text" value="50"/><br/>
	<br/><button id="playBtn">Play</button>
	<button id="stopBtn">Stop</button>
</body>
</html>
JavaScript
Создаем поток при помощи функции session.createStream() и передаем имя потока «stream» и HTML элемент «myPlayer» в качестве параметров. Получаем значение громкости с HTML-страницы. Для упрощения примера значение передаем в простом текстовом поле и для его изменения нужно будет перезапускать воспроизведение потока.
volumeValue = document.getElementById("playVolume").value
Воспроизводим поток с этими параметрами. После начала воспроизведения потока устанавливаем значение громкости:
function playStream() {
    volumeValue = document.getElementById("playVolume").value
	stream = session.createStream({
        name: "stream",
        display: document.getElementById("myPlayer"),
    }).on(STREAM_STATUS.PLAYING, function(stream) {
        stream.setVolume(volumeValue);
    });
    stream.play();;
    console.log("Play");
}
Полный JS код примера:
volume-play-min.js
//Constants
var SESSION_STATUS = Flashphoner.constants.SESSION_STATUS;
var STREAM_STATUS = Flashphoner.constants.STREAM_STATUS;
var session;
var stream;

//Init Flashphoner API on page load & Connect to WCS server over webSockets
function init_api() {
    Flashphoner.init({});
    session = Flashphoner.createSession({
        urlServer: "wss://demo.flashphoner.com:8443" //specify the address of your WCS
    }).on(SESSION_STATUS.ESTABLISHED, function(session) {
        console.log("ESTABLISHED");
    });
	playBtn.onclick= playStream;
    stopBtn.onclick = stopPlay;
}

//Play stream
function playStream() {
    volumeValue = document.getElementById("playVolume").value
	stream = session.createStream({
        name: "stream",
        display: document.getElementById("myPlayer"),
    }).on(STREAM_STATUS.PLAYING, function(stream) {
        stream.setVolume(volumeValue);
    });
    stream.play();;
    console.log("Play");
}


//Stopping stream
function stopPlay() {
    stream.stop();
    console.log("Stop")
}
Включение и отключение звука при воспроизведении
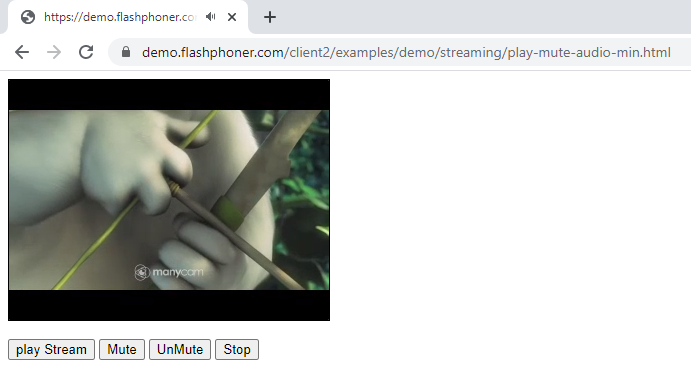
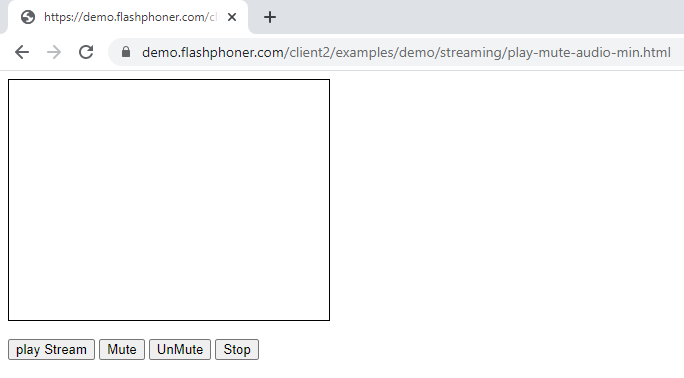
Рассмотрим пример минимального кода для включения и отключения звука при воспроизведении потока. Создадим два пустых файла play-mute-audio-min.html и play-mute-audio-min.js, в которых разместим следующий код.
Полный код HTML-страницы:
play-mute-audio-min.html
<!DOCTYPE html>
<html lang="en">
<head>
    <script type="text/javascript" src="https://flashphoner.com/downloads/builds/flashphoner_client/wcs_api-2.0/current/flashphoner.js"></script>
    <script type="text/javascript" src="play-mute-audio-min.js"></script>
</head>
<body onload="init_api()">
    <div id="myPlayer" style="width:320px;height:240px;border: solid 1px"></div>
   	<br/>
	<button id="playBtn">play Stream</button>
	<button id="playAudioMute">Mute</button>
	<button id="playAudioUnMute">UnMute</button>
	<button id="stopBtn">Stop</button>
</body>
</html>
JavaScript
1. Функция отключения звука
function audioMute() {
	stream.muteRemoteAudio();
}
2. Функция включения звука
function audioUnMute() {
	stream.unmuteRemoteAudio();
}
Полный код JavaScript для этого примера:
play-mute-audio-min.js
//Constants
var SESSION_STATUS = Flashphoner.constants.SESSION_STATUS;
var STREAM_STATUS = Flashphoner.constants.STREAM_STATUS;
var session;
var stream;

//Init Flashphoner API on page load & Connect to WCS server over webSockets
function init_api() {
    Flashphoner.init({});
    session = Flashphoner.createSession({
        urlServer: "wss://demo.flashphoner.com:8443" //specify the address of your WCS
    }).on(SESSION_STATUS.ESTABLISHED, function(session) {
        console.log("ESTABLISHED");
    });
	playBtn.onclick = playStream;
	playAudioMute.onclick= audioMute;
	playAudioUnMute.onclick= audioUnMute;
    stopBtn.onclick = stopPlay;
}

//Play stream
function playStream() {
    constraints = {
		audio: true,
		video: true
	};
	stream = session.createStream({
        name: "stream",
        display: document.getElementById("myPlayer"),
		constraints: constraints,
    });
    stream.play();
    console.log("play");
}

//Mute audio
function audioMute() {
	stream.muteRemoteAudio();
}

//UnMute audio
function audioUnMute() {
	stream.unmuteRemoteAudio();
}

//Stopping stream
function stopPlay() {
    stream.stop();
    console.log("Stop")
}
Индикатор речи
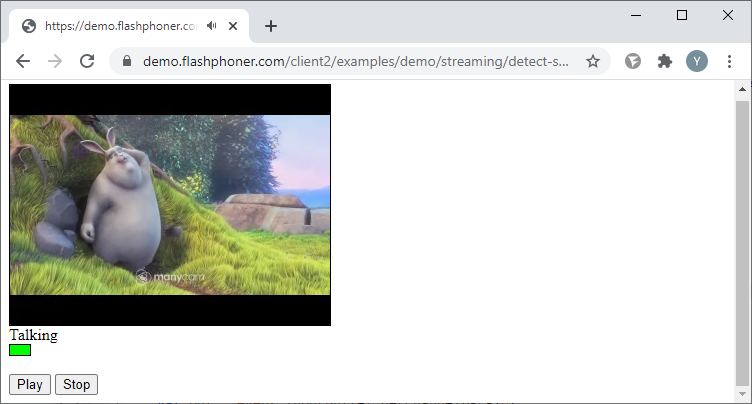
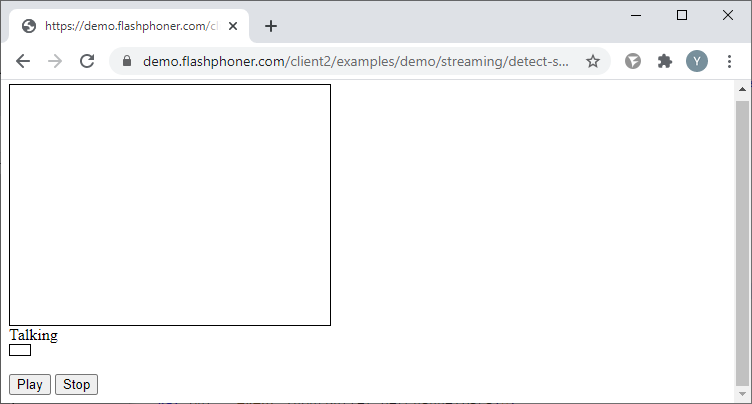
Рассмотрим пример минимального кода для встраивания индикатора речи. Создадим два пустых файла detect-speech-play-min.html и detect-speech-play-min.js, в которых разместим следующий код.
Полный код HTML-страницы:
detect-speech-play-min.html
<!DOCTYPE html>
<html lang="en">
<head>
    <script type="text/javascript" src="https://flashphoner.com/downloads/builds/flashphoner_client/wcs_api-2.0/current/flashphoner.js"></script>
    <script type="text/javascript" src="detect-speech-play-min.js"></script>
</head>
<body onload="init_api()">
    <div id="myPlayer" style="width:320px;height:240px;border: solid 1px"></div>
    <label>Talking</label>
	<div id="talking" style="width:20px;height:10px;border: solid 1px; background-color: #ffffff"></div>
	<br/><button id="playBtn">Play</button>
	<button id="stopBtn">Stop</button>
</body>
</html>
JavaScript
Получаем поток из плеера и определяем наличие аудио составляющей в потоке. Проверяем наличие аудио каждые 500 ms и меняем цвет div элемента «Talking»:
function detectSpeech(stream, level, latency) {
	var audioContext = new (window.AudioContext || window.webkitAudioContext)();
	var mediaStream = document.getElementById(stream.id()).srcObject;
    var source = audioContext.createMediaStreamSource(mediaStream);
    var processor = audioContext.createScriptProcessor(512);
    processor.onaudioprocess = handleAudio;
    processor.connect(audioContext.destination);
    processor.clipping = false;
    processor.lastClip = 0;
    // threshold
    processor.threshold = level || 0.10;
    processor.latency = latency || 750;

    processor.isSpeech =
        function () {
            if (!this.clipping) return false;
            if ((this.lastClip + this.latency) < window.performance.now()) this.clipping = false;
            return this.clipping;
        };

    source.connect(processor);

    // Check speech every 500 ms
    intervalID = setInterval(function () {
        if (processor.isSpeech()) {
           console.log("talking");
            document.getElementById("talking").style.background = "#00ff00";
        } else {
            document.getElementById("talking").style.background = "#ff0000";
            console.log("NO_talking");
        }
    }, 500);
}
Функция определения наличия аудио составляющей в потоке
function handleAudio(event) {
    var buf = event.inputBuffer.getChannelData(0);
    var bufLength = buf.length;
    var x;
    for (var i = 0; i < bufLength; i++) {
        x = buf[i];
        if (Math.abs(x) >= this.threshold) {
            this.clipping = true;
            this.lastClip = window.performance.now();
        }
    }
}
Полный JS код примера:
detect-speech-play-min.js
//Constants
var SESSION_STATUS = Flashphoner.constants.SESSION_STATUS;
var STREAM_STATUS = Flashphoner.constants.STREAM_STATUS;
var session;
var stream;


//Init Flashphoner API on page load & Connect to WCS server over webSockets
function init_api() {
    Flashphoner.init({});
    session = Flashphoner.createSession({
        urlServer: "wss://demo.flashphoner.com:8443" //specify the address of your WCS
    }).on(SESSION_STATUS.ESTABLISHED, function(session) {
        console.log("ESTABLISHED");
    });
	playBtn.onclick= playStream;
    stopBtn.onclick = stopPlay;
}

//Play stream
function playStream() {

	stream = session.createStream({
        name: "stream",
        display: document.getElementById("myPlayer"),
    }).on(STREAM_STATUS.PLAYING, function(stream) {
       detectSpeech(stream);
    });
    stream.play();;
    console.log("Play");
}

function detectSpeech(stream, level, latency) {
	var audioContext = new (window.AudioContext || window.webkitAudioContext)();
	var mediaStream = document.getElementById(stream.id()).srcObject;
    var source = audioContext.createMediaStreamSource(mediaStream);
    var processor = audioContext.createScriptProcessor(512);
    processor.onaudioprocess = handleAudio;
    processor.connect(audioContext.destination);
    processor.clipping = false;
    processor.lastClip = 0;
    // threshold
    processor.threshold = level || 0.10;
    processor.latency = latency || 750;

    processor.isSpeech =
        function () {
            if (!this.clipping) return false;
            if ((this.lastClip + this.latency) < window.performance.now()) this.clipping = false;
            return this.clipping;
        };

    source.connect(processor);

    // Check speech every 500 ms
    intervalID = setInterval(function () {
        if (processor.isSpeech()) {
           console.log("talking");
            document.getElementById("talking").style.background = "#00ff00";
        } else {
            document.getElementById("talking").style.background = "#ff0000";
            console.log("NO_talking");
        }
    }, 500);
}

function handleAudio(event) {
    var buf = event.inputBuffer.getChannelData(0);
    var bufLength = buf.length;
    var x;
    for (var i = 0; i < bufLength; i++) {
        x = buf[i];
        if (Math.abs(x) >= this.threshold) {
            this.clipping = true;
            this.lastClip = window.performance.now();
        }
    }
}

//Stopping stream
function stopPlay() {
    stream.stop();
    console.log("Stop")
}
Воспроизведение с указанием размеров видео, битрейта и качества
При воспроизведении потока с указанием размеров видео, битрейта на WCS сервере будет включен транскодинг, что приведет к увеличению нагрузки на процессор сервера.
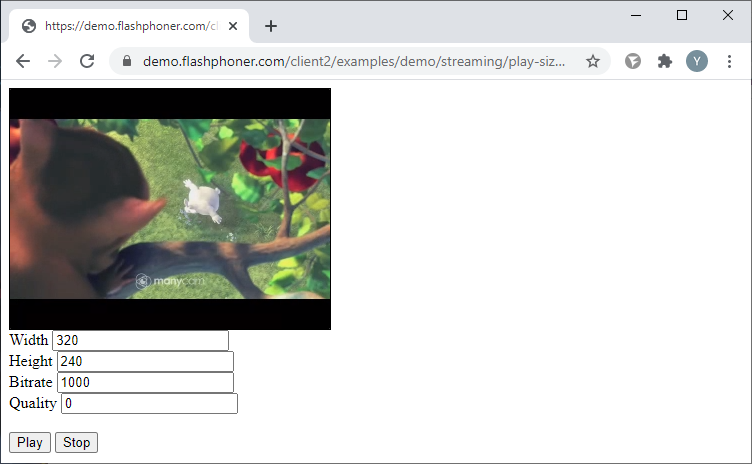
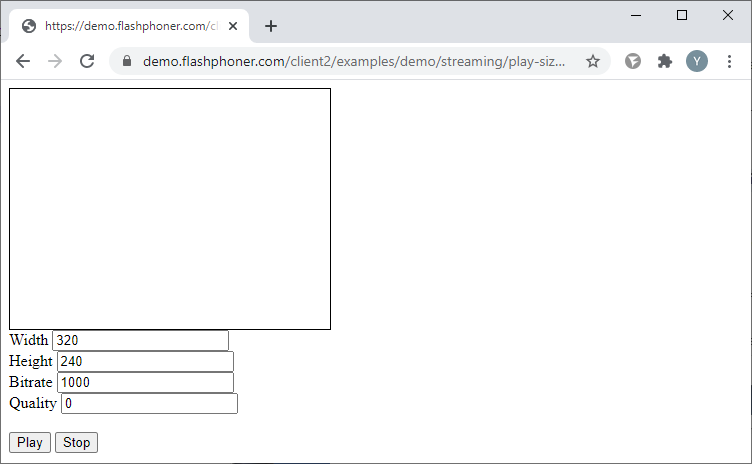
Рассмотрим пример минимального кода для воспроизведения с указанием размеров видео, битрейта и качества . Создадим два пустых файла play-size-video-min.html и play-size-video-min.js, в которых разместим следующий код.
Полный код HTML-страницы:
play-size-video-min.html
<!DOCTYPE html>
<html lang="en">
<head>
    <script type="text/javascript" src="https://flashphoner.com/downloads/builds/flashphoner_client/wcs_api-2.0/current/flashphoner.js"></script>
    <script type="text/javascript" src="play-size-video-min.js"></script>
</head>
<body onload="init_api()">
    <div id="myPlayer" style="width:320px;height:240px;border: solid 1px"></div>
    <label>Width</label>
	<input id="playWidth" type="text" value="320"/><br/>
	<label>Height</label>
	<input id="playHeight" type="text" value="240"/><br/>
	<label>Bitrate</label>
	<input id="playBitrate" type="text" value="1000"/><br/>
	<label>Quality</label>
	<input id="playQuality" type="text" value="0"/>
	<br/><button id="playBtn">Play</button>
	<button id="stopBtn">Stop</button>
</body>
</html>
JavaScript
Создаем поток для воспроизведения при помощи функции session.createStream() и передаем имя потока «stream» и HTML элемент «myPlayer» в качестве параметров. Получаем значения констрейнтов из полей на HTML странице:
Для воспроизведения видео потока доступны следующие параметры
- width — ширина кадра (в px);
- height — высота кадра (в px);
- bitrate — значение битрейта (в кбит/с);
- quality — качество видео. Значение от 0 до 51 (0 — самое высокое качество, 51 — самое низкое качество).
constraints = {
    audio: true,
    video: {
         width: document.getElementById("playWidth").value,
         height: document.getElementById("playHeight").value,
         bitrate: document.getElementById("playBitrate").value,
         quality: document.getElementById("playQuality").value
    }
};
Воспроизводим поток с этими параметрами:
function playStream() {
    constraints = {
        audio: true,
        video: {
            width: document.getElementById("playWidth").value,
            height: document.getElementById("playHeight").value,
            bitrate: document.getElementById("playBitrate").value,
            quality: document.getElementById("playQuality").value
        }
    };
    stream = session.createStream({
        name: "stream",
        display: document.getElementById("myPlayer"),
        constraints: constraints,
    });
    stream.play();
    console.log("Play")
}
Полный код JavaScript:
play-size-video-min.js
//Constants
var SESSION_STATUS = Flashphoner.constants.SESSION_STATUS;
var STREAM_STATUS = Flashphoner.constants.STREAM_STATUS;
var session;
var stream;

//Init Flashphoner API on page load & Connect to WCS server over webSockets
function init_api() {
    Flashphoner.init({});
    session = Flashphoner.createSession({
        urlServer: "wss://demo.flashphoner.com:8443" //specify the address of your WCS
    }).on(SESSION_STATUS.ESTABLISHED, function(session) {
        console.log("ESTABLISHED");
    });
    playBtn.onclick = playStream;
    stopBtn.onclick = stopPlay;
}

//Play stream
function playStream() {
    constraints = {
        audio: true,
        video: {
            width: document.getElementById("playWidth").value,
            height: document.getElementById("playHeight").value,
            bitrate: document.getElementById("playBitrate").value,
            quality: document.getElementById("playQuality").value
        }
    };
    stream = session.createStream({
        name: "stream",
        display: document.getElementById("myPlayer"),
        constraints: constraints,
    });
    stream.play();
    console.log("Play")
}

//Stopping stream
function stopPlay() {
    stream.stop();
    console.log("Stop")
}
Выбор протокола транспорта для воспроизведения потока
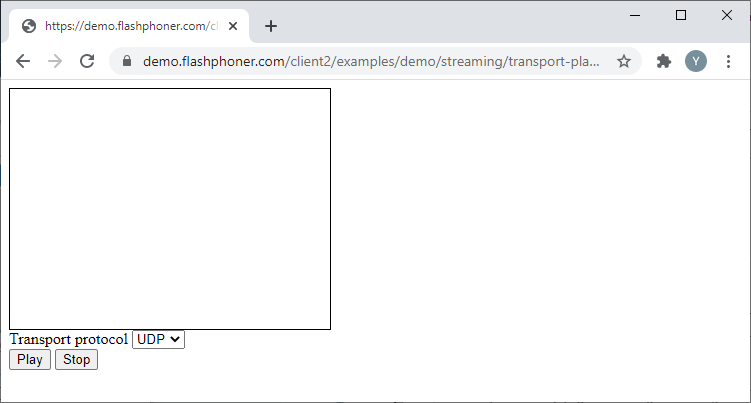
Рассмотрим пример минимального кода для выбора протокола транспорта при воспроизведении потока. Создадим два пустых файла transport-play-min.html и transport-play-min.js, в которых разместим следующий код.
На HTML-страницу добавляем элемент «select», с помощью которого можно выбрать протокол транспорта — UDP или TCP.
Полный код HTML-страницы:
transport-play-min.html
<!DOCTYPE html>
<html lang="en">
<head>
    <script type="text/javascript" src="https://flashphoner.com/downloads/builds/flashphoner_client/wcs_api-2.0/current/flashphoner.js"></script>
    <script type="text/javascript" src="transport-play-min.js"></script>
</head>
<body onload="init_api()">
    <div id="myPlayer" style="width:320px;height:240px;border: solid 1px"></div>
    <label>Transport protocol</label>
	<select id="transportOutput">
        <option value="UDP">UDP</option>
		<option value="TCP">TCP</option>
	</select>
	<br/><button id="playBtn">Play</button>
	<button id="stopBtn">Stop</button>
</body>
</html>
JavaScript
Создаем поток при помощи функции session.createStream() и передаем имя потока «stream» и HTML элемент «myPlayer» в качестве параметров. Получаем значение протокола из элемента «select» на HTML-странице:
transport:document.getElementById("transportOutput").value,
Воспроизводим поток с этими параметрами:
function playStream() {
    stream = session.createStream({
        name: "stream",
        display: document.getElementById("myPlayer"),
		transport:document.getElementById("transportOutput").value,
    });
    stream.play();;
    console.log("Play");
}
Полный JS код примера:
transport-play-min.js
//Constants
var SESSION_STATUS = Flashphoner.constants.SESSION_STATUS;
var STREAM_STATUS = Flashphoner.constants.STREAM_STATUS;
var session;
var stream;

//Init Flashphoner API on page load & Connect to WCS server over webSockets
function init_api() {
    Flashphoner.init({});
    session = Flashphoner.createSession({
        urlServer: "wss://demo.flashphoner.com:8443" //specify the address of your WCS
    }).on(SESSION_STATUS.ESTABLISHED, function(session) {
        console.log("ESTABLISHED");
    });
	playBtn.onclick= playStream;
    stopBtn.onclick = stopPlay;
}

//Play stream audio
function playStream() {
    stream = session.createStream({
        name: "stream",
        display: document.getElementById("myPlayer"),
		transport:document.getElementById("transportOutput").value,
    });
    stream.play();;
    console.log("Play");
}

//Stopping stream
function stopPlay() {
    stream.stop();
    console.log("Stop")
}
Исключение кодеков при воспроизведении потока
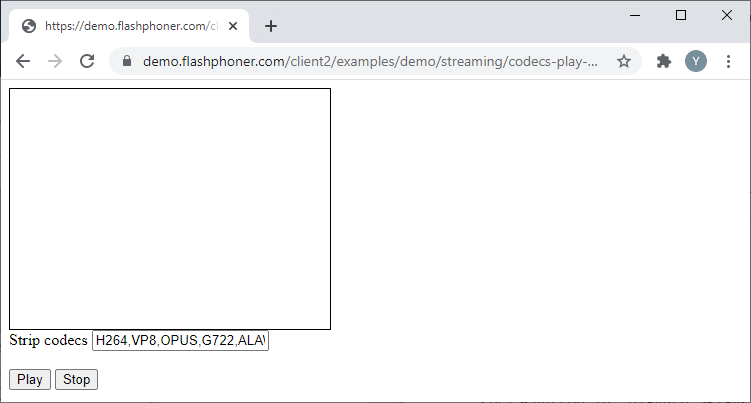
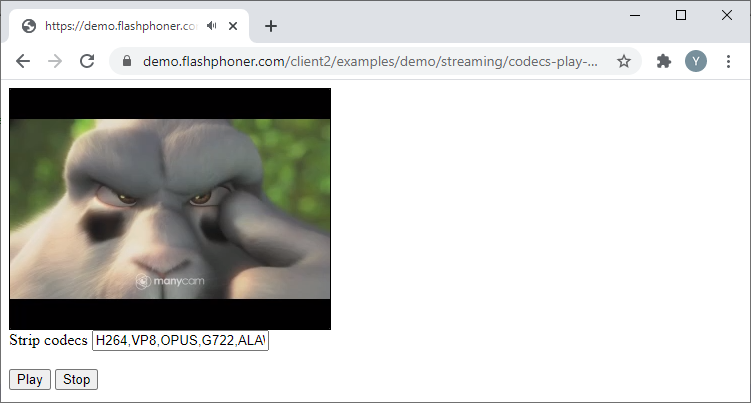
Рассмотрим пример минимального кода для исключения кодеков при воспроизведении потока. Создадим два пустых файла codecs-play-min.html и codecs-play-min.js, в которых разместим следующий код.
Полный код HTML-страницы:
codecs-play-min.html
<!DOCTYPE html>
<html lang="en">
<head>
    <script type="text/javascript" src="https://flashphoner.com/downloads/builds/flashphoner_client/wcs_api-2.0/current/flashphoner.js"></script>
    <script type="text/javascript" src="codecs-play-min.js"></script>
</head>
<body onload="init_api()">
    <div id="myPlayer" style="width:320px;height:240px;border: solid 1px"></div>
    <label>Strip codecs</label>
	<input id="stripCodecs" type="text" value="H264,VP8,OPUS,G722,ALAW,ULAW"/><br/>
	<br/><button id="playBtn">Play</button>
	<button id="stopBtn">Stop</button>
</body>
</html>
JavaScript
Создаем поток при помощи функции session.createStream() и передаем имя потока «stream» и HTML элемент «myPlayer» в качестве параметров. Получаем список кодеков из поля на HTML странице:
stripCodecs:document.getElementById("stripCodecs").value,
Воспроизводим поток с этими параметрами:
function playStream() {
    stream = session.createStream({
        name: "stream",
        display: document.getElementById("myPlayer"),
		stripCodecs:document.getElementById("stripCodecs").value,
    });
    stream.play();;
    console.log("Play");
}
Полный js код примера:
codecs-play-min.js
//Constants
var SESSION_STATUS = Flashphoner.constants.SESSION_STATUS;
var STREAM_STATUS = Flashphoner.constants.STREAM_STATUS;
var session;
var stream;

//Init Flashphoner API on page load & Connect to WCS server over webSockets
function init_api() {
    Flashphoner.init({});
    session = Flashphoner.createSession({
        urlServer: "wss://demo.flashphoner.com:8443" //specify the address of your WCS
    }).on(SESSION_STATUS.ESTABLISHED, function(session) {
        console.log("ESTABLISHED");
    });
	playBtn.onclick= playStream;
    stopBtn.onclick = stopPlay;
}

//Play stream
function playStream() {
    stream = session.createStream({
        name: "stream",
        display: document.getElementById("myPlayer"),
		stripCodecs:document.getElementById("stripCodecs").value,
    });
    stream.play();;
    console.log("Play");
}

//Stopping stream
function stopPlay() {
    stream.stop();
    console.log("Stop")
}
Загрузить Web Call Server 5
Системные требования: Linux x86_64, 1 core CPU, 2 Gb RAM, Java
Установка:
- wget https://flashphoner.com/download-wcs5.2-server.tar.gz
- Распаковать и установить с помощью скрипта 'install.sh'
- Запустить сервер с помощью команды 'service webcallserver start'
- Открыть веб-интерфейс https://host:8444 и активировать вашу лицензию
Если вы используете серверы Amazon EC2, то скачивать ничего не нужно.

