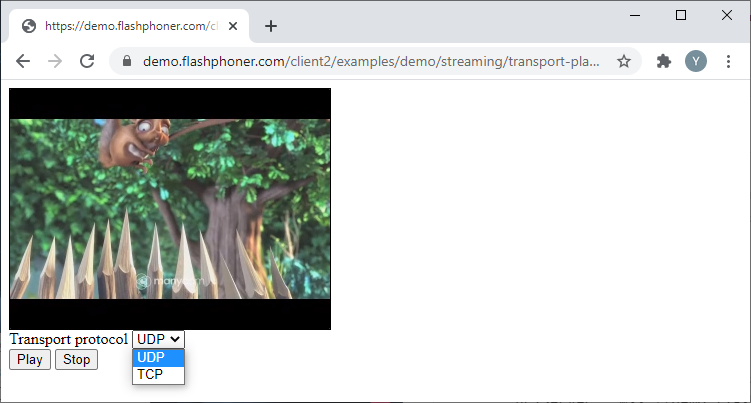
Embedding camera, microphone and
stream parameters controls
The following is a guide on how to embed the code for stream publishing and playback into your site or web project
Content
- Managing stream parameters upon publishing
- Getting the cameras and microphones list
- Testing microphones and cameras
- Publishing in Audio only and Video only modes
- Managing the microphone sensitivity upon audio capture
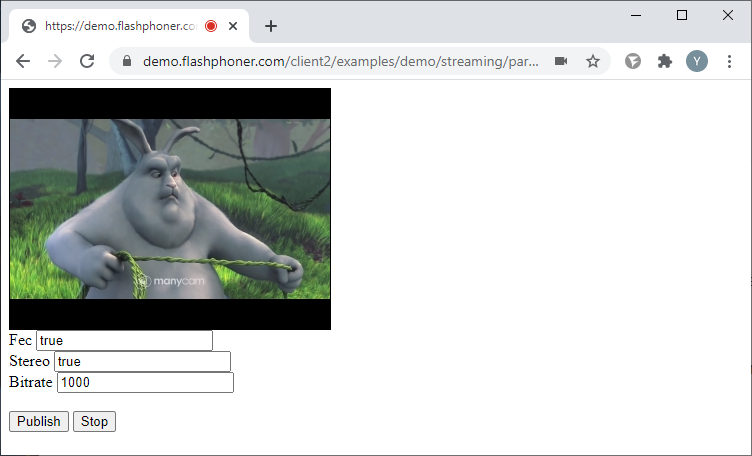
- Managing the audio stream parameters upon publishing
- Turning audio on and off upon publishing
- Publishing with set video resolution, FPS and bitrate
- Turning the camera on and off upon publishing
- Managing the COD and CVO parameters
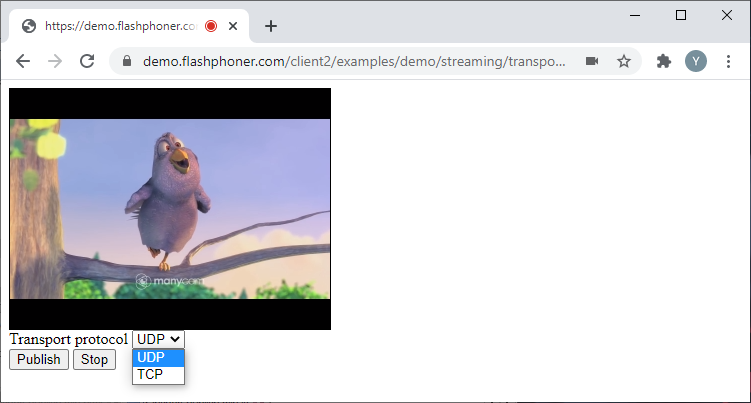
- Selecting the transport protocol for stream publishing
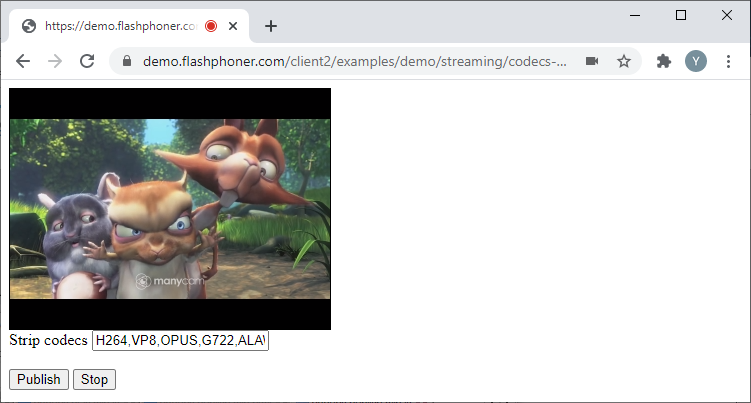
- Excluding codecs upon stream publishing
- Stopping the publishing and “releasing” cameras and microphones
- Managing the playback stream parameters
Managing stream parameters upon publishing
The following examples will use a simple web page, where we’ll deploy a div element and controls. For examples involving publishing, the div element shall display the stream preview.
The JS code descriptions will not feature explanations on constants and functions related to connecting to WCS via WebSocket and stopping the stream. You can find more information on that here.
Here is the full baseline HTML code for stream publishing:
publish-min.html
<!DOCTYPE html>
<html lang="en">
<head>
    <script type="text/javascript" src="https://flashphoner.com/downloads/builds/flashphoner_client/wcs_api-2.0/current/flashphoner.js"></script>
    <script type="text/javascript" src="publish-min.js"></script>
</head>
<body onload="init_api()">
    <div id="publish" style="width:320px;height:240px;border: solid 1px"></div>
    <br/>
    <button id="publishBtn">Publish</button>
    <button id="stopBtn">Stop</button>
</body>
</html>
JS code for initializing API and connecting to WCS via WebSocket. Upon page loading, assign the appropriate functions to buttons:
function init_api() {
    Flashphoner.init({});
    session = Flashphoner.createSession({
        urlServer: "wss://demo.flashphoner.com:8443" //specify the address of your WCS
    }).on(SESSION_STATUS.ESTABLISHED, function(session) {
        console.log("ESTABLISHED");
    });
	publishBtn.onclick = publishStream;
    stopBtn.onclick = stopPublish;
JS code for stream publishing:
function publishStream() {
    stream = session.createStream({
        name: "stream",
        display: document.getElementById("publish"),
    });
    stream.publish();
    console.log("Publish")
}
JS for stopping the stream publishing:
function stopPublish() {
    stream.stop();
    console.log("Stop")
}
Full JS code for baseline publisher:
publish-min.js
//Constants
var SESSION_STATUS = Flashphoner.constants.SESSION_STATUS;
var STREAM_STATUS = Flashphoner.constants.STREAM_STATUS;
var session;
var stream;

//Init Flashphoner API on page load & Connect to WCS server over webSockets
function init_api() {
    Flashphoner.init({});
    session = Flashphoner.createSession({
        urlServer: "wss://demo.flashphoner.com:8443" //specify the address of your WCS
    }).on(SESSION_STATUS.ESTABLISHED, function(session) {
        console.log("ESTABLISHED");
    });
	publishBtn.onclick= publishStream;
    stopBtn.onclick = stopPlay;
}

//Publish stream
function publishStream() {
    stream = session.createStream({
        name: "stream",
        display: document.getElementById("publish"),
    });
    stream.publish();
    console.log("Publish")
}

//Stopping stream
function stopPlay() {
    stream.stop();
    console.log("Stop")
}
Getting the cameras and microphones list
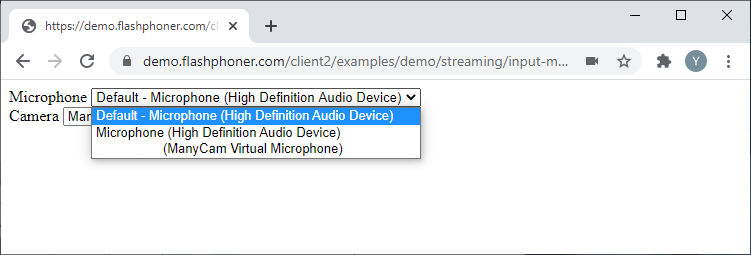
Let’s take a look at the baseline code for getting the list of cameras and microphones available to the user. Create two empty files titled input-media-device-min.html and input-media-device-min.js. and put the following code into them.
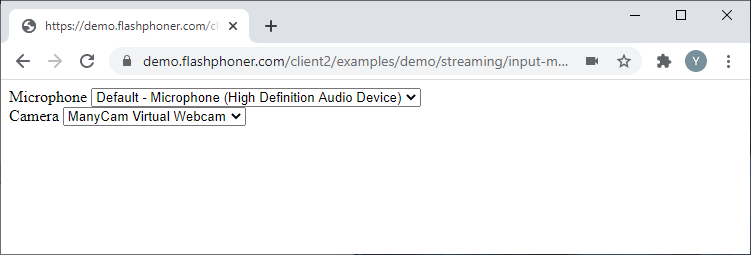
In this example, the HTML page shall have two fields with lists of cameras and microphones respectively. Here is the full code for the HTML page:
input-media-device-min.html
<!DOCTYPE html>
<html lang="en">
<head>
    <script type="text/javascript" src="https://flashphoner.com/downloads/builds/flashphoner_client/wcs_api-2.0/current/flashphoner.js"></script>
    <script type="text/javascript" src="input-media-device-min.js"></script>
</head>
<body onload="init_api()">
    <label>Microphone</label>
    <select id="audioInput"></select>
	<br/>
	<label>Camera</label>
    <select id="videoInput"></select>
</body>
</html>
JavaScript
The Flashphoner.getMediaDevices() function allows us to receive the list of available cameras and microphones, and it will be launched upon page loading.
Here is the complete JS code for this example:
input-media-device-min.js
//Init Flashphoner API on page load & get a list of available input devices
function init_api() {
    Flashphoner.init({});
    Flashphoner.getMediaDevices(null, true).then(function(list) {
        //Get a list of available Microphone
        list.audio.forEach(function(device) {
			//List filling
            var audio = document.getElementById("audioInput");
            var deviceInList = false;
            for (var i = 0; i < audio.options.length; i++) {
                if (audio.options[i].value === device.id) {
                    deviceInList = true;
                    break;
                }
            }
            if (!deviceInList) {
                var option = document.createElement("option");
                option.text = device.label || device.id;
                option.value = device.id;
                audio.appendChild(option);
            }
        });
        //Get a list of available Camera
        list.video.forEach(function(device) {
			//List filling
            var video = document.getElementById("videoInput");
            var deviceInList = false;
            for (var i = 0; i < video.options.length; i++) {
                if (video.options[i].value === device.id) {
                    deviceInList = true;
                    break;
                }
            }
            if (!deviceInList) {
                var option = document.createElement("option");
                option.text = device.label || device.id;
                option.value = device.id;
                if (option.text.toLowerCase().indexOf("back") >= 0 && video.children.length > 0) {
                    video.insertBefore(option, video.children[0]);
                } else {
                    video.appendChild(option);
                }
            }
        });
    });
};
Testing microphones and cameras
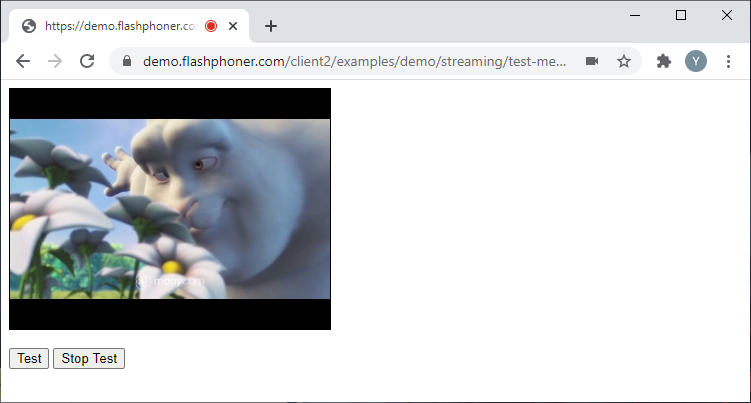
Testing doesn’t require creating a stream and publishing it, it is performed locally, at the browser level.
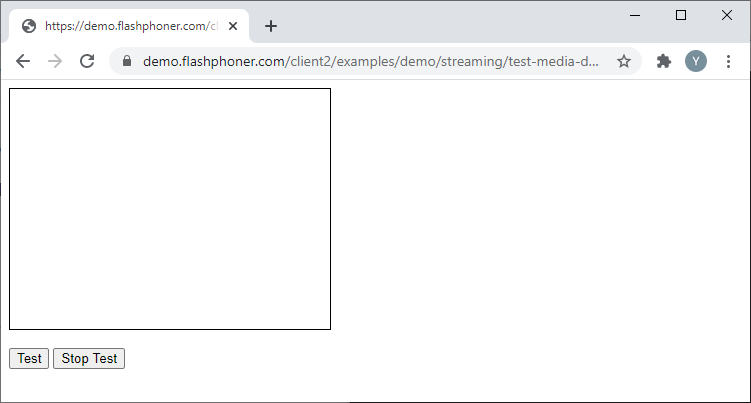
Let’s take a look at the baseline code for microphone and camera testing. Create two empty files titled test-media-device-min.html and test-media-device-min.js, with the following code.
Here is the complete code for the HTML page:
test-media-device-min.html
<!DOCTYPE html>
<html lang="en">
<head>
    <script type="text/javascript" src="https://flashphoner.com/downloads/builds/flashphoner_client/wcs_api-2.0/current/flashphoner.js"></script>
    <script type="text/javascript" src="test-media-device-min.js"></script>
</head>
<body onload="init_api()">
    <div id="testScreen" style="width:320px;height:240px;border: solid 1px"></div>
   	<br/>
	<button id="testBtn">Test</button>
	<button id="stopTestBtn">Stop Test</button>
</body>
</html>
Here is the complete JS code for this example:
test-media-device-min.js
//Init Flashphoner API on page load
function init_api() {
    Flashphoner.init({});
    testBtn.onclick = startTest;
    stopTestBtn.onclick = stopTest;
}

//Test run
function startTest() {
    var constraints = {
        audio: true,
        video: true
    };
    var testScreen = document.getElementById("testScreen");
    Flashphoner.getMediaAccess(constraints, testScreen).then(function(disp) {
        testStarted = true;
    });
}

//Stopping testing
function stopTest() {
	testStarted = false;
	document.getElementById("testScreen").innerHTML = "";
}
Publishing in Audio only and Video only modes
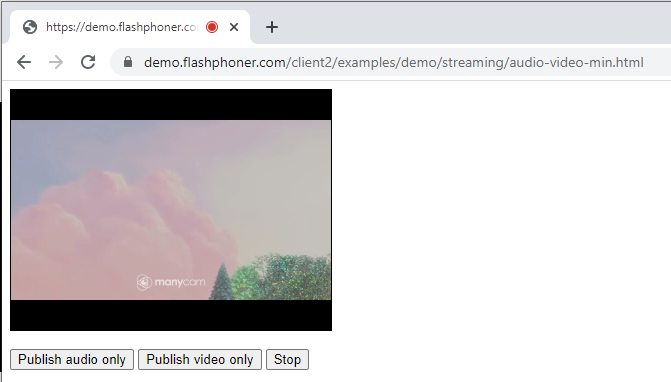
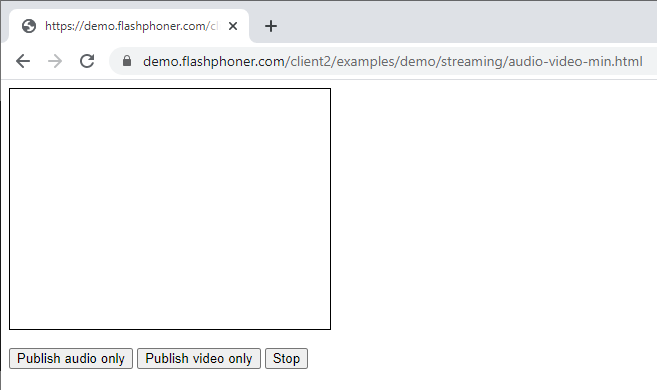
Let’s take a look at the baseline code for embedding an Audio only or Video only stream. Create two empty files titled audio-video-min.html and audio-video-min.js with the following code.
Here is the complete code for the HTML page:
audio-video-min.html
<!DOCTYPE html>
<html lang="en">
<head>
    <script type="text/javascript" src="https://flashphoner.com/downloads/builds/flashphoner_client/wcs_api-2.0/current/flashphoner.js"></script>
    <script type="text/javascript" src="audio-video-min.js"></script>
</head>
<body onload="init_api()">
    <div id="publish" style="width:320px;height:240px;border: solid 1px"></div>
   	<br/>
	<button id="publishAudio">Publish audio only</button>
	<button id="publishVideo">Publish video only</button>
	<button id="stopBtn">Stop</button>
</body>
</html>
JavaScript
Create a stream using the session.createStream() function and transmit the stream name “stream” and the HTML element titled “publish” as parameters. To make sure only audio is transmitted, set the following constraints:
constraints = {
	audio: true,
	video: false
};
Publish the stream with these parameters
function publishStreamAudio() {
    constraints = {
	audio: true,
	video: false
	};
	stream = session.createStream({
        name: "stream",
        display: document.getElementById("publish"),
		constraints: constraints,
    });
    stream.publish();
    console.log("Publish audio");
}
Create a stream using the session.createStream() function and transmit the stream name “stream” and the HTML element titled “publish” as parameters. To make sure only video is transmitted, set the following constraints:
constraints = {
	audio: false,
	video: true
};
Publish the stream with these parameters:
function publishStreamVideo() {
    constraints = {
	audio: false,
	video: true
	};
	stream = session.createStream({
        name: "stream",
        display: document.getElementById("publish"),
		constraints: constraints,
    });
    stream.publish();
    console.log("Publish video");
}
Here is the complete JavaScript code for this example:
audio-video-min.js
//Constants
var SESSION_STATUS = Flashphoner.constants.SESSION_STATUS;
var STREAM_STATUS = Flashphoner.constants.STREAM_STATUS;
var session;
var stream;

//Init Flashphoner API on page load & Connect to WCS server over webSockets
function init_api() {
    Flashphoner.init({});
    session = Flashphoner.createSession({
        urlServer: "wss://demo.flashphoner.com:8443" //specify the address of your WCS
    }).on(SESSION_STATUS.ESTABLISHED, function(session) {
        console.log("ESTABLISHED");
    });
	publishAudio.onclick = publishStreamAudio;
	publishVideo.onclick= publishStreamVideo;
    stopBtn.onclick = stopPublish;
}

//Publish stream audio
function publishStreamAudio() {
    constraints = {
	audio: true,
	video: false
	};
	stream = session.createStream({
        name: "stream",
        display: document.getElementById("publish"),
		constraints: constraints,
    });
    stream.publish();
    console.log("Publish audio");
}

//Publish stream video
function publishStreamVideo() {
    constraints = {
	audio: false,
	video: true
	};
	stream = session.createStream({
        name: "stream",
        display: document.getElementById("publish"),
		constraints: constraints,
    });
    stream.publish();
    console.log("Publish video");
}

//Stopping stream
function stopPublish() {
    stream.stop();
    console.log("Stop")
}
Managing the microphone sensitivity upon audio capture
Managing the microphone sensitivity works only in Chromium-powered browsers.
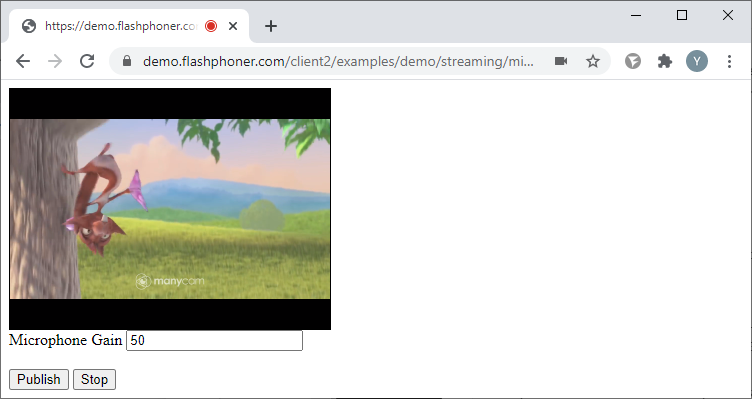
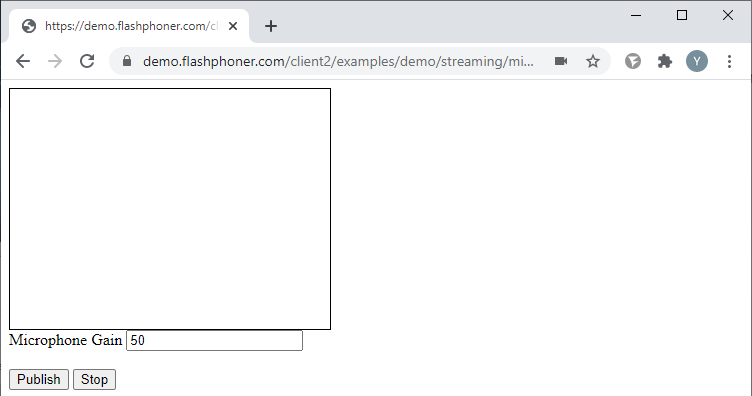
Let’s take a look at a baseline code for managing the microphone sensitivity upon audio capture. Create two empty files titled mic-gain-publish-min.html and mic-gain-publish-min.js, with the following code:
Here is the complete code for the HTML page:
mic-gain-publish-min.html
<!DOCTYPE html>
<html lang="en">
<head>
    <script type="text/javascript" src="https://flashphoner.com/downloads/builds/flashphoner_client/wcs_api-2.0/current/flashphoner.js"></script>
    <script type="text/javascript" src="mic-gain-publish-min.js"></script>
</head>
<body onload="init_api()">
    <div id="publish" style="width:320px;height:240px;border: solid 1px"></div>
    <label>Microphone Gain</label>
	<input id="sendGain" type="text" value="50"/><br/>
	<br/><button id="publishBtn">Publish</button>
	<button id="stopBtn">Stop</button>
</body>
</html>
JavaScript
Create a stream using the session.createStream() function and transmit the stream name “stream” and the HTML element titled “publish” as parameters. Receive the microphone sensitivity value. To make the example easier, the value is presented simply as text and to adjust it you would need to re-publish the stream.
gainValue = document.getElementById("sendGain").value
Publish the stream with these parameters. Upon successful publication, set the microphone sensitivity value:
function publishStream() {
    gainValue = document.getElementById("sendGain").value
    stream = session.createStream({
        name: "stream",
        display: document.getElementById("publish"),
    }).on(STREAM_STATUS.PUBLISHING, function(stream) {
        stream.setMicrophoneGain(gainValue);
    });
    stream.publish();
    console.log("Publish")
}
Here is the complete JS code for this example:
mic-gain-publish-min.js
//Constants
var SESSION_STATUS = Flashphoner.constants.SESSION_STATUS;
var STREAM_STATUS = Flashphoner.constants.STREAM_STATUS;
var session;
var stream;

//Init Flashphoner API on page load & Connect to WCS server over webSockets
function init_api() {
    Flashphoner.init({});
    session = Flashphoner.createSession({
        urlServer: "wss://demo.flashphoner.com:8443" //specify the address of your WCS
    }).on(SESSION_STATUS.ESTABLISHED, function(session) {
        console.log("ESTABLISHED");
    });
    publishBtn.onclick = publishStream;
    stopBtn.onclick = stopPublish;

}

//Publish stream
function publishStream() {
    gainValue = document.getElementById("sendGain").value
    stream = session.createStream({
        name: "stream",
        display: document.getElementById("publish"),
    }).on(STREAM_STATUS.PUBLISHING, function(stream) {
        stream.setMicrophoneGain(gainValue);
    });
    stream.publish();
    console.log("Publish")
}

//Stopping stream
function stopPublish() {
    stream.stop();
    console.log("Stop")
}
Managing the audio stream parameters upon publishing
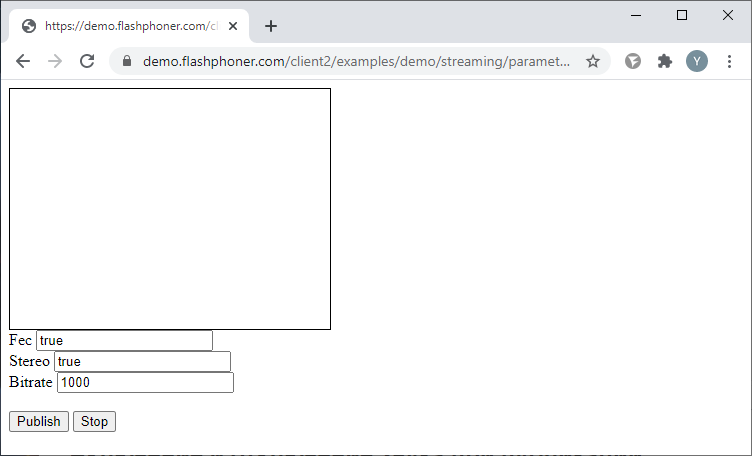
Let’s take a look at a baseline code for managing the audio-related stream elements upon publishing. Create two empty files titled parameters-audio-min.html and parameters-audio-min.js, with the following code:
Here is the complete code for the HTML page:
parameters-audio-min.html
<!DOCTYPE html>
<html lang="en">
<head>
    <script type="text/javascript" src="https://flashphoner.com/downloads/builds/flashphoner_client/wcs_api-2.0/current/flashphoner.js"></script>
    <script type="text/javascript" src="parameters-audio-min.js"></script>
</head>
<body onload="init_api()">
    <div id="publish" style="width:320px;height:240px;border: solid 1px"></div>
    <label>FEC</label>
	<input id="sendFec" type="text" value="true"/><br/>
	<label>Stereo</label>
	<input id="sendStereo" type="text" value="true"/><br/>
	<label>Bitrate</label>
	<input id="sendBitrate" type="text" value="1000"/><br/>
	<br/>
	<button id="publishBtn">Publish</button>
	<button id="stopBtn">Stop</button>
</body>
</html>
JavaScript
Create a stream using the session.createStream() function and transmit the stream name “stream” and the HTML element titled “publish” as parameters. Receive the constraints values for audio from the HTML page fields.
The following parameters are available for audio capture:
- FEC – uses the Opus codec with error correction (supports Opus only). Values: true, false;
- Stereo – switches between stereo/mono modes. Values: true, false;
- Bitrate – sets bitrate for audio (kbps)
constraints = {
        audio: {
            fec: document.getElementById("sendFec").value,
            stereo: document.getElementById("sendStereo").value,
            bitrate: document.getElementById("sendBitrate").value,
        },
		video: true,
    };
Publish the stream with these parameters:
function publishStream() {
    constraints = {
        audio: {
            fec: document.getElementById("sendFec").value,
            stereo: document.getElementById("sendStereo").value,
            bitrate: document.getElementById("sendBitrate").value,
        },
		video: true,
    };
    stream = session.createStream({
        name: "stream",
        display: document.getElementById("publish"),
        constraints: constraints,
    });
    stream.publish();
    console.log("Publish")
}
Here is the complete JavaScript code for this example:
parameters-audio-min.js
//Constants
var SESSION_STATUS = Flashphoner.constants.SESSION_STATUS;
var STREAM_STATUS = Flashphoner.constants.STREAM_STATUS;
var session;
var stream;

//Init Flashphoner API on page load & Connect to WCS server over webSockets
function init_api() {
    Flashphoner.init({});
    session = Flashphoner.createSession({
        urlServer: "wss://demo.flashphoner.com:8443" //specify the address of your WCS
    }).on(SESSION_STATUS.ESTABLISHED, function(session) {
        console.log("ESTABLISHED");
    });
    publishBtn.onclick = publishStream;
    stopBtn.onclick = stopPublish;
}

//Publish stream
function publishStream() {
    constraints = {
        audio: {
            fec: document.getElementById("sendFec").value,
            stereo: document.getElementById("sendStereo").value,
            bitrate: document.getElementById("sendBitrate").value,
        },
		video: true,
    };
    stream = session.createStream({
        name: "stream",
        display: document.getElementById("publish"),
        constraints: constraints,
    });
    stream.publish();
    console.log("Publish")
}

//Stopping stream
function stopPublish() {
    stream.stop();
    console.log("Stop")
}
Turning audio on and off upon publishing
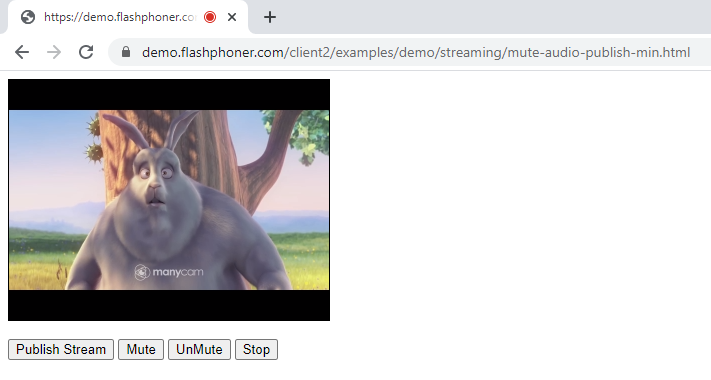
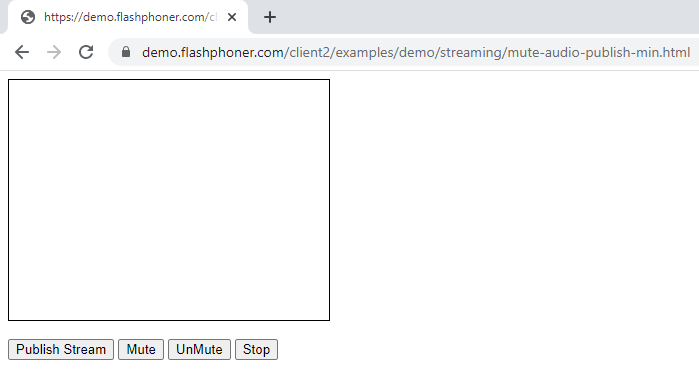
The Mute functions allows to disable the microphone without stopping the stream. The stream audio, in this case, becomes silence.
Let’s take a look at a baseline code for turning the audio on and off upon publishing. Create two empty files titled mute-audio-publish-min.html and mute-audio-publish-min.js, with the following code:
Here is the complete code for the HTML page:
mute-audio-publish-min.html
<!DOCTYPE html>
<html lang="en">
<head>
    <script type="text/javascript" src="https://flashphoner.com/downloads/builds/flashphoner_client/wcs_api-2.0/current/flashphoner.js"></script>
    <script type="text/javascript" src="mute-audio-publish-min.js"></script>
</head>
<body onload="init_api()">
    <div id="publish" style="width:320px;height:240px;border: solid 1px"></div>
   	<br/>
	<button id="publishBtn">Publish Stream</button>
	<button id="publishAudioMute">Mute</button>
	<button id="publishAudioUnMute">UnMute</button>
	<button id="stopBtn">Stop</button>
</body>
</html>
JavaScript
1. Function for turning off the microphone and disabling audio capture
function audioMute() {
	stream.muteAudio();
}
2. Function for turning on the microphone and re-enabling audio capture
function audioUnMute() {
	stream.unmuteAudio();
}
Here is the complete JavaScript code for this example:
mute-audio-publish-min.js
//Constants
var SESSION_STATUS = Flashphoner.constants.SESSION_STATUS;
var STREAM_STATUS = Flashphoner.constants.STREAM_STATUS;
var session;
var stream;

//Init Flashphoner API on page load & Connect to WCS server over webSockets
function init_api() {
    Flashphoner.init({});
    session = Flashphoner.createSession({
        urlServer: "wss://demo.flashphoner.com:8443" //specify the address of your WCS
    }).on(SESSION_STATUS.ESTABLISHED, function(session) {
        console.log("ESTABLISHED");
    });
	publishBtn.onclick = publishStream;
	publishAudioMute.onclick= audioMute;
	publishAudioUnMute.onclick= audioUnMute;
    stopBtn.onclick = stopPublish;
}

//Publish stream
function publishStream() {
    stream = session.createStream({
        name: "stream",
        display: document.getElementById("publish"),
    });
    stream.publish();
    console.log("Publish");
}

//Mute audio
function audioMute() {
	stream.muteAudio();
}

//UnMute audio
function audioUnMute() {
	stream.unmuteAudio();
}

//Stopping stream
function stopPublish() {
    stream.stop();
    console.log("Stop")
}
Publishing with set video resolution, FPS and bitrate
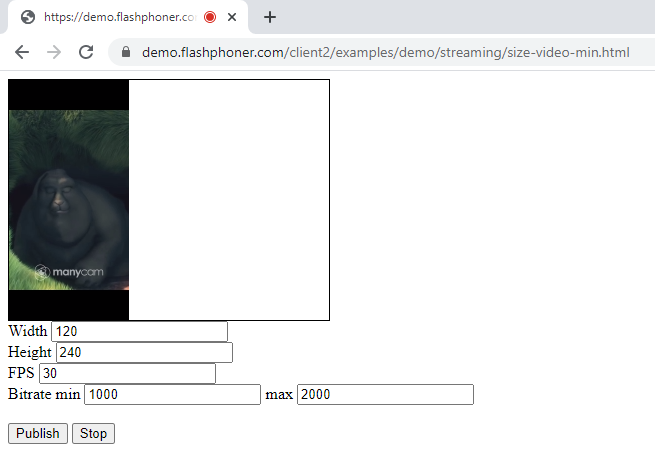
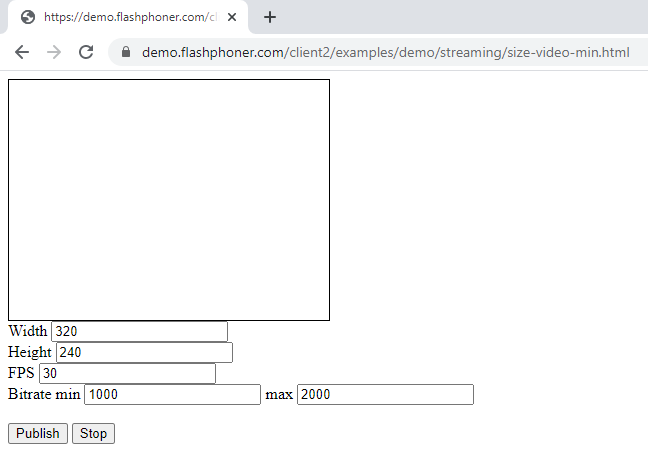
Let’s take a look at a baseline code for publishing with set video resolution, FPS and bitrate. Create two empty files titled size-video-min.html and size-video-min.js, with the following code:
Here is the complete code for the HTML page:
size-video-min.html
<!DOCTYPE html>
<html lang="en">
<head>
    <script type="text/javascript" src="https://flashphoner.com/downloads/builds/flashphoner_client/wcs_api-2.0/current/flashphoner.js"></script>
    <script type="text/javascript" src="size-video-min.js"></script>
</head>
<body onload="init_api()">
    <div id="publish" style="width:320px;height:240px;border: solid 1px"></div>
    <label>Width</label>
	<input id="sendWidth" type="text" value="320"/><br/>
	<label>Height</label>
	<input id="sendHeight" type="text" value="240"/><br/>
	<label>FPS</label>
	<input id="sendFPS" type="text" value="30"/><br/>
	<label>Bitrate min</label>
	<input id="sendBitrateMin" type="text" value="1000"/>
	<label>max</label>
	<input id="sendBitrateMax" type="text" value="2000"/>
	<br/>
	<br/><button id="publishBtn">Publish</button>
	<button id="stopBtn">Stop</button>
</body>
</html>
JavaScript
Create a stream using the session.createStream() function and transmit the stream name “stream” and HTML element titled “publish” as parameters. Receive the constraints values from the text fields of the HTML page.
For video streams the following parameters are available:
- width – frame width (px);
- height – frame height(px);
- minBitrate – minimum bitrate(kbps);
- maxBitrate – maximum bitrate(kbps);
- frameRate – frames per second.
constraints = {
        audio: true,
        video: {
            width: document.getElementById("sendWidth").value,
            height: document.getElementById("sendHeight").value,
            minBitrate: document.getElementById("sendBitrateMin").value,
            maxBitrate: document.getElementById("sendBitrateMax").value,
            frameRate: document.getElementById("sendFPS").value,
        }
    };
Publish the stream with these parameters:
function publishStream() {
    constraints = {
        audio: true,
        video: {
            width: document.getElementById("sendWidth").value,
            height: document.getElementById("sendHeight").value,
            minBitrate: document.getElementById("sendBitrateMin").value,
            maxBitrate: document.getElementById("sendBitrateMax").value,
            frameRate: document.getElementById("sendFPS").value,
        }
    };
    stream = session.createStream({
        name: "stream",
        display: document.getElementById("publish"),
        constraints: constraints,
    });
    stream.publish();
    console.log("Publish")
}
Here is the complete JavaScript code for tis example:
size-video-min.js
//Constants
var SESSION_STATUS = Flashphoner.constants.SESSION_STATUS;
var STREAM_STATUS = Flashphoner.constants.STREAM_STATUS;
var session;
var stream;

//Init Flashphoner API on page load & Connect to WCS server over webSockets
function init_api() {
    Flashphoner.init({});
    session = Flashphoner.createSession({
        urlServer: "wss://p10.flashphoner.com:8443" //specify the address of your WCS
    }).on(SESSION_STATUS.ESTABLISHED, function(session) {
        console.log("ESTABLISHED");
    });
    publishBtn.onclick = publishStream;
    stopBtn.onclick = stopPublish;
}

//Publish stream
function publishStream() {
    constraints = {
        audio: true,
        video: {
            width: document.getElementById("sendWidth").value,
            height: document.getElementById("sendHeight").value,
            minBitrate: document.getElementById("sendBitrateMin").value,
            maxBitrate: document.getElementById("sendBitrateMax").value,
            frameRate: document.getElementById("sendFPS").value,
        }
    };
    stream = session.createStream({
        name: "stream",
        display: document.getElementById("publish"),
        constraints: constraints,
    });
    stream.publish();
    console.log("Publish")
}

//Stopping stream
function stopPublish() {
    stream.stop();
    console.log("Stop")
}
Turning the camera on and off upon publishing
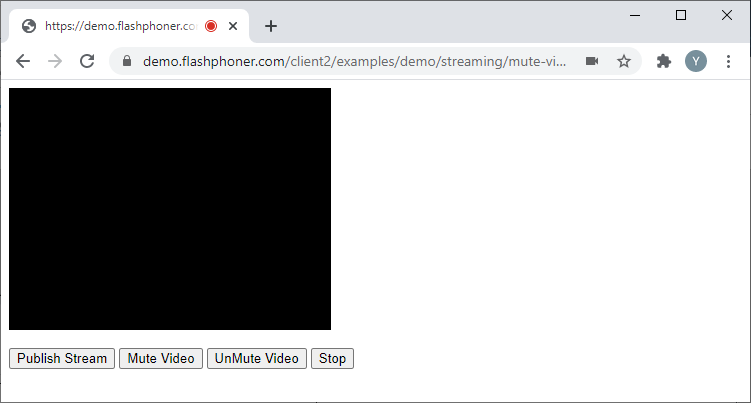
The Mute function allows to turn off the camera without stopping the stream. The stream video, in this case, becomes a black screen.
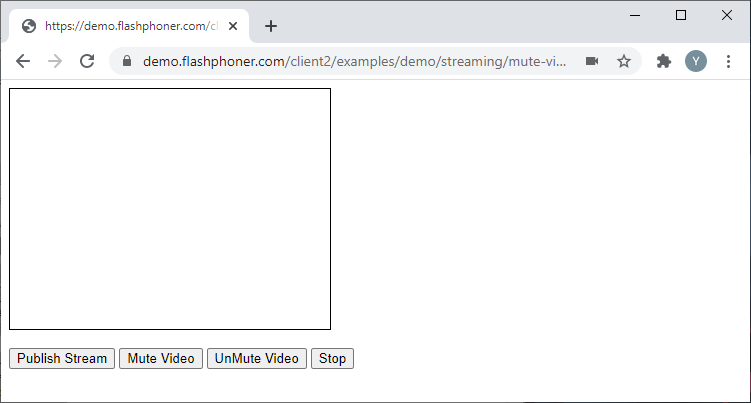
Let’s take a look at a baseline code for turning the video on or off upon publishing. Create two empty files titled mute-video-publish-min.html and mute-video-publish-min.js, with the following code:
Here is the complete code for the HTML page:
mute-video-publish-min.html
<!DOCTYPE html>
<html lang="en">
<head>
    <script type="text/javascript" src="https://flashphoner.com/downloads/builds/flashphoner_client/wcs_api-2.0/current/flashphoner.js"></script>
    <script type="text/javascript" src="mute-video-publish-min.js"></script>
</head>
<body onload="init_api()">
    <div id="publish" style="width:320px;height:240px;border: solid 1px"></div>
   	<br/>
	<button id="publishBtn">Publish Stream</button>
	<button id="publishVideoMute">Mute Video</button>
	<button id="publishVideoUnMute">UnMute Video</button>
	<button id="stopBtn">Stop</button>
</body>
</html>
JavaScript
1. Function for turning off the camera and stopping video capture
function videoMute() {
	stream.muteVideo();
}
2. Function for turning on the camera and re-starting the video capture
function videoUnMute() {
	stream.unmuteVideo();
}
Here is the complete JavaScript code for this example:
mute-video-publish-min.js
//Constants
var SESSION_STATUS = Flashphoner.constants.SESSION_STATUS;
var STREAM_STATUS = Flashphoner.constants.STREAM_STATUS;
var session;
var stream;

//Init Flashphoner API on page load & Connect to WCS server over webSockets
function init_api() {
    Flashphoner.init({});
    session = Flashphoner.createSession({
        urlServer: "wss://demo.flashphoner.com:8443" //specify the address of your WCS
    }).on(SESSION_STATUS.ESTABLISHED, function(session) {
        console.log("ESTABLISHED");
    });
	publishBtn.onclick = publishStream;
	publishVideoMute.onclick= videoMute;
	publishVideoUnMute.onclick= videoUnMute;
    stopBtn.onclick = stopPublish;
}

//Publish stream
function publishStream() {
    stream = session.createStream({
        name: "stream",
        display: document.getElementById("publish"),
    });
    stream.publish();
    console.log("Publish");
}

//Mute Video
function videoMute() {
	stream.muteVideo();
}

//UnMute Video
function videoUnMute() {
	stream.unmuteVideo();
}

//Stopping stream
function stopPublish() {
    stream.stop();
    console.log("Stop")
}
Managing the COD and CVO parameters
COD – CPU Overuse Detection – monitors the processor load and upon it reaching a certain threshold initializes a resolution reset by Google Chrome.
CVO – Coordination of video orientation extension – a picture orientation indicator. When publishing WebRTC stream via a mobile device, the picture orientation may be adjusted upon device turning.
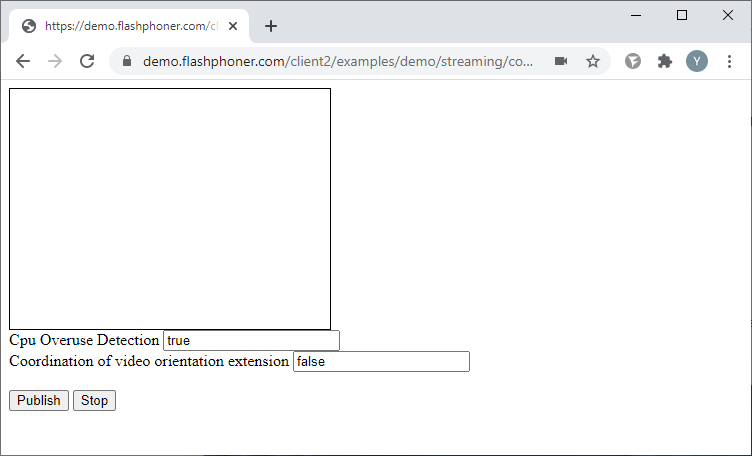
Let’s take a look at a baseline code for managing COD and CVO parameters. Create two empty files titled cod-cvo-publish-min.html and cod-cvo-publish-min.js, with the following code:
Here is the complete code for the HTML page:
cod-cvo-publish-min.html
<!DOCTYPE html>
<html lang="en">
<head>
    <script type="text/javascript" src="https://flashphoner.com/downloads/builds/flashphoner_client/wcs_api-2.0/current/flashphoner.js"></script>
    <script type="text/javascript" src="cod-cvo-publish-min.js"></script>
</head>
<body onload="init_api()">
    <div id="publish" style="width:320px;height:240px;border: solid 1px"></div>
    <label>Cpu Overuse Detection</label>
	<input id="sendCod" type="text" value="true"/><br/>
	<label>Coordination of video orientation extension</label>
	<input id="sendCvo" type="text" value="false"/><br/>
	<br/><button id="publishBtn">Publish</button>
	<button id="stopBtn">Stop</button>
</body>
</html>
JavaScript
Create a stream using the session.createStream() function and transmit the stream name “stream” and the HTML element “publish” as parameters. Receive the COD and CVO parameters from the text fields of the HTML page
- COD – values true, false;
- CVO – values true, false.
googCpuOveruseDetection: document.getElementById("sendCod").value,
...
cvoExtension: document.getElementById("sendCvo").value,
Publish the stream with these parameters
function publishStream() {
    mediaConnectionConstraints = {
        "mandatory": {
            googCpuOveruseDetection: document.getElementById("sendCod").value,
        }
    }
    stream = session.createStream({
        name: "stream",
        display: document.getElementById("publish"),
        mediaConnectionConstraints: mediaConnectionConstraints,
        cvoExtension: document.getElementById("sendCvo").value,
    });
    stream.publish();
    console.log("Publish")
}
Here is the complete JS code for this example:
cod-cvo-publish-min.js
//Constants
var SESSION_STATUS = Flashphoner.constants.SESSION_STATUS;
var STREAM_STATUS = Flashphoner.constants.STREAM_STATUS;
var session;
var stream;

//Init Flashphoner API on page load & Connect to WCS server over webSockets
function init_api() {
    Flashphoner.init({});
    session = Flashphoner.createSession({
        urlServer: "wss://demo.flashphoner.com:8443" //specify the address of your WCS
    }).on(SESSION_STATUS.ESTABLISHED, function(session) {
        console.log("ESTABLISHED");
    });
    publishBtn.onclick = publishStream;
    stopBtn.onclick = stopPublish;
}

//Publish stream
function publishStream() {
    mediaConnectionConstraints = {
        "mandatory": {
            googCpuOveruseDetection: document.getElementById("sendCod").value,
        }
    }
    stream = session.createStream({
        name: "stream",
        display: document.getElementById("publish"),
        mediaConnectionConstraints: mediaConnectionConstraints,
        cvoExtension: document.getElementById("sendCvo").value,
    });
    stream.publish();
    console.log("Publish")
}

//Stopping stream
function stopPublish() {
    stream.stop();
    console.log("Stop")
}
Selecting the transport protocol for stream publishing
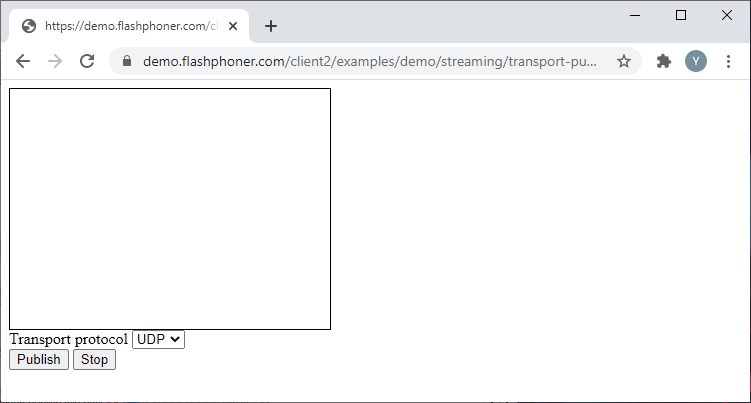
Let’s take a look at a baseline code for selecting the transport protocol for stream publishing. Create two empty files titled transport-publish-min.html and transport-publish-min.js, with the following code:
Add a “select” element to the HTML page, which will allow to select the transport protocol – UDP or TCP.
Here is the complete code for the HTML page:
transport-publish-min.html
<!DOCTYPE html>
<html lang="en">
<head>
    <script type="text/javascript" src="https://flashphoner.com/downloads/builds/flashphoner_client/wcs_api-2.0/current/flashphoner.js"></script>
    <script type="text/javascript" src="transport-publish-min.js"></script>
</head>
<body onload="init_api()">
    <div id="publish" style="width:320px;height:240px;border: solid 1px"></div>
    <label>Transport protocol</label>
	<select id="transportInput">
        <option value="UDP">UDP</option>
		<option value="TCP">TCP</option>
	</select>
	<br/><button id="publishBtn">Publish</button>
	<button id="stopBtn">Stop</button>
</body>
</html>
JavaScript
1. Create a stream using the session.createStream() function and transmit the stream name “stream” and the HTML element “publish” as parameters. Receive the protocol value from the “select” element of the HTML page:
transport:document.getElementById("transportInput").value,
Publish the stream with these parameters:
function publishStream() {
    stream = session.createStream({
        name: "stream",
        display: document.getElementById("publish"),
		transport:document.getElementById("transportInput").value,
    });
    stream.publish();
    console.log("Publish")
}
Here is the complete JS code for this example:
transport-publish-min.js
//Constants
var SESSION_STATUS = Flashphoner.constants.SESSION_STATUS;
var STREAM_STATUS = Flashphoner.constants.STREAM_STATUS;
var session;
var stream;

//Init Flashphoner API on page load & Connect to WCS server over webSockets
function init_api() {
    Flashphoner.init({});
    session = Flashphoner.createSession({
        urlServer: "wss://demo.flashphoner.com:8443" //specify the address of your WCS
    }).on(SESSION_STATUS.ESTABLISHED, function(session) {
        console.log("ESTABLISHED");
    });
	publishBtn.onclick = publishStream;
    stopBtn.onclick = stopPublish;
}

//Publish stream
function publishStream() {
    stream = session.createStream({
        name: "stream",
        display: document.getElementById("publish"),
		transport:document.getElementById("transportInput").value,
    });
    stream.publish();
    console.log("Publish")
}

//Stopping stream
function stopPublish() {
    stream.stop();
    console.log("Stop")
}
Excluding codecs upon stream publishing
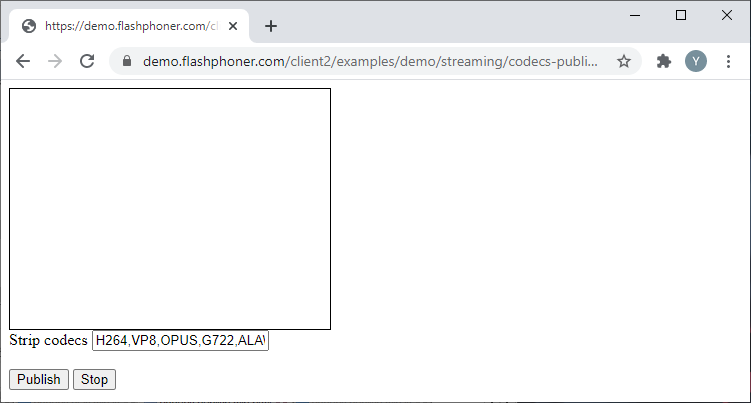
Let’s take a look at a baseline code for excluding codecs upon stream publishing. Create two empty files titled codecs-publish-min.html and codecs-publish-min.js, with the following code:
Here is the complete code for the HTML page:
codecs-publish-min.html
<!DOCTYPE html>
<html lang="en">
<head>
    <script type="text/javascript" src="https://flashphoner.com/downloads/builds/flashphoner_client/wcs_api-2.0/current/flashphoner.js"></script>
    <script type="text/javascript" src="codecs-publish-min.js"></script>
</head>
<body onload="init_api()">
    <div id="publish" style="width:320px;height:240px;border: solid 1px"></div>
    <label>Strip codecs</label>
	<input id="sendCodecs" type="text" value="H264,VP8,OPUS,G722,ALAW,ULAW"/><br/>
	<br/><button id="publishBtn">Publish</button>
	<button id="stopBtn">Stop</button>
</body>
</html>
JavaScript
Create a stream using the session.createStream() function and transmit the stream name “stream” and the HTML element “publish” as parameters. Receive the list of codecs from the field of the HTML page:
stripCodecs:document.getElementById("sendCodecs").value,
Publish the stream with these parameters:
function publishStream() {
    stream = session.createStream({
        name: "stream",
        display: document.getElementById("publish"),
		stripCodecs:document.getElementById("sendCodecs").value,
    });
    stream.publish();
    console.log("Publish")
}
Here is the complete JS code for this example:
codecs-publish-min.js
//Constants
var SESSION_STATUS = Flashphoner.constants.SESSION_STATUS;
var STREAM_STATUS = Flashphoner.constants.STREAM_STATUS;
var session;
var stream;

//Init Flashphoner API on page load & Connect to WCS server over webSockets
function init_api() {
    Flashphoner.init({});
    session = Flashphoner.createSession({
        urlServer: "wss://demo.flashphoner.com:8443" //specify the address of your WCS
    }).on(SESSION_STATUS.ESTABLISHED, function(session) {
        console.log("ESTABLISHED");
    });
	publishBtn.onclick = publishStream;
    stopBtn.onclick = stopPublish;

}

//Publish stream
function publishStream() {
    stream = session.createStream({
        name: "stream",
        display: document.getElementById("publish"),
		stripCodecs:document.getElementById("sendCodecs").value,
    });
    stream.publish();
    console.log("Publish")
}

//Stopping stream
function stopPublish() {
    stream.stop();
    console.log("Stop")
}
Stopping the publishing and “releasing” cameras and microphones
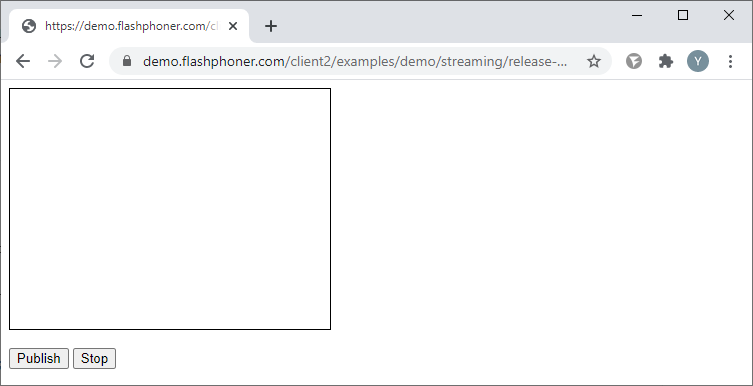
Let’s take a look at a baseline code for stopping the publishing and “releasing” cameras and microphones. Create two empty files titled release-media-device-min.html and release-media-device-min.js, with the following code:
Here is the complete code for the HTML page:
release-media-device-min.html
<!DOCTYPE html>
<html lang="en">
<head>
    <script type="text/javascript" src="https://flashphoner.com/downloads/builds/flashphoner_client/wcs_api-2.0/current/flashphoner.js"></script>
    <script type="text/javascript" src="release-media-device-min.js"></script>
</head>
<body onload="init_api()">
    <div id="publish" style="width:320px;height:240px;border: solid 1px"></div>
    <br/>
    <button id="publishBtn">Publish</button>
    <button id="stopBtn">Stop</button>
</body>
</html>
JavaScript
Clicking Stop triggers two consecutive actions: one stops the publishing of the stream and the other triggers an API function “Flashphoner.releaseLocalMedia()”, which releases the captured camera and microphone.
function stopPlay() {
    stream.stop();
	Flashphoner.releaseLocalMedia();
    console.log("Stop")
}
Here is the complete JS code for this example:
release-media-device-min.js
//Constants
var SESSION_STATUS = Flashphoner.constants.SESSION_STATUS;
var STREAM_STATUS = Flashphoner.constants.STREAM_STATUS;
var session;
var stream;

//Init Flashphoner API on page load & Connect to WCS server over webSockets
function init_api() {
    Flashphoner.init({});
    session = Flashphoner.createSession({
        urlServer: "wss://demo.flashphoner.com:8443" //specify the address of your WCS
    }).on(SESSION_STATUS.ESTABLISHED, function(session) {
        console.log("ESTABLISHED");
    });
	publishBtn.onclick= publishStream;
    stopBtn.onclick = stopPlay;
}

//Publish stream
function publishStream() {
    stream = session.createStream({
        name: "stream",
        display: document.getElementById("publish"),
    });
    stream.publish();
    console.log("Publish")
}

//Stopping stream & Release local media device
function stopPlay() {
    stream.stop();
	Flashphoner.releaseLocalMedia();
    console.log("Stop")
}
Managing the playback stream parameters
In order to test these examples, publish a stream titled “stream” on your WCS server using any method you prefer. For examples, you may use our integrated Two-way streaming demo-example.
From this point, we’ll use a simple web page for our examples, where we’ll put a div element and playback controls. The div element will be displaying the playback for the requested stream.
The JS code descriptions will not feature explanations on constants and functions related to connecting to WCS via WebSocket and stream stopping. You can find more information on that here.
Here is the complete HTML code for a baseline player:
play-min.html
<!DOCTYPE html>
<html lang="en">
<head>
    <script type="text/javascript" src="https://flashphoner.com/downloads/builds/flashphoner_client/wcs_api-2.0/current/flashphoner.js"></script>
    <script type="text/javascript" src="play-min.js"></script>
</head>
<body onload="init_api()">
    <div id="myPlayer" style="width:320px;height:240px;border: solid 1px"></div>
   	<br/>
   	<button id="playBtn">Play</button>
	<button id="stopBtn">Stop</button>
</body>
</html>
JS code for initializing API and connecting to WCS via WebSocket. As described, assign the appropriate functions to the controls.
function init_api() {
    Flashphoner.init({});
    session = Flashphoner.createSession({
        urlServer: "wss://demo.flashphoner.com:8443" //specify the address of your WCS
    }).on(SESSION_STATUS.ESTABLISHED, function(session) {
        console.log("ESTABLISHED");
    });
	playBtn.onclick = playStream;
    stopBtn.onclick = stopPlay;
}
JS code for stream playback
function playStream() {
    stream = session.createStream({
        name: "stream",
        display: document.getElementById("myPlayer"),
    });
    stream.play();
    console.log("Play")
}
JS code for stopping the playback
function stopPublish() {
    stream.stop();
    console.log("Stop")
}
Here is the complete JS code for a baseline player
play-min.js
//Constants
var SESSION_STATUS = Flashphoner.constants.SESSION_STATUS;
var STREAM_STATUS = Flashphoner.constants.STREAM_STATUS;
var session;
var stream;

//Init Flashphoner API on page load & Connect to WCS server over webSockets
function init_api() {
    Flashphoner.init({});
    session = Flashphoner.createSession({
        urlServer: "wss://demo.flashphoner.com:8443" //specify the address of your WCS
    }).on(SESSION_STATUS.ESTABLISHED, function(session) {
        console.log("ESTABLISHED");
    });
	playBtn.onclick= playStream;
    stopBtn.onclick = stopPlay;
}

//Play stream
function playStream() {
	stream = session.createStream({
        name: "stream",
        display: document.getElementById("myPlayer"),
    });
    stream.play();;
    console.log("Play");
}

//Stopping stream
function stopPlay() {
    stream.stop();
    console.log("Stop")
}
Requesting the playback devices list
Requesting the playback devices list only works in Chrome and MS Edge browsers.
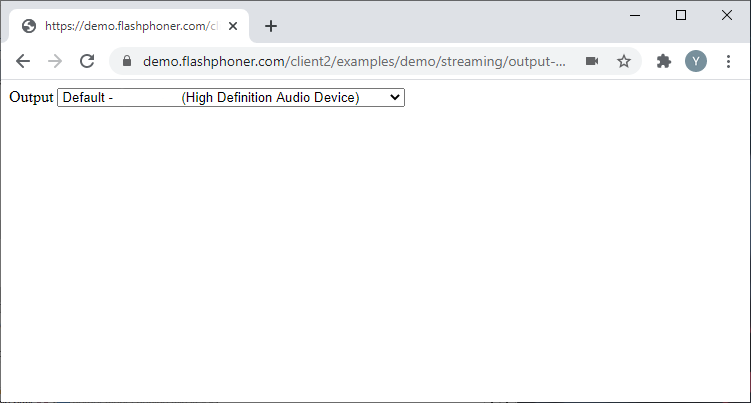
Let’s take a look at a baseline code for requesting the playback devices list. Create two empty files output-media-device-min.html and output-media-device-min.js, with the following code.
For this example, place a field containing the list of playback devices on the HTML page.
Here is the complete code for the HTML page:
output-media-device-min.html
<!DOCTYPE html>
<html lang="en">
<head>
    <script type="text/javascript" src="https://flashphoner.com/downloads/builds/flashphoner_client/wcs_api-2.0/current/flashphoner.js"></script>
    <script type="text/javascript" src="output-media-device-min.js"></script>
</head>
<body onload="init_api()">
    <label>Output</label>
    <select id="audioOutput"></select>
</body>
</html>
JavaScript
Receive the list of playback devices using the Flashphoner.getMediaDevices() function, which will activate upon loading the HTML page.
Here is the complete JS code for this example:
output-media-device-min.js
//Constants
var MEDIA_DEVICE_KIND = Flashphoner.constants.MEDIA_DEVICE_KIND;

//Init Flashphoner API on page load & get a list of available output devices
function init_api() {
    Flashphoner.init({});
	//Get a list of available output devices
    Flashphoner.getMediaDevices(null, true, MEDIA_DEVICE_KIND.OUTPUT).then(function (list) {
        list.audio.forEach(function (device) {
            var audio = document.getElementById("audioOutput");
            var deviceInList = false;
            for (var i = 0; i < audio.options.length; i++) {
                if (audio.options[i].value === device.id) {
                    deviceInList = true;
                    break;
                }
            }
            if (!deviceInList) {
                var option = document.createElement("option");
                option.text = device.label || device.id;
                option.value = device.id;
                audio.appendChild(option);
            }
        });
    });
};
Audio only and Video only playback
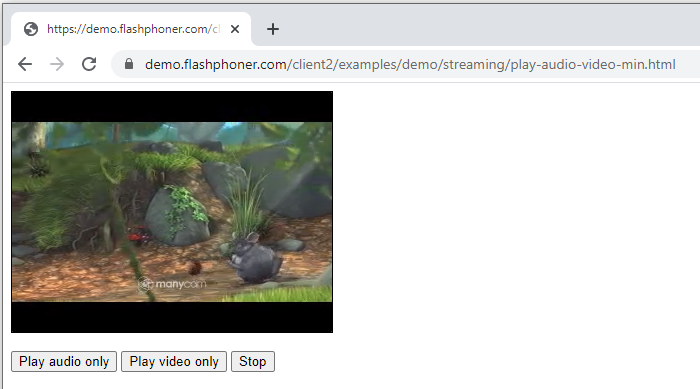
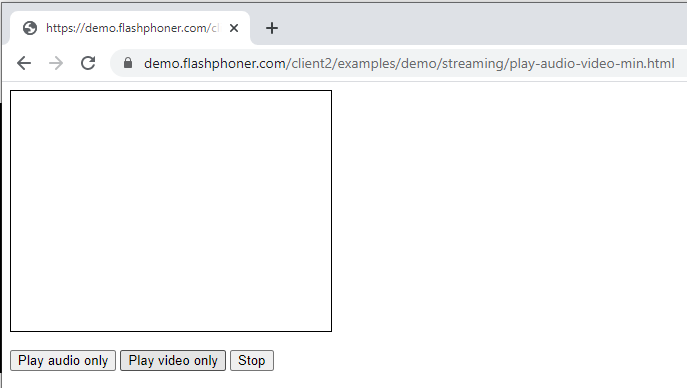
Let’s take a look at a baseline code for Audio only and Video only playback. Create two empty files play-audio-video-min.html and play-audio-video-min.js, with the following code.
Here is the complete code for the HTML page:
play-audio-video-min.html
<!DOCTYPE html>
<html lang="en">
<head>
    <script type="text/javascript" src="https://flashphoner.com/downloads/builds/flashphoner_client/wcs_api-2.0/current/flashphoner.js"></script>
    <script type="text/javascript" src="play-audio-video-min.js"></script>
</head>
<body onload="init_api()">
    <div id="myPlayer" style="width:320px;height:240px;border: solid 1px"></div>
   	<br/>
	<button id="playAudio">Play audio only</button>
	<button id="playVideo">Play video only</button>
	<button id="stopBtn">Stop</button>
</body>
</html>
JavaScript
1. Create a stream using the session.createStream() function and transmit the stream name “stream” and the HTML element “myPlayer” as parameters. To make sure only the audio is played, set the following constraints
constraints = {
	audio: true,
	video: false
};
Playback the stream with these parameters.
function playStreamAudio() {
    constraints = {
		audio: true,
		video: false
	};
	stream = session.createStream({
        name: "stream",
        display: document.getElementById("myPlayer"),
		constraints: constraints,
    });
    stream.play();;
    console.log("Play audio");
}
2. Create a stream using the session.createStream() function and transmit the stream name “stream” and the HTML element “myPlayer” as parameters. To make sure only the video is played, set the following constraints
constraints = {
	audio: false,
	video: true
};
Playback the stream with these parameters.
function playStreamVideo() {
    constraints = {
		audio: false,
		video: true
	};
	stream = session.createStream({
        name: "stream",
        display: document.getElementById("myPlayer"),
		constraints: constraints,
    });
    stream.play();
    console.log("Play video");
}
Here is the complete JS code for this example:
play-audio-video-min.js
//Constants
var SESSION_STATUS = Flashphoner.constants.SESSION_STATUS;
var STREAM_STATUS = Flashphoner.constants.STREAM_STATUS;
var session;
var stream;

//Init Flashphoner API on page load & Connect to WCS server over webSockets
function init_api() {
    Flashphoner.init({});
    session = Flashphoner.createSession({
        urlServer: "wss://demo.flashphoner.com:8443" //specify the address of your WCS
    }).on(SESSION_STATUS.ESTABLISHED, function(session) {
        console.log("ESTABLISHED");
    });
	playAudio.onclick = playStreamAudio;
	playVideo.onclick= playStreamVideo;
    stopBtn.onclick = stopPlay;
}

//Play stream audio
function playStreamAudio() {
    constraints = {
		audio: true,
		video: false
	};
	stream = session.createStream({
        name: "stream",
        display: document.getElementById("myPlayer"),
		constraints: constraints,
    });
    stream.play();;
    console.log("Play audio");
}

//Play stream video
function playStreamVideo() {
    constraints = {
		audio: false,
		video: true
	};
	stream = session.createStream({
        name: "stream",
        display: document.getElementById("myPlayer"),
		constraints: constraints,
    });
    stream.play();
    console.log("Play video");
}

//Stopping stream
function stopPlay() {
    stream.stop();
    console.log("Stop")
}
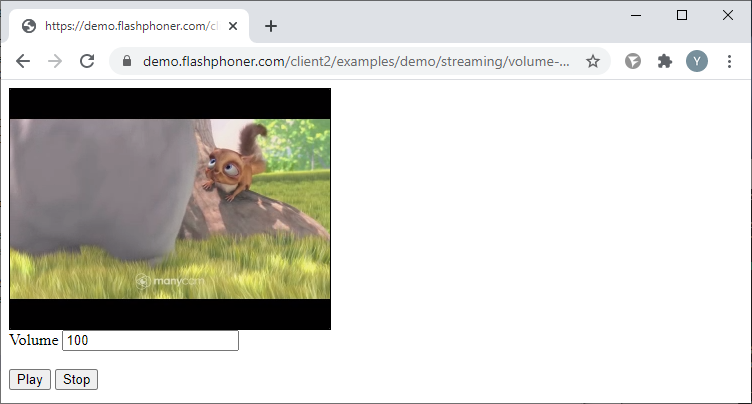
Managing the volume levels
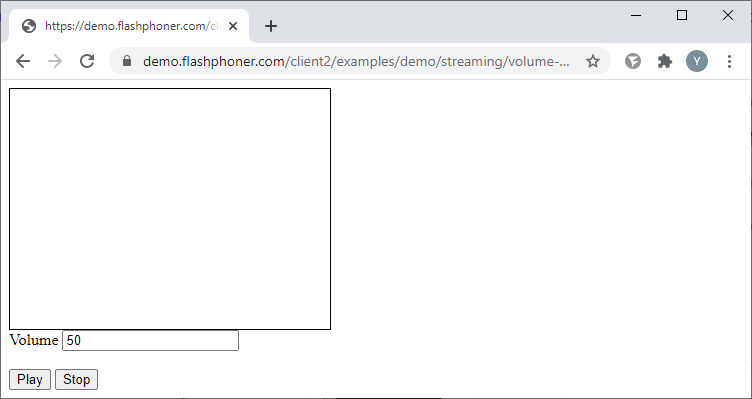
Let’s take a look at a baseline code for managing the volume levels. Create two empty files titled volume-play-min.html and volume-play-min.js, with the following code.
Here is the complete code for the HTML page:
volume-play-min.html
<!DOCTYPE html>
<html lang="en">
<head>
    <script type="text/javascript" src="https://flashphoner.com/downloads/builds/flashphoner_client/wcs_api-2.0/current/flashphoner.js"></script>
    <script type="text/javascript" src="volume-play-min.js"></script>
</head>
<body onload="init_api()">
    <div id="myPlayer" style="width:320px;height:240px;border: solid 1px"></div>
    <label>Volume</label>
	<input id="playVolume" type="text" value="50"/><br/>
	<br/><button id="playBtn">Play</button>
	<button id="stopBtn">Stop</button>
</body>
</html>
JavaScript
Create a stream using the session.createStream() function and transmit the stream name “stream” and the HTML element “myPlayer” as parameters. Receive the volume value from the HTML page. For the purpose of this example, the volume value is shown in the text field and in order to change it the stream will need to be restarted.
volumeValue = document.getElementById("playVolume").value
Playback the stream with these parameters. Once it’s begun, set the volume level:
function playStream() {
    volumeValue = document.getElementById("playVolume").value
	stream = session.createStream({
        name: "stream",
        display: document.getElementById("myPlayer"),
    }).on(STREAM_STATUS.PLAYING, function(stream) {
        stream.setVolume(volumeValue);
    });
    stream.play();;
    console.log("Play");
}
Here is the complete JS code for this example:
volume-play-min.js
//Constants
var SESSION_STATUS = Flashphoner.constants.SESSION_STATUS;
var STREAM_STATUS = Flashphoner.constants.STREAM_STATUS;
var session;
var stream;

//Init Flashphoner API on page load & Connect to WCS server over webSockets
function init_api() {
    Flashphoner.init({});
    session = Flashphoner.createSession({
        urlServer: "wss://demo.flashphoner.com:8443" //specify the address of your WCS
    }).on(SESSION_STATUS.ESTABLISHED, function(session) {
        console.log("ESTABLISHED");
    });
	playBtn.onclick= playStream;
    stopBtn.onclick = stopPlay;
}

//Play stream
function playStream() {
    volumeValue = document.getElementById("playVolume").value
	stream = session.createStream({
        name: "stream",
        display: document.getElementById("myPlayer"),
    }).on(STREAM_STATUS.PLAYING, function(stream) {
        stream.setVolume(volumeValue);
    });
    stream.play();;
    console.log("Play");
}


//Stopping stream
function stopPlay() {
    stream.stop();
    console.log("Stop")
}
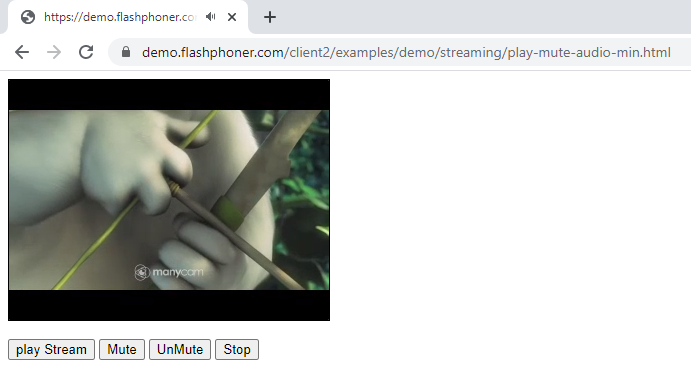
Turning the audio on and off upon playback
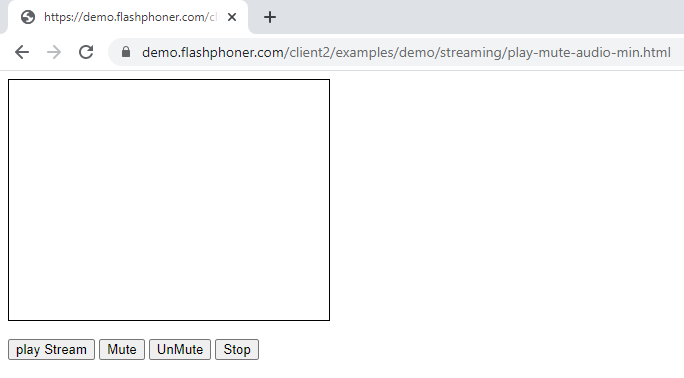
Let’s take a look at a baseline code for turning the audio on and off upon playback. Create two empty files titled play-mute-audio-min.html and play-mute-audio-min.js, with the following code.
Here is the complete code for the HTML page:
play-mute-audio-min.html
<!DOCTYPE html>
<html lang="en">
<head>
    <script type="text/javascript" src="https://flashphoner.com/downloads/builds/flashphoner_client/wcs_api-2.0/current/flashphoner.js"></script>
    <script type="text/javascript" src="play-mute-audio-min.js"></script>
</head>
<body onload="init_api()">
    <div id="myPlayer" style="width:320px;height:240px;border: solid 1px"></div>
   	<br/>
	<button id="playBtn">play Stream</button>
	<button id="playAudioMute">Mute</button>
	<button id="playAudioUnMute">UnMute</button>
	<button id="stopBtn">Stop</button>
</body>
</html>
JavaScript
1. Audio mute function
function audioMute() {
	stream.muteRemoteAudio();
}
2. Audio unmute function
function audioUnMute() {
	stream.unmuteRemoteAudio();
}
Here is the complete JS code for this example:
play-mute-audio-min.js
//Constants
var SESSION_STATUS = Flashphoner.constants.SESSION_STATUS;
var STREAM_STATUS = Flashphoner.constants.STREAM_STATUS;
var session;
var stream;

//Init Flashphoner API on page load & Connect to WCS server over webSockets
function init_api() {
    Flashphoner.init({});
    session = Flashphoner.createSession({
        urlServer: "wss://demo.flashphoner.com:8443" //specify the address of your WCS
    }).on(SESSION_STATUS.ESTABLISHED, function(session) {
        console.log("ESTABLISHED");
    });
	playBtn.onclick = playStream;
	playAudioMute.onclick= audioMute;
	playAudioUnMute.onclick= audioUnMute;
    stopBtn.onclick = stopPlay;
}

//Play stream
function playStream() {
    constraints = {
		audio: true,
		video: true
	};
	stream = session.createStream({
        name: "stream",
        display: document.getElementById("myPlayer"),
		constraints: constraints,
    });
    stream.play();
    console.log("play");
}

//Mute audio
function audioMute() {
	stream.muteRemoteAudio();
}

//UnMute audio
function audioUnMute() {
	stream.unmuteRemoteAudio();
}

//Stopping stream
function stopPlay() {
    stream.stop();
    console.log("Stop")
}
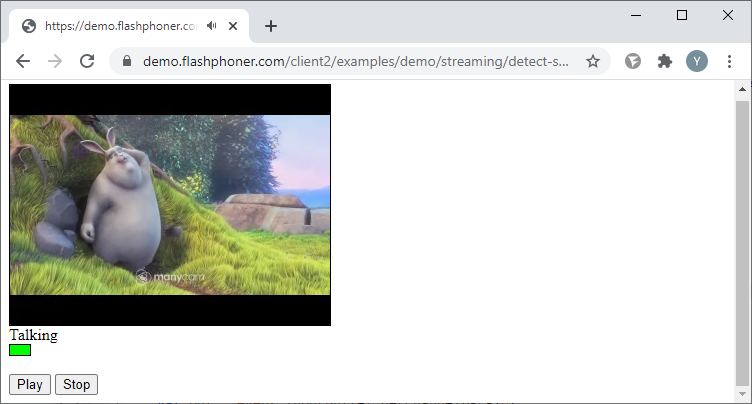
Speech indicator
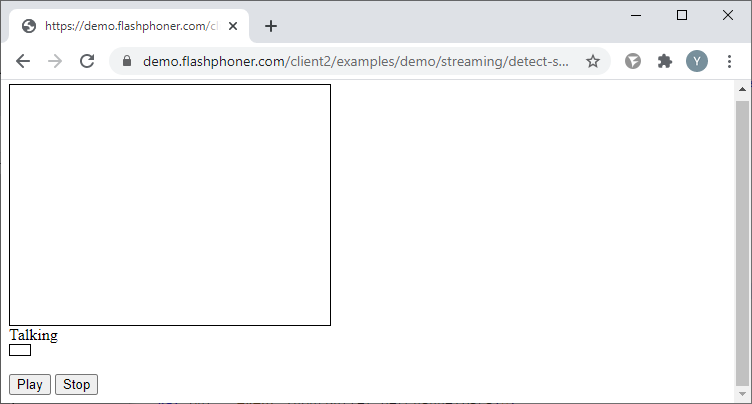
Let’s take a look at the baseline code for embedding a speech indicator. Create two empty files detect-speech-play-min.html and detect-speech-play-min.js, with the following code.
Here is the complete code for the HTML page:
detect-speech-play-min.html
<!DOCTYPE html>
<html lang="en">
<head>
    <script type="text/javascript" src="https://flashphoner.com/downloads/builds/flashphoner_client/wcs_api-2.0/current/flashphoner.js"></script>
    <script type="text/javascript" src="detect-speech-play-min.js"></script>
</head>
<body onload="init_api()">
    <div id="myPlayer" style="width:320px;height:240px;border: solid 1px"></div>
    <label>Talking</label>
	<div id="talking" style="width:20px;height:10px;border: solid 1px; background-color: #ffffff"></div>
	<br/><button id="playBtn">Play</button>
	<button id="stopBtn">Stop</button>
</body>
</html>
JavaScript
Receive the stream from the player and determine the audio elements of the stream. Check for audio every 500 ms and change the div element color to “Talking”:
function detectSpeech(stream, level, latency) {
	var audioContext = new (window.AudioContext || window.webkitAudioContext)();
	var mediaStream = document.getElementById(stream.id()).srcObject;
    var source = audioContext.createMediaStreamSource(mediaStream);
    var processor = audioContext.createScriptProcessor(512);
    processor.onaudioprocess = handleAudio;
    processor.connect(audioContext.destination);
    processor.clipping = false;
    processor.lastClip = 0;
    // threshold
    processor.threshold = level || 0.10;
    processor.latency = latency || 750;

    processor.isSpeech =
        function () {
            if (!this.clipping) return false;
            if ((this.lastClip + this.latency) < window.performance.now()) this.clipping = false;
            return this.clipping;
        };

    source.connect(processor);

    // Check speech every 500 ms
    intervalID = setInterval(function () {
        if (processor.isSpeech()) {
           console.log("talking");
            document.getElementById("talking").style.background = "#00ff00";
        } else {
            document.getElementById("talking").style.background = "#ff0000";
            console.log("NO_talking");
        }
    }, 500);
}
Here is a function for checking for the audio element in the stream
function handleAudio(event) {
    var buf = event.inputBuffer.getChannelData(0);
    var bufLength = buf.length;
    var x;
    for (var i = 0; i < bufLength; i++) {
        x = buf[i];
        if (Math.abs(x) >= this.threshold) {
            this.clipping = true;
            this.lastClip = window.performance.now();
        }
    }
}
Here is the complete JS code for this example:
detect-speech-play-min.js
//Constants
var SESSION_STATUS = Flashphoner.constants.SESSION_STATUS;
var STREAM_STATUS = Flashphoner.constants.STREAM_STATUS;
var session;
var stream;


//Init Flashphoner API on page load & Connect to WCS server over webSockets
function init_api() {
    Flashphoner.init({});
    session = Flashphoner.createSession({
        urlServer: "wss://demo.flashphoner.com:8443" //specify the address of your WCS
    }).on(SESSION_STATUS.ESTABLISHED, function(session) {
        console.log("ESTABLISHED");
    });
	playBtn.onclick= playStream;
    stopBtn.onclick = stopPlay;
}

//Play stream
function playStream() {

	stream = session.createStream({
        name: "stream",
        display: document.getElementById("myPlayer"),
    }).on(STREAM_STATUS.PLAYING, function(stream) {
       detectSpeech(stream);
    });
    stream.play();;
    console.log("Play");
}

function detectSpeech(stream, level, latency) {
	var audioContext = new (window.AudioContext || window.webkitAudioContext)();
	var mediaStream = document.getElementById(stream.id()).srcObject;
    var source = audioContext.createMediaStreamSource(mediaStream);
    var processor = audioContext.createScriptProcessor(512);
    processor.onaudioprocess = handleAudio;
    processor.connect(audioContext.destination);
    processor.clipping = false;
    processor.lastClip = 0;
    // threshold
    processor.threshold = level || 0.10;
    processor.latency = latency || 750;

    processor.isSpeech =
        function () {
            if (!this.clipping) return false;
            if ((this.lastClip + this.latency) < window.performance.now()) this.clipping = false;
            return this.clipping;
        };

    source.connect(processor);

    // Check speech every 500 ms
    intervalID = setInterval(function () {
        if (processor.isSpeech()) {
           console.log("talking");
            document.getElementById("talking").style.background = "#00ff00";
        } else {
            document.getElementById("talking").style.background = "#ff0000";
            console.log("NO_talking");
        }
    }, 500);
}

function handleAudio(event) {
    var buf = event.inputBuffer.getChannelData(0);
    var bufLength = buf.length;
    var x;
    for (var i = 0; i < bufLength; i++) {
        x = buf[i];
        if (Math.abs(x) >= this.threshold) {
            this.clipping = true;
            this.lastClip = window.performance.now();
        }
    }
}

//Stopping stream
function stopPlay() {
    stream.stop();
    console.log("Stop")
}
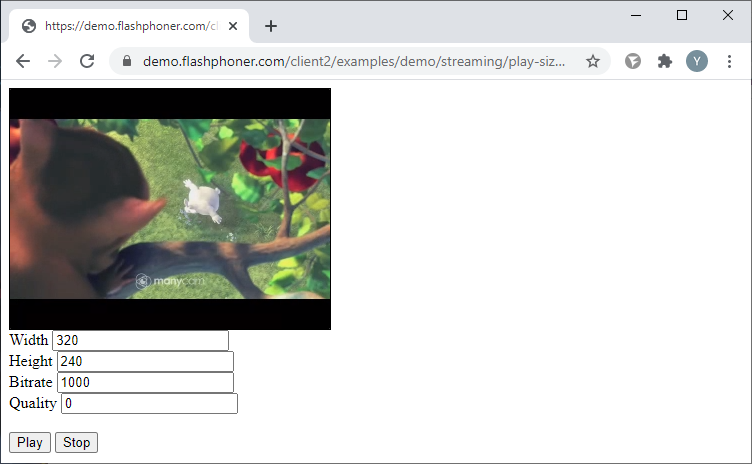
Playback with set resolution, bitrate and quality
Playback with set resolution, bitrate and quality will turn on WCS transcoding, which will result in increased load on the server processor.
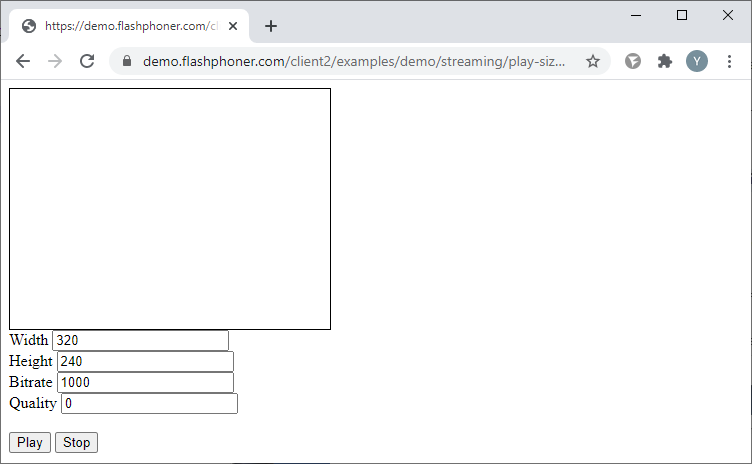
Let’s take a look at a baseline code for streaming with set resolution, bitrate and quality. Create two empty files titled play-size-video-min.html and play-size-video-min.js, with the following code.
Here is the complete code for the HTML page:
play-size-video-min.html
<!DOCTYPE html>
<html lang="en">
<head>
    <script type="text/javascript" src="https://flashphoner.com/downloads/builds/flashphoner_client/wcs_api-2.0/current/flashphoner.js"></script>
    <script type="text/javascript" src="play-size-video-min.js"></script>
</head>
<body onload="init_api()">
    <div id="myPlayer" style="width:320px;height:240px;border: solid 1px"></div>
    <label>Width</label>
	<input id="playWidth" type="text" value="320"/><br/>
	<label>Height</label>
	<input id="playHeight" type="text" value="240"/><br/>
	<label>Bitrate</label>
	<input id="playBitrate" type="text" value="1000"/><br/>
	<label>Quality</label>
	<input id="playQuality" type="text" value="0"/>
	<br/><button id="playBtn">Play</button>
	<button id="stopBtn">Stop</button>
</body>
</html>
JavaScript
Create a stream using the session.createStream() function and transmit the stream name “stream” and the HTML element “myPlayer” as parameters. Receive the constraints values from the text fields of the HTML page:
The following parameters are available for playback:
- width – frame width (px);
- height – frame height(px);
- bitrate – bitrate value (kbps);
- quality – video quality. The range for it is 0 to 51 (0 being the highest, 51 being the lowest).
constraints = {
    audio: true,
    video: {
         width: document.getElementById("playWidth").value,
         height: document.getElementById("playHeight").value,
         bitrate: document.getElementById("playBitrate").value,
         quality: document.getElementById("playQuality").value
    }
};
Playback the stream with these parameters:
function playStream() {
    constraints = {
        audio: true,
        video: {
            width: document.getElementById("playWidth").value,
            height: document.getElementById("playHeight").value,
            bitrate: document.getElementById("playBitrate").value,
            quality: document.getElementById("playQuality").value
        }
    };
    stream = session.createStream({
        name: "stream",
        display: document.getElementById("myPlayer"),
        constraints: constraints,
    });
    stream.play();
    console.log("Play")
}
Here is the complete JS code:
play-size-video-min.js
//Constants
var SESSION_STATUS = Flashphoner.constants.SESSION_STATUS;
var STREAM_STATUS = Flashphoner.constants.STREAM_STATUS;
var session;
var stream;

//Init Flashphoner API on page load & Connect to WCS server over webSockets
function init_api() {
    Flashphoner.init({});
    session = Flashphoner.createSession({
        urlServer: "wss://demo.flashphoner.com:8443" //specify the address of your WCS
    }).on(SESSION_STATUS.ESTABLISHED, function(session) {
        console.log("ESTABLISHED");
    });
    playBtn.onclick = playStream;
    stopBtn.onclick = stopPlay;
}

//Play stream
function playStream() {
    constraints = {
        audio: true,
        video: {
            width: document.getElementById("playWidth").value,
            height: document.getElementById("playHeight").value,
            bitrate: document.getElementById("playBitrate").value,
            quality: document.getElementById("playQuality").value
        }
    };
    stream = session.createStream({
        name: "stream",
        display: document.getElementById("myPlayer"),
        constraints: constraints,
    });
    stream.play();
    console.log("Play")
}

//Stopping stream
function stopPlay() {
    stream.stop();
    console.log("Stop")
}
Selecting the transport protocol for playback
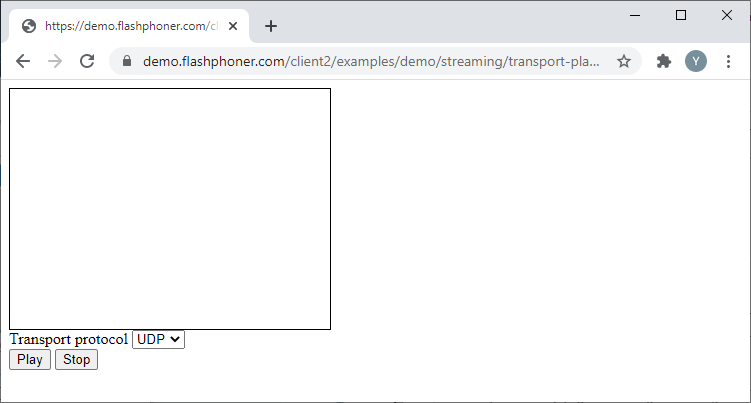
Let’s take a look at a baseline code for selecting the transport protocol for playback. Create two empty files titled transport-play-min.html and transport-play-min.js, with the following code.
Add a “select element to the HTML page, which will allow to select the transport protocol – UDP or TCP.
Here is the complete code for the HTML page:
transport-play-min.html
<!DOCTYPE html>
<html lang="en">
<head>
    <script type="text/javascript" src="https://flashphoner.com/downloads/builds/flashphoner_client/wcs_api-2.0/current/flashphoner.js"></script>
    <script type="text/javascript" src="transport-play-min.js"></script>
</head>
<body onload="init_api()">
    <div id="myPlayer" style="width:320px;height:240px;border: solid 1px"></div>
    <label>Transport protocol</label>
	<select id="transportOutput">
        <option value="UDP">UDP</option>
		<option value="TCP">TCP</option>
	</select>
	<br/><button id="playBtn">Play</button>
	<button id="stopBtn">Stop</button>
</body>
</html>
JavaScript
Create a stream using the session.createStream() function and transmit the stream name “stream” and the HTML element “myPlayer” as parameters. Receive the protocol value from the “select” element on the HTML page:
transport:document.getElementById("transportOutput").value,
Playback the stream with these parameters:
function playStream() {
    stream = session.createStream({
        name: "stream",
        display: document.getElementById("myPlayer"),
		transport:document.getElementById("transportOutput").value,
    });
    stream.play();;
    console.log("Play");
}
Here is the complete JS code for this example:
transport-play-min.js
//Constants
var SESSION_STATUS = Flashphoner.constants.SESSION_STATUS;
var STREAM_STATUS = Flashphoner.constants.STREAM_STATUS;
var session;
var stream;

//Init Flashphoner API on page load & Connect to WCS server over webSockets
function init_api() {
    Flashphoner.init({});
    session = Flashphoner.createSession({
        urlServer: "wss://demo.flashphoner.com:8443" //specify the address of your WCS
    }).on(SESSION_STATUS.ESTABLISHED, function(session) {
        console.log("ESTABLISHED");
    });
	playBtn.onclick= playStream;
    stopBtn.onclick = stopPlay;
}

//Play stream audio
function playStream() {
    stream = session.createStream({
        name: "stream",
        display: document.getElementById("myPlayer"),
		transport:document.getElementById("transportOutput").value,
    });
    stream.play();;
    console.log("Play");
}

//Stopping stream
function stopPlay() {
    stream.stop();
    console.log("Stop")
}
Excluding codecs upon playback
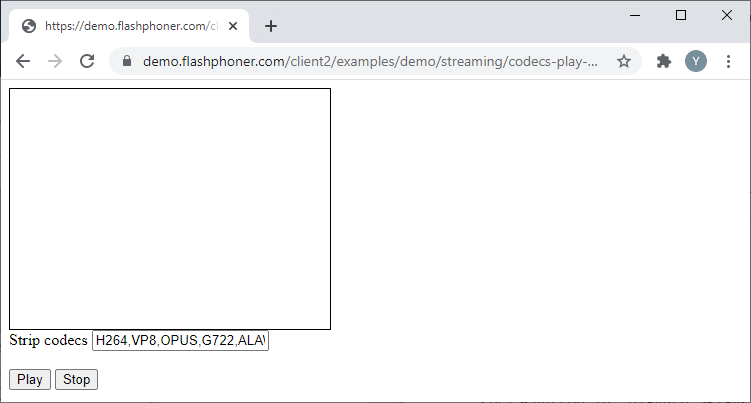
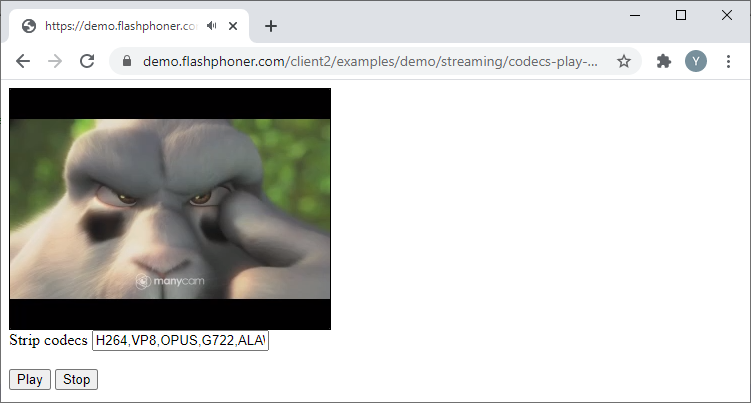
Let’s take a look at a baseline code for excluding codecs upon playback. Create two empty files titled codecs-play-min.html and codecs-play-min.js, with the following code.
Here is the complete code for the HTML page:
codecs-play-min.html
<!DOCTYPE html>
<html lang="en">
<head>
    <script type="text/javascript" src="https://flashphoner.com/downloads/builds/flashphoner_client/wcs_api-2.0/current/flashphoner.js"></script>
    <script type="text/javascript" src="codecs-play-min.js"></script>
</head>
<body onload="init_api()">
    <div id="myPlayer" style="width:320px;height:240px;border: solid 1px"></div>
    <label>Strip codecs</label>
	<input id="stripCodecs" type="text" value="H264,VP8,OPUS,G722,ALAW,ULAW"/><br/>
	<br/><button id="playBtn">Play</button>
	<button id="stopBtn">Stop</button>
</body>
</html>
JavaScript
Create a stream using the session.createStream() function and transmit the stream name “stream” and the HTML element “myPlayer” as parameters. Receive the codecs list from the text field of the HTML page:
stripCodecs:document.getElementById("stripCodecs").value,
Playback the stream with these parameters:
function playStream() {
    stream = session.createStream({
        name: "stream",
        display: document.getElementById("myPlayer"),
		stripCodecs:document.getElementById("stripCodecs").value,
    });
    stream.play();;
    console.log("Play");
}
Here is the complete JS code for this example:
codecs-play-min.js
//Constants
var SESSION_STATUS = Flashphoner.constants.SESSION_STATUS;
var STREAM_STATUS = Flashphoner.constants.STREAM_STATUS;
var session;
var stream;

//Init Flashphoner API on page load & Connect to WCS server over webSockets
function init_api() {
    Flashphoner.init({});
    session = Flashphoner.createSession({
        urlServer: "wss://demo.flashphoner.com:8443" //specify the address of your WCS
    }).on(SESSION_STATUS.ESTABLISHED, function(session) {
        console.log("ESTABLISHED");
    });
	playBtn.onclick= playStream;
    stopBtn.onclick = stopPlay;
}

//Play stream
function playStream() {
    stream = session.createStream({
        name: "stream",
        display: document.getElementById("myPlayer"),
		stripCodecs:document.getElementById("stripCodecs").value,
    });
    stream.play();;
    console.log("Play");
}

//Stopping stream
function stopPlay() {
    stream.stop();
    console.log("Stop")
}
Download Web Call Server 5
System requirements: Linux x86_64, 1 core CPU, 2 Gb RAM, Java
Installation:
- wget https://flashphoner.com/download-wcs5.2-server.tar.gz
- Unpack and install using 'install.sh'
- Launch server using command 'service webcallserver start'
- Open the web interface https://host:8444 and activate your license
If you are using Amazon EC2, you don't need to download anything.

