Make sure that your RTSP source supports the H.264 codec for video and the AAC or G.711 codec for audio, and the camera delivers the stream via the TCP protocol. The source parameters can be specified in the device or server documentation. Typically, an RTSP address looks like this: “rtsp://host:554/live.sdp”
Test plan
Connect to WCS server
Start playback of the video stream from your IP camera in the player
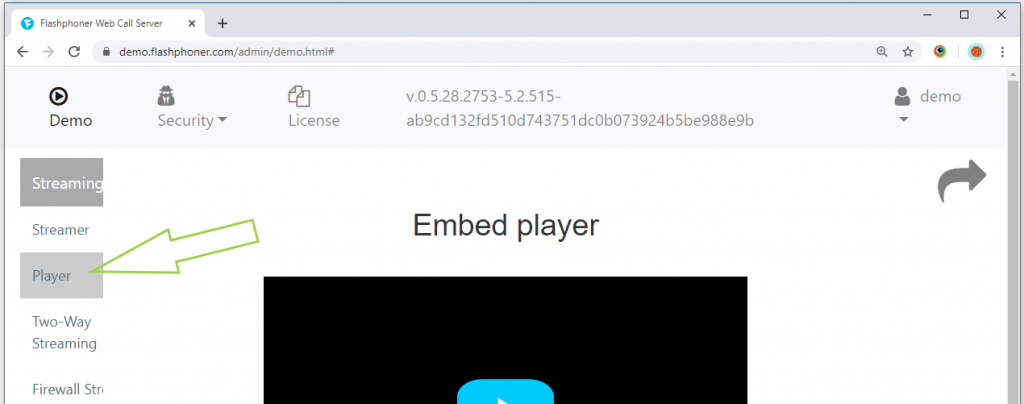
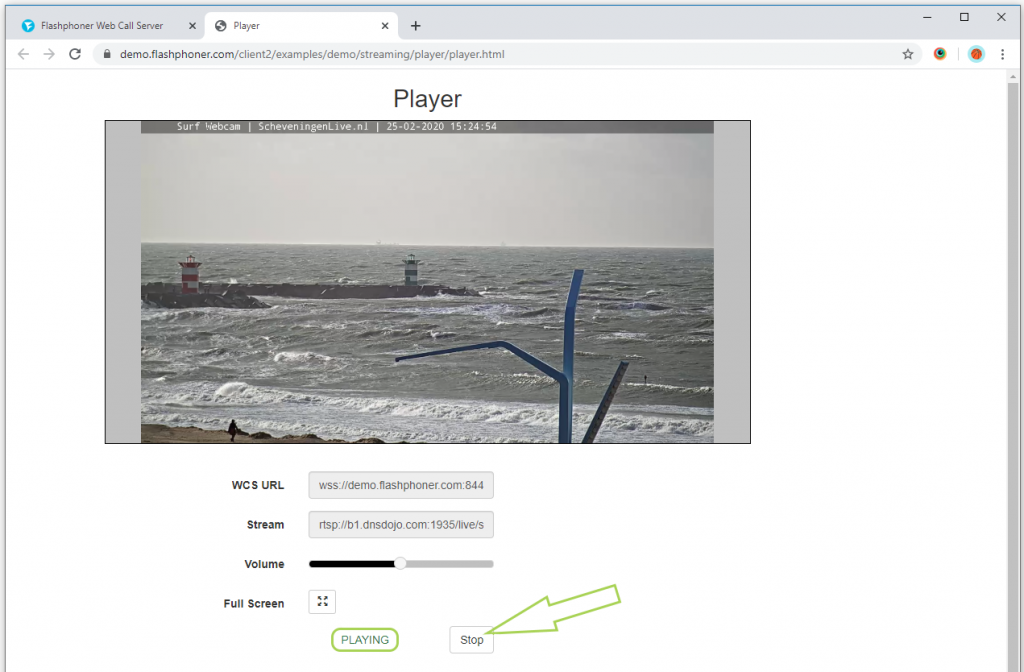
2. Select “Player” from the menu on the left side of the page
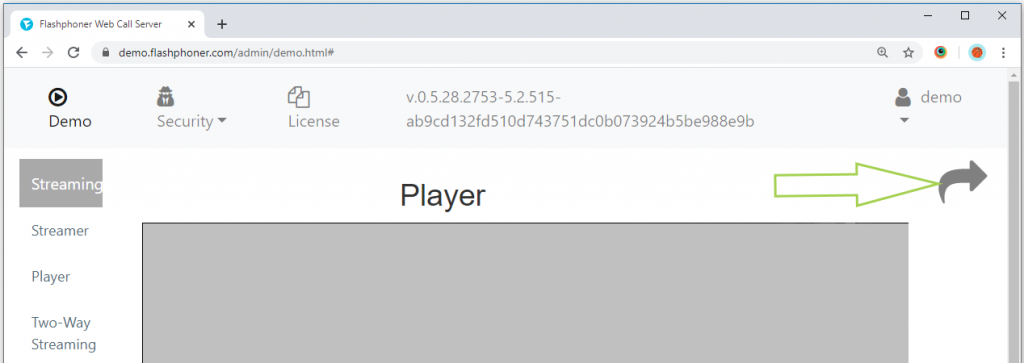
3. For the convenience of further testing, open the example in a new tab. To do this, click on the curved arrow in the upper right corner of the page
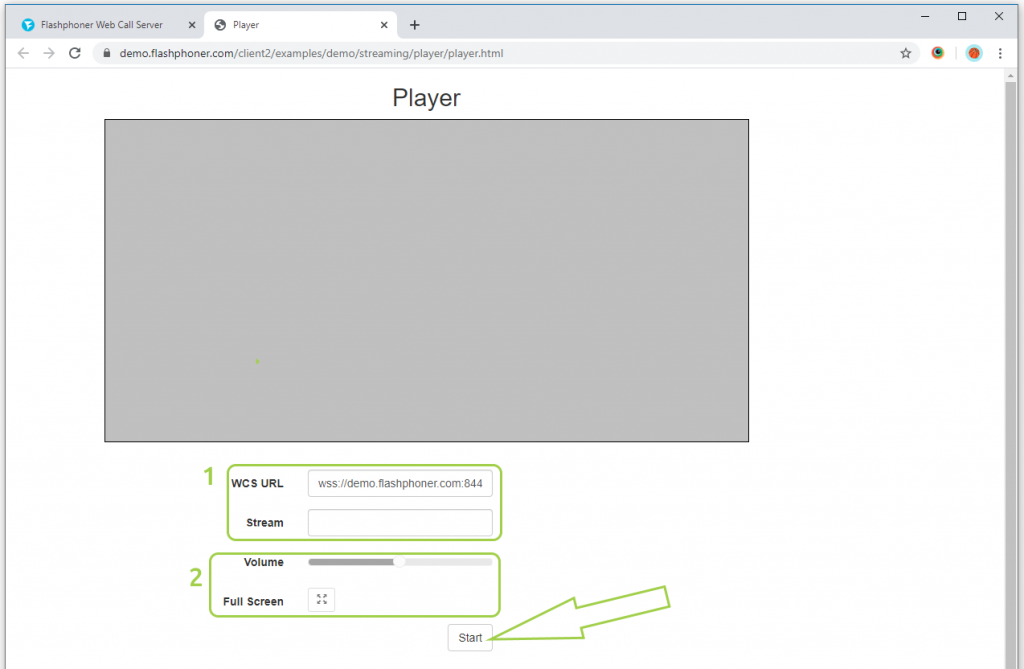
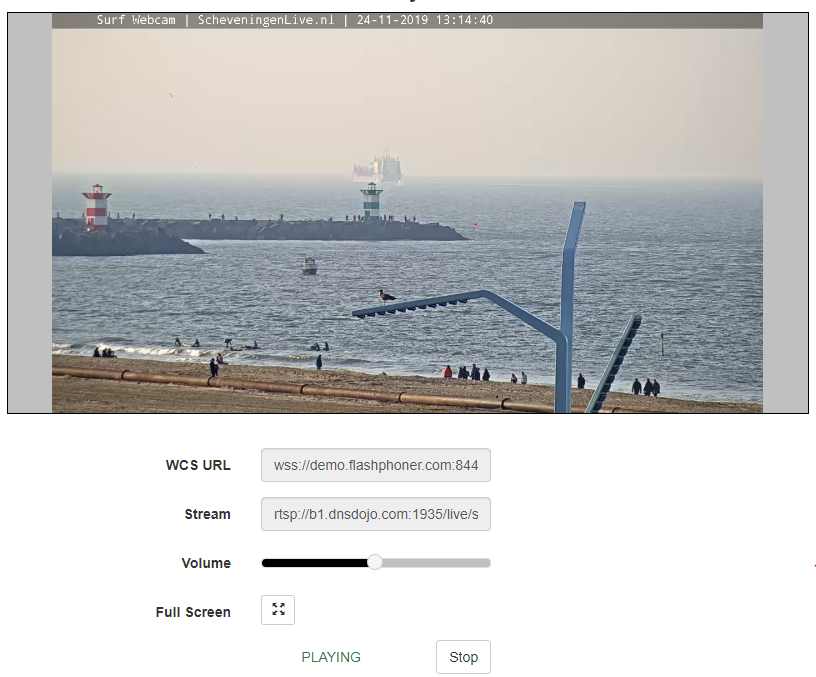
4. Fill in the “WCS URL” and “Stream” (1) fields. Usually the “WCS URL” field is filled in by default and contains the wss URL of the current WCS server. In the “Stream” field, you can specify the RTSP address of the video stream that your RTSP camera gives. To play the stream, click the “Start” button. You can adjust the volume using the “Volume” slider and expand the playback to full screen using the “Full Screen” button (2)
5. The page displays the current status of the connection and playback of the stream. To stop playback, click the “Stop” button
We have tested the player to work in Google Chrome. The player plays back video streams in other browsers and mobile applications for iOS and Android in a similar way.
To embed an RTSP player in your website, go to the Embedding page
Download Web Call Server 5
System requirements: Linux x86_64, 1 core CPU, 2 Gb RAM, Java
Use these instructions for quick installation and configuration of the server. In addition to that, you can connect to our demo server demo.flashphoner.com via the Websockets protocol to perform the tests.
Step-by-step instructions for an RTSP HTML5 player embedding
To embed an RTSP player in our web page, let’s create two empty files: player-min.html and player-min.js. These files will contain the minimal code for our player’s operation.
1. Create the constants and variables for the server operation status, Websocket session and stream. To work with the iOS Safari browser, we need a preloader, which can be downloaded from GitHub
var SESSION_STATUS = Flashphoner.constants.SESSION_STATUS;
var STREAM_STATUS = Flashphoner.constants.STREAM_STATUS;
var session;
var PRELOADER_URL = "https://github.com/flashphoner/flashphoner_client/raw/wcs_api-2.0/examples/demo/dependencies/media/preloader.mp4";
2. Initialize API when the HTML page is loaded, match the functions to clicking the corresponding buttons and connect to the WCS server via WebSocket. In this example, we are using our demo server. To test your own server, replace “wss://demo.flashphoner.com” with your WCS address
function init_api() {
    Flashphoner.init({});
    //Connect to WCS server over websockets
    session = Flashphoner.createSession({
        urlServer: "wss://demo.flashphoner.com:8443" //specify the address of your WCS
    }).on(SESSION_STATUS.ESTABLISHED, function(session) {
        console.log("ESTABLISHED");
    });

    playBtn.onclick = playClick;
}
3. We detect the browser, and if the browser is Safari, we launch the preloader. Playback should start strictly upon a user’s gesture (i.e. button click). This is limitation of mobile Safari browsers. More
var Browser = {
    isSafari: function() {
        return /^((?!chrome|android).)*safari/i.test(navigator.userAgent);
    },
}

function playClick() {
    if (Browser.isSafari()) {
        Flashphoner.playFirstVideo(document.getElementById("play"), true, PRELOADER_URL).then(function() {
            playStream();
        });
    } else {
        playStream();
    }
}
4. Then, create a session.createStream() stream and transmit the RTSP URL “rtsp://myrtspserver/stream1” and the element of myVideo as the parameters. Done, the video stream is played on the web page.
For everything to work correctly, replace “rtsp://myrtspserver/stream1” with the address of the required RTSP stream
function playStream() {
    session.createStream({
        name: "rtsp://myrtspserver/stream1", //specify the RTSP stream address
        display: document.getElementById("play"),
    }).play();
}
The full JavaScript code (file “player-min.js”) looks as follows:
//Status constants
var SESSION_STATUS = Flashphoner.constants.SESSION_STATUS;
var STREAM_STATUS = Flashphoner.constants.STREAM_STATUS;
var session;
var PRELOADER_URL = "https://github.com/flashphoner/flashphoner_client/raw/wcs_api-2.0/examples/demo/dependencies/media/preloader.mp4";

//Init Flashphoner API on page load
function init_api() {
    Flashphoner.init({});
    //Connect to WCS server over websockets
    session = Flashphoner.createSession({
        urlServer: "wss://demo.flashphoner.com" //specify the address of your WCS
    }).on(SESSION_STATUS.ESTABLISHED, function(session) {
        console.log("ESTABLISHED");
    });

    playBtn.onclick = playClick;
}

//Detect browser
var Browser = {
    isSafari: function() {
        return /^((?!chrome|android).)*safari/i.test(navigator.userAgent);
    },
}
/**
*
If browser is Safari, we launch the preloader before playing the stream.
Playback should start strictly upon a user's gesture (i.e. button click). This is limitation of mobile Safari browsers.
https://docs.flashphoner.com/display/WEBSDK2EN/Video+playback+on+mobile+devices
*
**/
function playClick() {
    if (Browser.isSafari()) {
        Flashphoner.playFirstVideo(document.getElementById("play"), true, PRELOADER_URL).then(function() {
            playStream();
        });
    } else {
        playStream();
    }
}

//Playing stream
function playStream() {
    session.createStream({
        name: "rtsp://myrtspserver/stream1", //specify the RTSP stream address
        display: document.getElementById("play"),
    }).play();
}
As a result, we get a minimal player that is basically a div block with a frame and is able to request an RTSP stream and to play it via the server.
For an RTSP stream to be broadcasted from an IP camera to a browser and played back in the browser without any additional plugins, the stream has to be specially prepared and converted into an HTML5 compatible format supported by browsers. The player accesses the WCS server to convert the RTSP stream into HTML5, and the server requests the RTSP stream from the camera or from another source via the RTSP protocol. The following formats can be used to play back the stream in a browser: WebRTC, MSE (Media Source Extension) and HLS.
Specifications of an RTSP HTML5 player
The video stream is captured from the RTSP source that delivers audio and video in the supported codecs, and transformed on the server side for subsequent playback in browsers and mobile devices.
RTSP sources
RTSP codecs
Playback technologies
Playback platforms
IP cams
Media servers
Video surveillance
Conference servers
H.264
VP8
AAC
G.711
Speex
WebRTC
Websocket
MSE
HLS
Flash
Chrome
Firefox
Opera
Safari, Mac OS
Safari, iOS
IE
Edge
iOS SDK
Android SDK
RTSP sources
IP cams
Media servers
Video surveillance
Conference servers
RTSP codecs
H.264
VP8
AAC
G.711
Speex
Playback technologies
WebRTC
Websocket
MSE
HLS
Flash
Playback platforms
Chrome
Firefox
Opera
Safari, Mac OS
Safari, iOS
IE
Edge
iOS SDK
Android SDK
Diagram of RTSP video stream delivery to browsers and mobile applications
The Web Call Server connects to an IP camera or a streaming video server via the RTSP protocol, receives video and audio traffic, converts the traffic into a browser compatible format, and then shares the streaming video to users’ HTML5 pages and to mobile applications for iOS and Android.
Step-by-step diagram of RTSP broadcast to an HTML5 browser or mobile application
The browser connects to the server via the Websocket protocol and requests the RTSP video stream. This is where the broadcast begins.
The browser requests the RTSP stream
The Web Call Server connects to the IP camera and requests the RTSP stream demanded by the browser
The IP camera sends audio and video traffic within the RTSP connection
The Web Call Server converts the traffic into WebRTC or Websockets and transmits it to the browser for playback
An RTSP HTML5 player in Google Chrome via WebRTC
An example of the player’s operation in Chrome via WebRTC is shown in the screenshot below
RTSP HTML5 player — Demo
Visit our demo server to test the operation of the RTSP HTML5 player
On April 16, 2025, we began the transition from Skype to Teams.
On the same day, we sent out a message via our Skype account (flashphoner.com / Flashphoner Sales) informing users about the move.
Unfortunately, this message appears to have triggered a block on our Microsoft account (Skype + Teams), most likely due to being flagged as spam. As of now, appeals have not been successful, and the account remains blocked.
Our current contact details:
Microsoft Teams: sales@flashphoner.com — for sales, pre-sales, and licensing inquiries