In a previous article we already discussed how to load test and choose the right server depending on the tasks and budget.
The testing turned out to be a “spherical chicken in vacuum.” We published a stream on one WCS, which we then retrieved a number of times with a second WCS, and, based on the results of these tests, drew conclusions about the hardware efficiency.
Such a test of one server with another of the same kind is not a completely independent test. In this case, the stream subscription procedure is somewhat simplified for the server under test, compared to the browser in which the end user will watch the stream. Therefore, the test results will be somewhat different from the real picture.
The simplest and most logical way to test is to perform a manual test – open the browser, open the tab with the player, specify the stream name and click “Play.” Repeat 1000 times.
And that’s where this all falls apart. First, you have to run the player 1000 times. I doubt it will be easy! Secondly, you need to prepare a cluster of several powerful servers to run the browser with a thousand tabs on which the video will be played. Thirdly, the manual test under these conditions will take quite a long time. For these reasons, the manual test should not be considered as one of the load testing methods.
In this article we’ll review another way of testing — using a Нeadless-browser and compare the results of such testing with testing based on stream capture.
The Headless Horseman
Нeadless-browser is something without a head. In the context of the frontend, it is an indispensable developer tool with which you can test code, check the quality and consistency of the layout, programmatically create scenarios of user interaction with the site, followed by fixing the results of these scenarios for use in tests.
Headless Chrome is a full-featured browser without a graphical interface, which means it draws everything in memory. Headless Chrome is faster and uses less memory than a regular browser.
The last statement seems like a contradiction. But the reduction in memory usage is achieved by the absence of a graphical component. The headless browser has no real content rendering, which means that it does not need to render illustrations weighing several gigabytes, with which modern websites are often flooded. At the same time, the headless browser will download all the content from the web page, just like a regular browser.
Headless Chrome is software-driven using an API and can be installed on “pure” Linux. You just need to install the package, and the browser will work out of the box, just like its brother with a head – Google Chrome.
Load testing using Headless Chrome will be closest to reality because it simulates real users connecting to WCS using a browser.
So here we go.
Load testing using Headless Chrome
Server under test
We will install on the server with the following characteristics
- 2x Intel(R) Xeon(R) Silver 4214 CPU @ 2.20GHz (a total of 24 cores, 48 streams);
- 192GB RAM;
- 2x 10Gbps
A WCS and perform work to prepare for operation in production. Read more in the article and in documentation.
In the standard Two-way Streaming example, we published the stream from the virtual camera titled “stream1”.
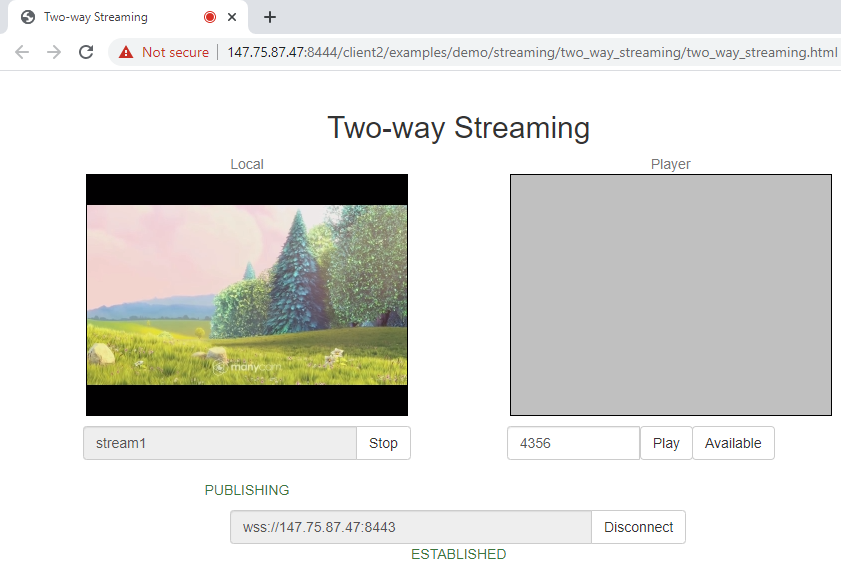
That’s all. Now leave the server to wait for the load test.
Testing server
A server with Ubuntu 20.04 OS was used in testing
Characteristics:
- 2x Intel(R) Xeon(R) Silver 4214 CPU @ 2.20GHz (a total of 24 cores, 48 streams);
- 192GB RAM;
- 2x 10Gbps
Setup and testing process:
1. Install Xvfb, Xorg for working with a virtual output device
apt-get install xvfb -y
apt-get install x11-xkb-utils xfonts-100dpi xfonts-75dpi xfonts-scalable xfonts-cyrillic xserver-xorg-core xserver-xorg-video-dummy alsa-base -y
2. Configure the virtual monitor – edit the configuration file /usr/share/X11/xorg.conf.d/xorg.conf
Section "Device"
    Identifier  "Configured Video Device"
    Driver      "dummy"
    Option "ConstantDPI" "true"
    VideoRam 192000
EndSection

Section "Monitor"
    Identifier  "Configured Monitor"
    HorizSync 31.5-48.5
    VertRefresh 50-70
    Modeline "1600x1200" 22.04 1600 1632 1712 1744 1200 1229 1231 1261
    Modeline "1600x900" 33.92 1600 1632 1760 1792 900 921 924 946
    Modeline "1440x900" 30.66 1440 1472 1584 1616 900 921 924 946
    ModeLine "1366x768" 72.00 1366 1414 1446 1494  768 771 777 803
    Modeline "1280x1024" 31.50 1280 1312 1424 1456 1024 1048 1052 1076
    Modeline "1280x800" 24.15 1280 1312 1400 1432 800 819 822 841
    Modeline "1280x768" 23.11 1280 1312 1392 1424 768 786 789 807
    Modeline "1360x768" 24.49 1360 1392 1480 1512 768 786 789 807
    Modeline "1024x768" 18.71 1024 1056 1120 1152 768 786 789 807
    Modeline "768x1024" 19.50 768 800 872 904 1024 1048 1052 1076
EndSection

Section "Screen"
    Identifier  "Default Screen"
    Monitor     "Configured Monitor"
    Device      "Configured Video Device"
    DefaultDepth 24
    SubSection "Display"
        Depth 24
        Modes "1600x1200" "1680x1050" "1600x900" "1400x1050" "1440x900" "1280x1024" "1366x768" "1280x800" "1024x768"
    EndSubSection
EndSection
3. Install Headless Chrome
wget -q -O - https://dl-ssl.google.com/linux/linux_signing_key.pub | sudo apt-key add -
echo "deb [arch=amd64] http://dl.google.com/linux/chrome/deb/ stable main" > /etc/apt/sources.list.d/google-chrome.list
apt-get update
apt-get install google-chrome-stable
4. Download and unpack the load testing scripts. An archive with load testing scripts is available for downloading here.
wget https://flashphoner.com/downloads/docs/2017/xload.tar.gz
tar -xvzf xload.tar.gz
5. Go to the directory in which the archive was extracted
cd xload
The directory contains:
player with Web-player scripts
start_xorg.sh – script for running Xorg
loadtest.sh – script for running tests
The following parameters can be passed to the loadtest.sh script:
required:
url – URL of the player page with the necessary parameters
or
urlsfile – the path to the file containing several such URLs, which will be traversed in order
optional:
stressrate – interval of adding a new subscriber in milliseconds
ttl – subscriber lifetime in seconds
maxsubscribers – maximum number of subscribers.
6. Run testing.
./loadtest.sh -url http://Your.WCS.server:8081/client2/examples/demo/streaming/player/player.html?streamName=stream1&autoplay=true -maxsubscribers 100 -stressrate 500 -ttl 600
The screenshot below shows the test result:
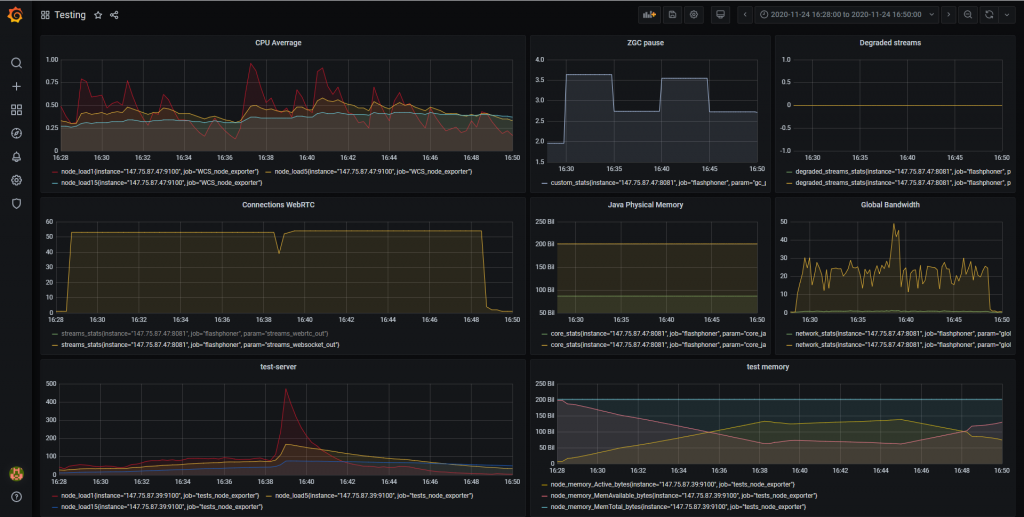
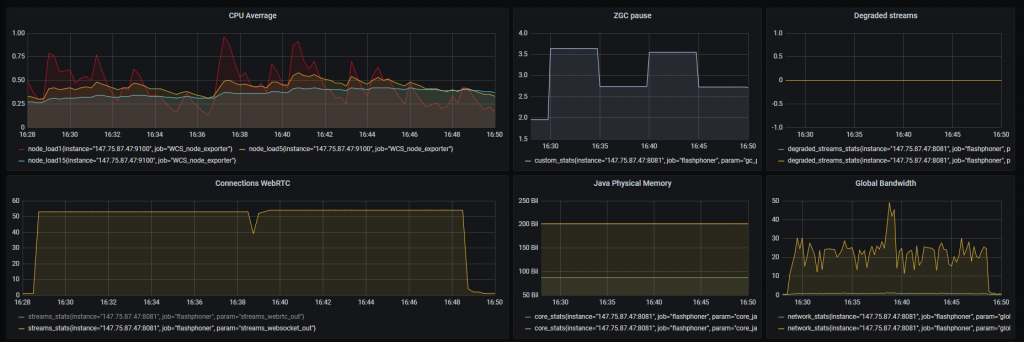
Unfortunately, because of the heavy load on the testing server it was not possible to connect to the test 1000 subscribers. Chrome, although headless, but took up all available CPU and RAM resources, with only 50 subscribers, as you can see in the CPU Load Averrage and memory consumption graphs. A long-lasting CPU Load Averrage value of more than 100 points indicates a high load on the processor. The RAM of the testing server also turned out to be occupied by more than 50%. And if the RAM resource was still available, the CPU load did not allow to reach the planned number of spectators.

In this test it was possible to connect a little more than 50 subscribers. In this case, there is no heavy load on the WCS server.
CPU Load Averrage value does not exceed 1 point. Pauses in the operation of Z Garbage Collector did not exceed 3.5 milliseconds. There were no degraded streams.
Load testing using stream capture
The testing methodology is discussed in detail in the article and in documentation
We will use two servers with the following specifications to test using stream capture:
- 2x Intel(R) Xeon(R) Silver 4214 CPU @ 2.20GHz (a total of 24 cores, 48 streams);
- 192GB RAM;
- 2x 10Gbps
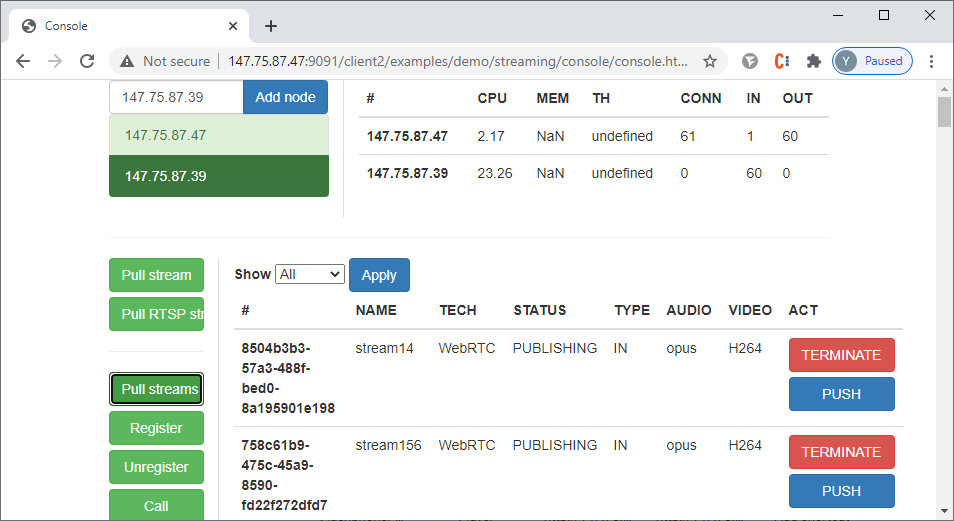
Let’s launch load testing using the Console web app:
1. On the first server, open the Console app via HTTP http://your.WCS.server.name:9091/client2/examples/demo/streaming/console/console.html
2. Specify the domain name or IP address of the first server and click “Add node.” This will be the server under test, which will be the source of streams. Then similarly connect the second server, which will simulate subscribers and capture streams.

3. For the first server, run the standard Two-way Streaming example and publish the stream from the web camera. The stream name can be anything.
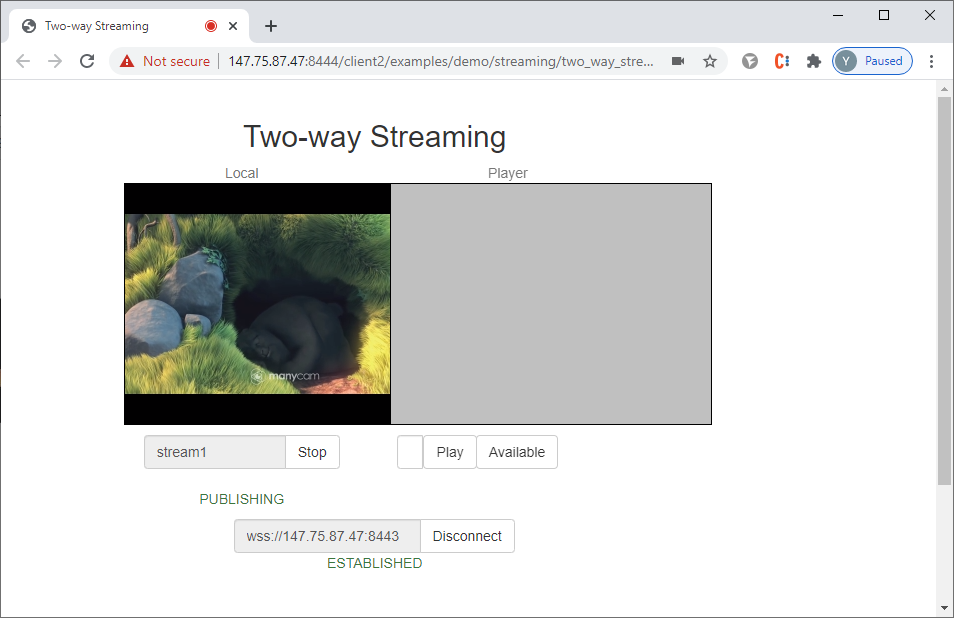
4. In the Console app, select the second server, click ‘Pull streams’ button, and set the test parameters:
- Choose node — choose the first server;
- Local stream name — specify the name of the stream on the testing server in which the stream from the one being tested will be captured. (index corresponding to the number of the captured stream will be added to the stream name)
- Remote stream name — specify the name of the stream published on the server under test;
- Qty — specify the number of spectators (for our test — 1000).
5. Then press the “Pull” button to start the test:
The test result is on the screenshot below:
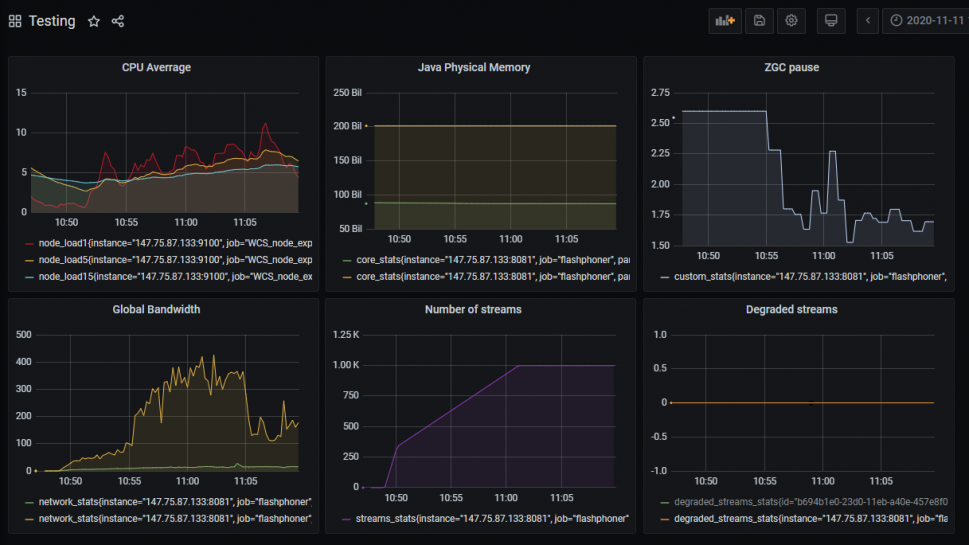
When testing using stream capturing, we managed to reach the planned number of viewers (1000 subscribers). The graphs show the increased load on the WCS server being tested.
The test using the second WCS server cannot be considered completely independent. We test our server using the second server of the same type. And, as it was already mentioned above, this variant is very rare in practice.
Despite the fact that we were not able to reach the estimated load of 1000 viewers when testing with Headless Chrome, this test clearly shows that with a small number of real subscribers there is no need to use powerful hardware to host WCS, and you can save some money when buying or renting a server.
Happy streaming!


