Embedding the video chat into a browser
A specific HTML code is placed on the page and contains all the required dependence scripts (JavaScript) to connect to the server and manage capturing of video from web cameras as well as all video chat communications (call, decline, hangup etc.).
Preparing to embedding the video chat into the page
To embed the video chat you need the required scripts and files.
- Install Web Call Server on your hosting and import SSL-certificates to work with the WebRTC technology.
- If you experience difficulties installing the server, you can launch a preconfigured virtual Web Call Server in Amazon AWS and import the SSL certificate.
- Besides, you can simply connect to our demo servers:
wss://wcs5-eu.flashphoner.com:8443
wss://wcs5-us.flashphoner.com:8443 - Download the latest build containing the HTML and JavaScript code
- Unpack the build on your web server and open the files
- examples/demo/video-chat/video-chat.html See on Github
- examples/demo/video-chat/video-chat.js See on Github
These are files of the video chat that are used on the Demo / Video Chat demo page in the Testing section. Let’s take a closer look at them.
HTML and JavaScript code to embed into the web page
Here are the main elements of video-chat.html and video-chat.js scripts that are used to provide operation of the video chat.
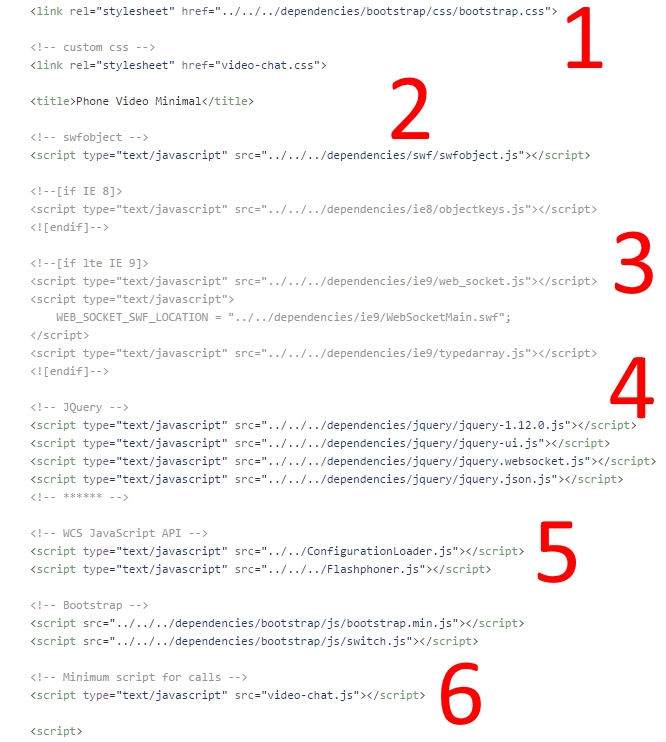
examples/demo/video-chat/video-chat.html
All dependencies are located in the head HTML element. The main ones are:
- Bootstrap.css is used to simplify work with the video chat interface, highlight statuses and button styles.
- Swfobject.js is used to position the Flash object on the page in non-WebRTC supporting browsers, such as Internet Explorer.
- A special code for IE8 and IE9.
- Jquery-scripts for auxiliary operations.
- Flashphoner.js – enables the Flashphoner API and the configuration tool.
- video-chat.js script.
The same video-chat.html file also redefines main functions: init, call, answer. These functions initialize the Flashphoner API, allows making a call and answering it.
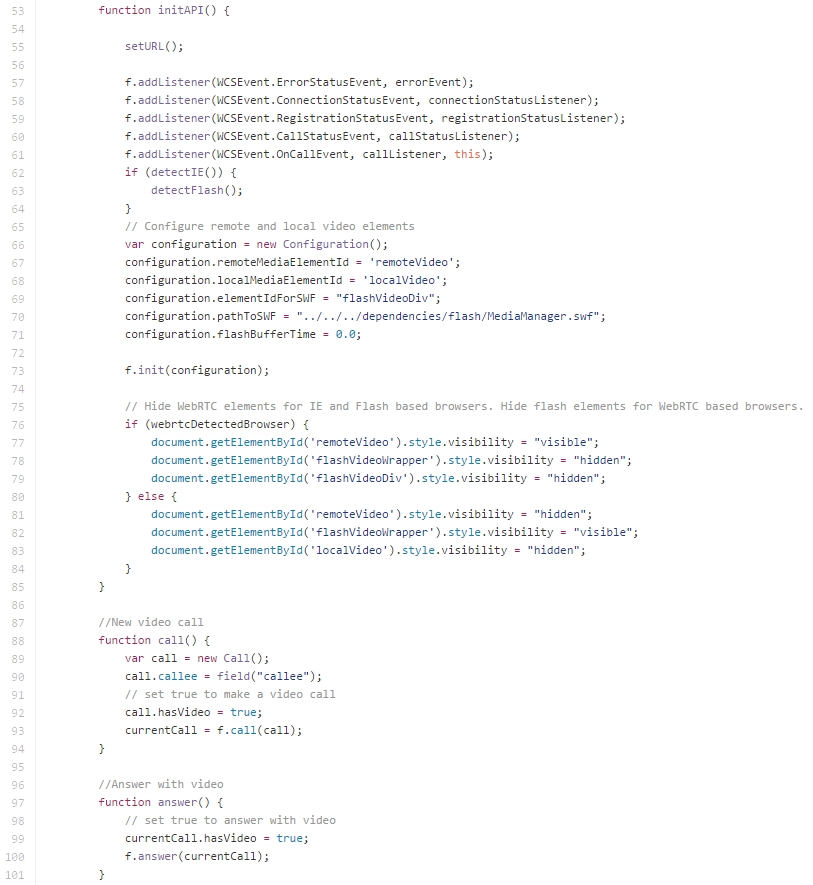
examples/demo/video-chat/video-chat.js
This script holds all supplementary functions required to control the interface, highlight statuses, buttons switching and so on.
The most important part of the code is getting an instance of the Flashphoner API and establishing connection with the server using the ‘connect’ method.
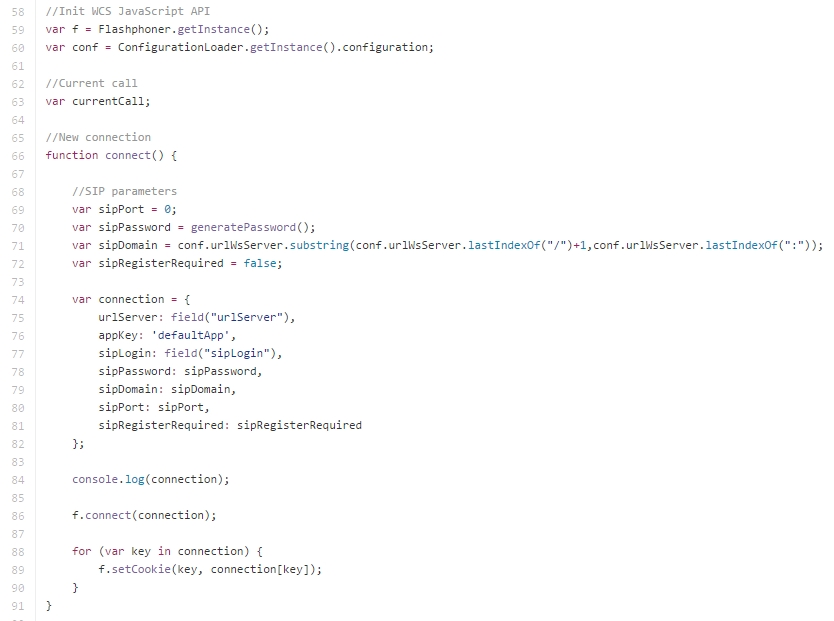
To establish connection we use the following parameters: urlServer, appKey, sipLogin, sipPassword, sipDomain, sipPort, sipRegisterRequired. These parameters are thoroughly explained in the Call Flow documentation.
Here, we do NOT use a SIP server. However, message exchange (call, answer, hangup etc.) is internally based on SIP, because this protocol is well-tailored for video chats. Therefore, these parameters may have sip prefixes.
The list of parameters to establish connection of the video chat with the server:
| urlServer | wss://wcs5-us.flashphoner.com:8443 | A Websocket URL of the server the connection is established with |
| appKey | defaultApp | Mapping of the appKey on the server side. If the server sees ‘defaultApp’, it passes all call and connection data to the corresponding URL of your backend server. |
| sipLogin | User1 | Specify an arbitrary user name. Your backend server can authorize the user. |
| sipPassword | 1234 | Specify an arbitrary password. Your backend server the request is sent to can authorized the user with this password. |
| sipDomain | wcs5-us.flashphoner.com | Specify the WCS domain here. This domain must also be specified in the ‘ip’ field of the flashphoner.properties file on the server. |
| sipPort | 0 | Specify 0, because we do not use a SIP server here. |
| sipRegisterRequired | false | Specify false, because we do not use a SIP server here and don’t need to register. |
Note: for the video chat to operate correctly, the flashphoner.properties file on the server side must include enable_local_videochat=true and ip=mydomain.com options, where mydomain.com is the domain name of your server.
The minimum working code of the video chat is available at:examples/min/phone-video. It does not use status highlights, button switching and so on. This produces the simplest code to embed.
Using the connection parameter table above, you can embed a video chat with the minimum code.
To authorize users, track user online/offline statuses, gather video calls statistics (amount and duration of calls) you should integrate WCS with your web service or database via the REST API, which is described in the Call Flow documentation.
For more information on testing the video chat, please see the Testing section.
This page is out of date
Please visit the actual page describing integration of a video chat into your HTML-code