Embedding republishing of a SIP call to a video stream
To embed the republishing of a SIP call to a stream, you need to insert HTML code and API dependency scripts into your website
Use these instructions for quick installation and configuration of the server. In addition to that, you can connect to our demo server demo.flashphoner.com to perform the tests.
Step-by-step instructions for embedding the republishing of a SIP call to a video stream
SIP calls that pass through the WCS server can be captured and processed as regular video streams. There are two options for capturing a video stream from a SIP call – “SIP as Stream” and “SIP as RTMP”. Consider implementing these options
Option 1. Embedding of the conversion of SIP video calls to WebRTC streams with playback in HTML5 player on a web page
To embed the conversion of a SIP call into a stream (SIP as Stream function) and a player for the stream, we will create two empty files sip-as-stream-min.html and sip-as-stream-min.js. In this case, the minimum REST API client and minimum player will be placed on the web page.
Let’s analyze the contents of files
HTML
Let’s place the necessary elements in sip-as-stream-min.html:
1. Import the main API script
<script type="text/javascript" src="https://flashphoner.com/downloads/builds/flashphoner_client/wcs_api-2.0/current/flashphoner.js"></script>
2. Import the SIP as Stream script
<script type="text/javascript" src="sip-as-stream-min.js"></script>
3. Specify styles for the “display” class. This is necessary for the further correct display of the video in the div element
<style>
	.display {
		width: 100%;
		height: 100%;
		display: inline-block;
	}

	.display > video, object {
		width: 100%;
		height: 100%;
	}
</style>
4. Initialize the API on page load
<body onload="init_page()">
5. Add the field to enter a SIP callee number
<input id="callee" type="text" placeholder="Callee SIP username"/>
6. Add the “Call” button to make an outgoing SIP call
<button id="callBtn">Call</button>
7. Add the button to end the call
<button id="hangupBtn">Hangup</button>
8. Add div element in which the captured SIP stream will be played
<div id="sipVideo" class="display" style="width:320px;height:260px;border: solid 1px"></div>
9. Add the button to start playback of the captured SIP stream
<button id="playBtn">Play</button>
The full HTML code of the page looks like this:
<!DOCTYPE html>
<html lang="en">
<head>
    <meta charset="UTF-8">
	<script type="text/javascript" src="https://flashphoner.com/downloads/builds/flashphoner_client/wcs_api-2.0/current/flashphoner.js"></script>
    <script type="text/javascript" src="sip-as-stream-min.js"></script>
    <style>
		.display {
			width: 100%;
			height: 100%;
			display: inline-block;
		}

		.display > video, object {
			width: 100%;
			height: 100%;
		}
    </style>
</head>
<body onload="init_page()">
	<input id="callee" type="text" placeholder="Callee SIP username"/>
	<br>
    <button id="callBtn">Call</button>
	<button id="hangupBtn">Hangup</button>
	<br>
	<div id="sipVideo" class="display" style="width:320px;height:260px;border: solid 1px"></div>
        <br>
	<button id="playBtn">Play</button>
</body>
</html>

JavaScript
1. Initialize the constants for the WCS server operation status
var SESSION_STATUS = Flashphoner.constants.SESSION_STATUS;
var STREAM_STATUS = Flashphoner.constants.STREAM_STATUS;
2. Initialize the global variables for the Websocket session, the div of the element in which the capturedSIP video stream will be played and the URL for the REST request
var session;
var sipVideo;
var url = "http://demo.flashphoner.com:8081/rest-api/call";
3. In the function “init_page()”, we initialize the API, bind the functions to the events of clicking on the corresponding buttons and define a div element for playing the stream
function init_page() {
    Flashphoner.init({});
    callBtn.onclick = call;
    hangupBtn.onclick = hangup;
    playBtn.onclick = playSipToStream;
    sipVideo = document.getElementById("sipVideo");
}
4. The function “call()” generates REST request and sends it to arrange an outgoing SIP call and capturing of the stream
function call() {
    fetchUrl = url + "/startup";
    const options = {
        method: "POST",
        headers: {
            "Content-Type": "application/json"
        },
        body: JSON.stringify({
            "callId": "123456",
            "callee": document.getElementById("callee").value,
            "toStream": "call_stream1",
            "hasAudio": "true",
            "hasVideo": "true",
            "sipLogin": "10001",
            "sipAuthenticationName": "10001",
            "sipPassword": "Pass123",
            "sipDomain": "your_sip_server.com",
            "sipOutboundProxy": "your_sip_server.com",
            "sipPort": "5060",
            "appKey": "defaultApp",
            "sipRegisterRequired": "true"
        }),
    }
    fetch(fetchUrl, options)
}
5. Function “hangup()” generates a REST call to end the ongoing outbound SIP call
function hangup() {
    fetchUrl = url + "/terminate";
    const options = {
        method: "POST",
        headers: {
            "Content-Type": "application/json"
        },
        body: JSON.stringify({
            "callId": "123456",
        }),
    }
    fetch(fetchUrl, options)
}
6. Function “playSipToStream()” creates Websocket session on the WCS server for playing the captured SIP stream
function playSipToStream() {
    Flashphoner.createSession({
        urlServer: "wss://demo.flashphoner.com:8443"
    }).on(SESSION_STATUS.ESTABLISHED, function(session) {
        playStream(session);
    });
}
7. The function “playStream(session)” plays the captured SIP stream in the div element on the HTML page
function playStream(session) {
    var stream = session.createStream({
        name: "call_stream1",
        display: sipVideo
    }).on(STREAM_STATUS.PLAYING, function(stream) {});
    stream.play();
}
Full JavaScript code looks like this:
var SESSION_STATUS = Flashphoner.constants.SESSION_STATUS;
var STREAM_STATUS = Flashphoner.constants.STREAM_STATUS;
var session;
var sipVideo;
var url = "http://demo.flashphoner.com:8081/rest-api/call";

function init_page() {
    Flashphoner.init({});
    callBtn.onclick = call;
    hangupBtn.onclick = hangup;
    playBtn.onclick = playSipToStream;
    sipVideo = document.getElementById("sipVideo");
}

function call() {
    fetchUrl = url + "/startup";
    const options = {
        method: "POST",
        headers: {
            "Content-Type": "application/json"
        },
        body: JSON.stringify({
            "callId": "123456",
            "callee": document.getElementById("callee").value,
            "toStream": "call_stream1",
            "hasAudio": "true",
            "hasVideo": "true",
            "sipLogin": "10001",
            "sipAuthenticationName": "10001",
            "sipPassword": "Pass123",
            "sipDomain": "your_sip_server.com",
            "sipOutboundProxy": "your_sip_server.com",
            "sipPort": "5060",
            "appKey": "defaultApp",
            "sipRegisterRequired": "true"
        }),
    }
    fetch(fetchUrl, options)
}

function hangup() {
    fetchUrl = url + "/terminate";
    const options = {
        method: "POST",
        headers: {
            "Content-Type": "application/json"
        },
        body: JSON.stringify({
            "callId": "123456",
        }),
    }
    fetch(fetchUrl, options)
}

function playSipToStream() {
    Flashphoner.createSession({
        urlServer: "wss://demo.flashphoner.com:8443"
    }).on(SESSION_STATUS.ESTABLISHED, function(session) {
        playStream(session);
    });
}

function playStream(session) {
    var stream = session.createStream({
        name: "call_stream1",
        display: sipVideo
    }).on(STREAM_STATUS.PLAYING, function(stream) {});
    stream.play();
}
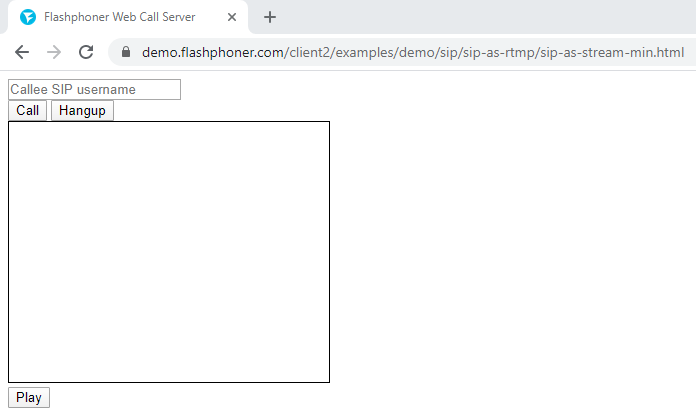
View of the page with the player in which the captured SIP video stream is played

Option 2. Embedding the republishing of SIP video calls to RTMP streams with playback in a third-party RTMP player
To embed the conversion of a SIP call into a stream, followed by republishing it to an RTMP server (SIP as RTMP function), we create two empty files sip-as-rtmp-min.html and sip-as-rtmp-min.js. In this case, on the web-page will be placed a minimum REST API client and a link for playback in a third-party player will be displayed.
Let’s analyze the contents of the files
HTML
Let’s place the necessary elements in sip-as-rtmp-min.html:
1. Import the main API script
<script type="text/javascript" src="https://flashphoner.com/downloads/builds/flashphoner_client/wcs_api-2.0/current/flashphoner.js"></script>
2. Import the SIP as RTMP script
<script type="text/javascript" src="sip-as-rtmp-min.js"></script>
3. Initialize the API on page load
<body onload="init_page()">
4. Add the field to enter a SIP called number
<input id="callee" type="text" placeholder="Callee SIP username"/>
5. Add the “Call” button to make an outgoing SIP call
<button id="callBtn">Call</button>
6. Add the button to end the call
<button id="hangupBtn">Hangup</button>
7. Add a div element, which will receive a link to play the video in a third-party player
<div id="rtmpurl"></div>
The full HTML code of the page looks like this:
<!DOCTYPE html>
<html lang="en">
<head>
    <meta charset="UTF-8">
	<script type="text/javascript" src="https://flashphoner.com/downloads/builds/flashphoner_client/wcs_api-2.0/current/flashphoner.js"></script>
    <script type="text/javascript" src="sip-as-rtmp-min.js"></script>

</head>
<body onload="init_page()">
	<input id="callee" type="text" placeholder="Callee SIP username"/>
	<br>
    <button id="callBtn">Call</button>
	<button id="hangupBtn">Hangup</button>
	<br>
	<div id="rtmpurl"></div>
</body>
</html>

JavaScript
1. Create global variable for the REST query URL, RTMP server URL and the name of the republished video
var url = "http://demo.flashphoner.com:8081/rest-api/call";
var rtmpUrl = "rtmp://demo.flashphoner.com:1935/live";
var rtmpStream = "stream1";
2. In the function “init_page()”, we initialize the API, bind the functions to the events of clicking on the corresponding buttons
function init_page() {
    Flashphoner.init({});
    callBtn.onclick = call;
    hangupBtn.onclick = hangup;
}
3. The “call()” function forms and sends a REST call to organize an outgoing SIP call, capture the video stream and republish it to an RTMP server. Also, a link to play the stream is generated and displayed on the web page. To work correctly, enter your details here to connect to your SIP server
function call() {
    fetchUrl = url + "/startup";
    const options = {
        method: "POST",
        headers: {
            "Content-Type": "application/json"
        },
        body: JSON.stringify({
            "callId": "123456",
            "callee": document.getElementById("callee").value,
			"rtmpUrl": rtmpUrl,
			"rtmpStream":rtmpStream,
            "hasAudio": "true",
            "hasVideo": "true",
            "sipLogin": "10001",
            "sipAuthenticationName": "10001",
            "sipPassword": "Abcd_1111",
            "sipDomain": "p21.flashphoner.com",
            "sipOutboundProxy": "p21.flashphoner.com",
            "sipPort": "5060",
            "appKey": "defaultApp",
            "sipRegisterRequired": "true"
        }),
    }
    fetch(fetchUrl, options)
    var sipToRtmpUrl = rtmpUrl + "/rtmp_" + rtmpStream;
    document.getElementById("rtmpurl").textContent = sipToRtmpUrl;
}
4. Function “hangup()” generates a REST call to end the ongoing outbound SIP call
function hangup() {
    fetchUrl = url + "/terminate";
    const options = {
        method: "POST",
        headers: {
            "Content-Type": "application/json"
        },
        body: JSON.stringify({
            "callId": "123456",
        }),
    }
    fetch(fetchUrl, options)
}
Full JavaScript code looks like this:
var url = "http://demo.flashphoner.com:8081/rest-api/call";
var rtmpUrl = "rtmp://demo.flashphoner.com:1935/live";
var rtmpStream = "stream1";

function init_page() {
    Flashphoner.init({});
    callBtn.onclick = call;
    hangupBtn.onclick = hangup;
}

function call() {
    fetchUrl = url + "/startup";
    const options = {
        method: "POST",
        headers: {
            "Content-Type": "application/json"
        },
        body: JSON.stringify({
            "callId": "123456",
            "callee": document.getElementById("callee").value,
			"rtmpUrl": rtmpUrl,
			"rtmpStream":rtmpStream,
            "hasAudio": "true",
            "hasVideo": "true",
            "sipLogin": "10001",
            "sipAuthenticationName": "10001",
            "sipPassword": "Abcd_1111",
            "sipDomain": "p21.flashphoner.com",
            "sipOutboundProxy": "p21.flashphoner.com",
            "sipPort": "5060",
            "appKey": "defaultApp",
            "sipRegisterRequired": "true"
        }),
    }
    fetch(fetchUrl, options)
    var sipToRtmpUrl = rtmpUrl + "/rtmp_" + rtmpStream;
    document.getElementById("rtmpurl").textContent = sipToRtmpUrl;
}

function hangup() {
    fetchUrl = url + "/terminate";
    const options = {
        method: "POST",
        headers: {
            "Content-Type": "application/json"
        },
        body: JSON.stringify({
            "callId": "123456",
        }),
    }
    fetch(fetchUrl, options)
}
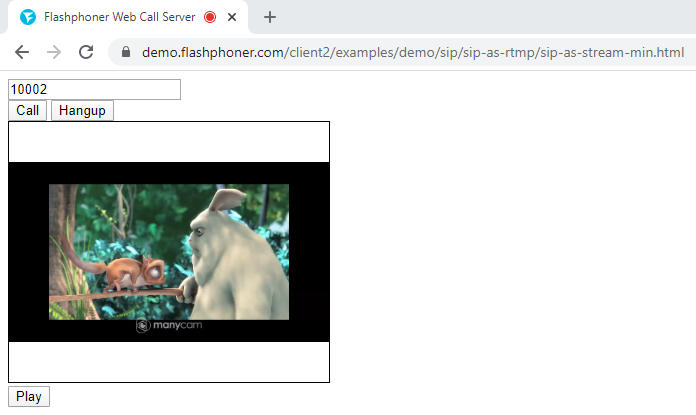
Page view while making a call

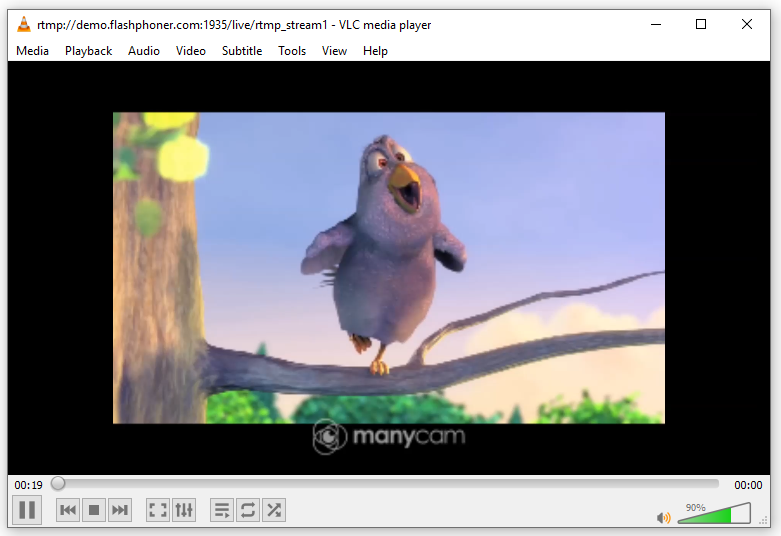
The RTMP stream is played in a third-party player (VLC Media Player)

Download Web Call Server 5
System requirements: Linux x86_64, 1 core CPU, 2 Gb RAM, Java
Installation:
- wget https://flashphoner.com/download-wcs5.2-server.tar.gz
- Unpack and install using 'install.sh'
- Launch server using command 'service webcallserver start'
- Open the web interface https://host:8444 and activate your license
If you are using Amazon EC2, you don't need to download anything.

