Recently we wrote about how to share a screen in the Google Chrome browser. As a result, we created our own screensharing extension, published it on Chrome Store and tested screen broadcasting using Web Call Server in the one-to-many mode.
In this article, we will try the same using the Firefox browser. The approach is the same, and again we need to pack and publish the extension, but this time we will publish it on Mozilla Add-ons. As a result, we will be able to make screencasts of video streams from FF without installing any third-party software.
Preparing the code of the extension for FF
Currently, there are two ways to prepare an FF extension:
The first way allows making an extension for Firefox browsers starting from version 45. The second way suggests building an xpi-file and suits all FF browsers starting from version 38.
Mozilla threatens to make the JPM based way deprecated. Nevertheless, we still describe this method because we tested it and it works. You can also refer to the documentation of WebExtension to make your add-on in a newer way. Most likely, packing and publishing remain very similar to what’s described here.
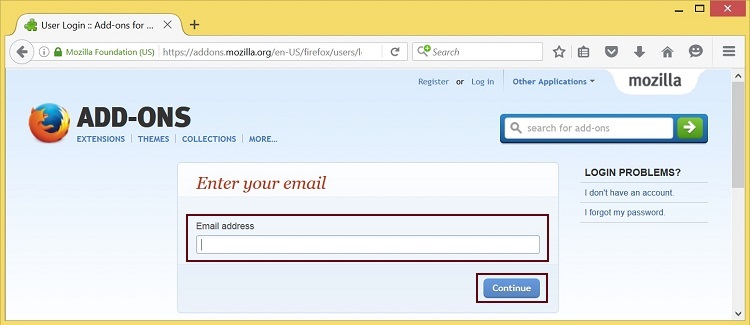
Create an account (if you don’t have one) at Firefox Accounts and go to Mozilla Add-ons
Download the source code of the extension which is basically several config files and icons.
Source code of the FF extension
Then, open the package.json configuration file and edit it to use with your own domain.
The initial config looks as follows:
{
  "title": "Flashphoner Screen Sharing",
  "name": "flashphoner-screen-sharing-extension",
  "id": "@flashphoner-screen-sharing-extension",
  "version": "0.0.4",
  "description": "Enable screen sharing for flashphoner.com",
  "main": "index.js",
  "author": "Flashphoner",
  "engines": {
    "firefox": ">=38.0a1",
    "fennec": ">=38.0a1"
  },
  "homepage": "https://flashphoner.com",
  "license": "MIT"
}
You need to substitute your own data, like this:
{
  "title": "My Screen Sharing Extension",
  "name": "my-screen-sharing",
  "id": "@my-screen-sharing",
  "version": "0.0.1",
  "description": "Enable screen sharing for mymegacat.com",
  "main": "index.js",
  "author": "Me",
  "engines": {
    "firefox": ">=38.0a1",
    "fennec": ">=38.0a1"
  },
  "homepage": "https://mymegacat.com",
  "license": "MIT"
}
Please note that we used mymegacat.com, the supposed domain of your website that should broadcast the screen (screencast).
Packing the screensharing extension
Then, we need to pack the source code of the extension to an .xpi-file. Here is where JPM comes to rescue. Packing is done on Windows.
1. Download and install Node.js + npm from this website: https://nodejs.org. Installing Node.js may require a reboot.
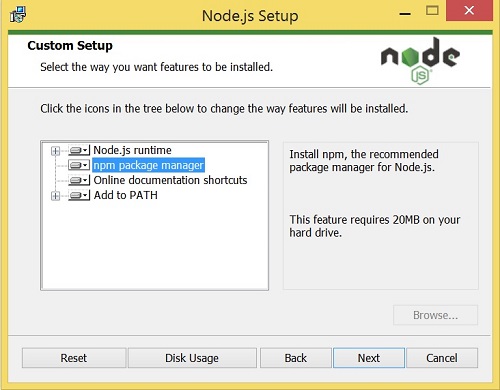
2. Make sure NPM installed correctly.
npm -v

3. Install JPM
npm install jpm –global
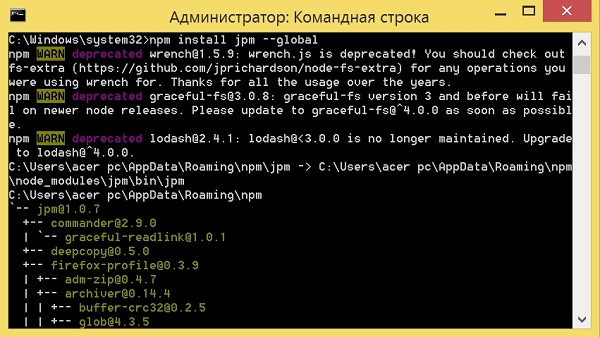
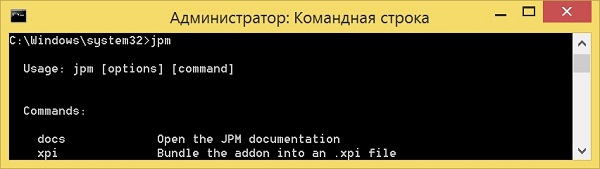
4.Check if JPM is installed
jpm
5. Create an XPI-file using JPM. To do this, go to the previously downloaded folder firefox-extension and execute the command
jpm xpi
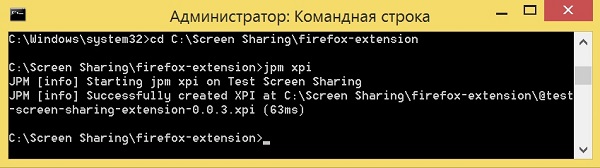
Done.
Finally, we received the XPI-file of the extension ready to be published on Mozilla Add-ons.
Publishing the extension on Mozilla Add-ons
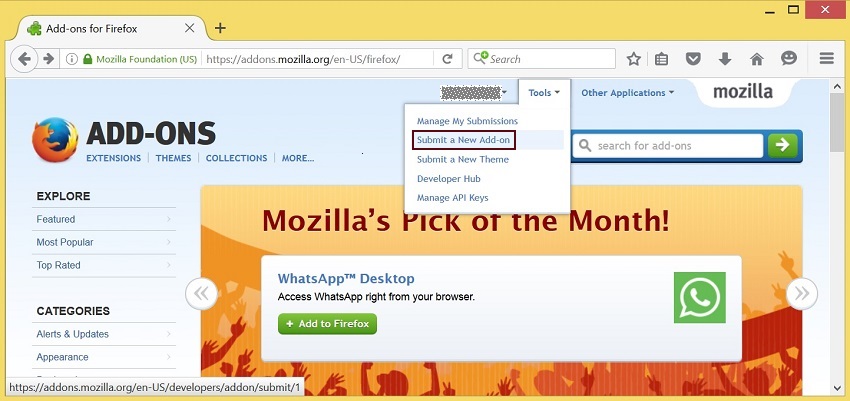
- At first, we login to Mozilla Add-ons and switch to the Tools / Submit a New Add-on menu.
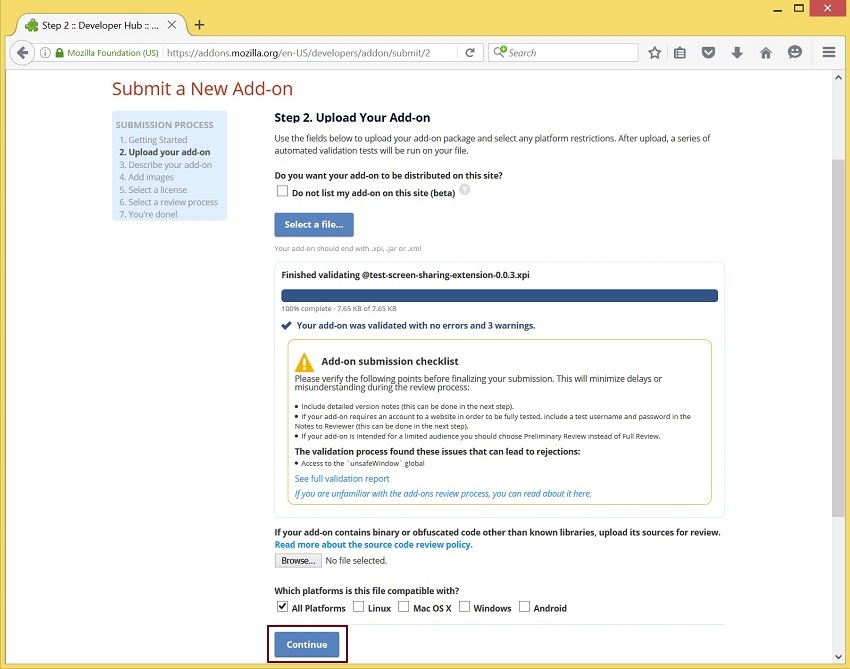
- Upload our XPI-file.
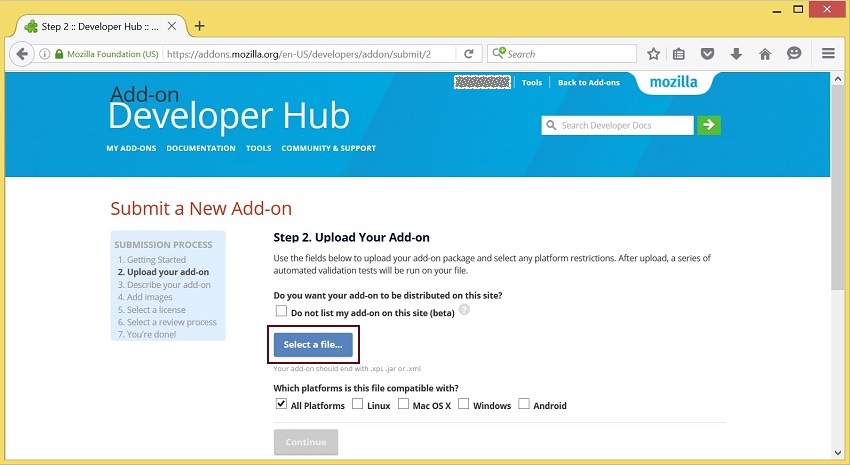
- After uploading and validation of your extensions, click Continue.
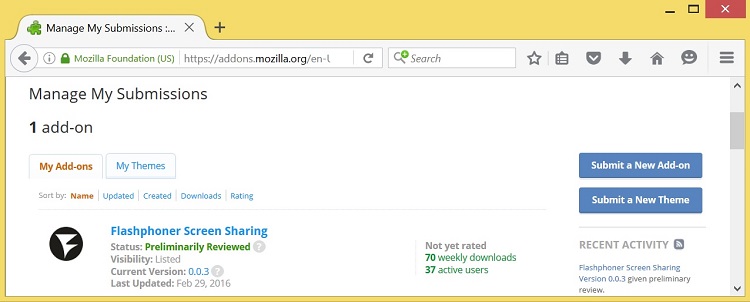
- You can manage your extensions in Tools / Manage My Submissions
You can learn more about distribution and signing your extensions here.
Prepare an HTML page for screencasting from Firefox
Screencasting in Firefox works via the WebRTC technology just like as in Google Chrome. As a WebRTC platform to broadcast video streams captured from the screen, we use Web Call Server 5 and the flashphoner.js script that offers API to work with the server and is a part of Web SDK.
The source code of screencasting extension contains:
- screen-sharing-ff.html
- screen-sharing-ff.js
- flashphoner.js
- flashphoner_screen_sharing-0.0.9-an+fx.xpi
You need to use your own XPI-file of the extension you created earlier using JPM.
The HTML code of the page is simple, containing merely 20 lines:
Screen Sharing
Capture
Preview
The page uses two scripts: screen-sharing-ff.js and flashphoner.js
Upon loading the page, the initialization function init_page() is invoked.
The installExtensionButton button is for quick installing the extension.
The localVideo div block is used to display the video from the screen captured locally.
The remoteVideo div block is used to display broadcast received from the server. For instance, if we want a player on the separate page, we can use only the remoteVideo div block. In this specific example we place the player and the streamer on the same page for the sake of simplicity.
Finally, the publishBtn starts broadcasting.
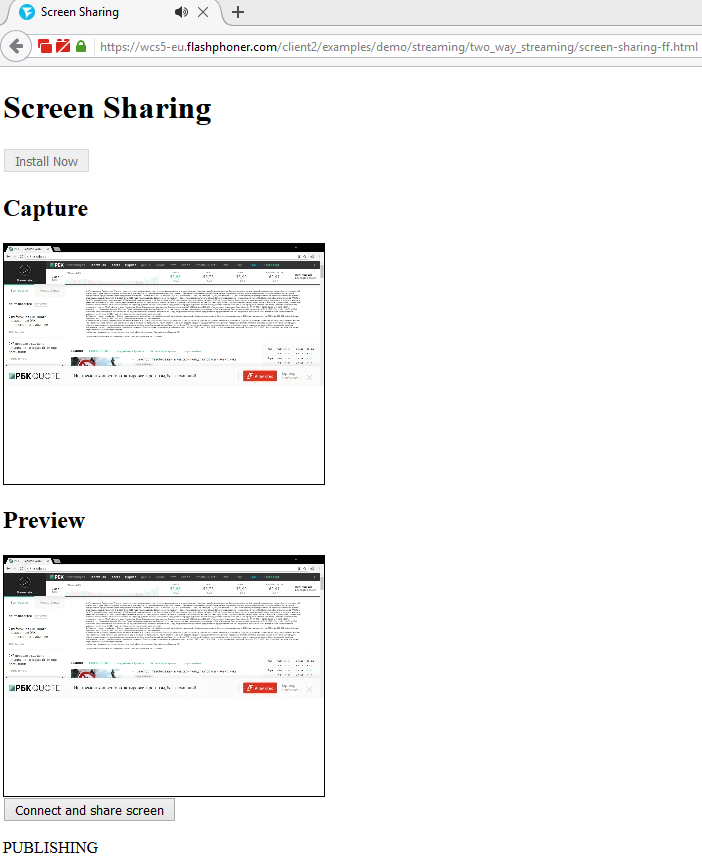
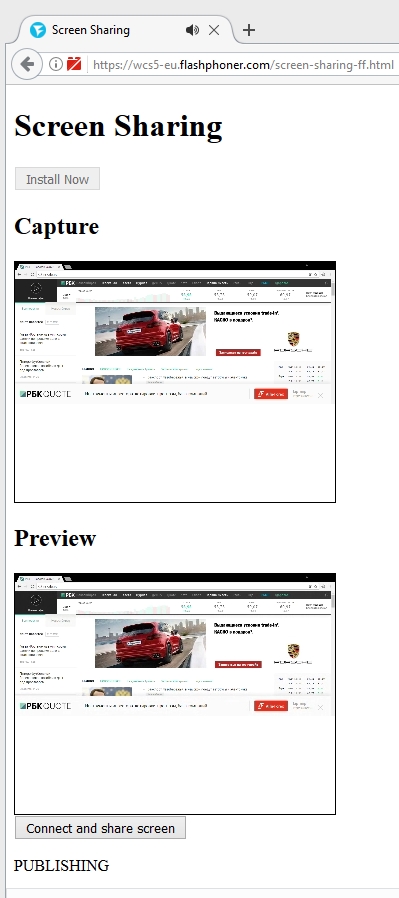
Below is how an HTML page with screencasting looks in the Mozilla Firefox 51.0.1 browser.
Now, let’s take a look at the screen-sharing-ff.js script and see what’s going on inside it.
var SESSION_STATUS = Flashphoner.constants.SESSION_STATUS;
var STREAM_STATUS = Flashphoner.constants.STREAM_STATUS;
var localVideo;
var remoteVideo;

function init_page() {
    //init api
    try {
        Flashphoner.init();
    } catch (e) {
        //can't init
        return;
    }
    var interval = setInterval(function() {
        if (Flashphoner.firefoxScreenSharingExtensionInstalled) {
            document.getElementById("installExtensionButton").disabled = true;
            clearInterval(interval);
            localVideo = document.getElementById("localVideo");
            remoteVideo = document.getElementById("remoteVideo");
        }else{
            document.getElementById("installExtensionButton").disabled = false;
        }
    }, 500);
}

function connectAndShareScreen() {
    var url = "wss://wcs5-eu.flashphoner.com:8443";
    console.log("Create new session with url " + url);
    Flashphoner.createSession({urlServer: url}).on(SESSION_STATUS.ESTABLISHED, function (session) {
        //session connected, start streaming
        startStreaming(session);
    }).on(SESSION_STATUS.DISCONNECTED, function () {
        setStatus(SESSION_STATUS.DISCONNECTED);
    }).on(SESSION_STATUS.FAILED, function () {
        setStatus(SESSION_STATUS.FAILED);
    });

}

function startStreaming(session) {
    var streamName = "test123";
    var constraints = {
        video: {
            width: 320,
            height: 240,
            frameRate: 10,
            type: "screen"
        }
    };
    session.createStream({
        name: streamName,
        display: localVideo,
        constraints: constraints
    }).on(STREAM_STATUS.PUBLISHING, function (publishStream) {
        setStatus(STREAM_STATUS.PUBLISHING);
        //play preview
        session.createStream({
            name: streamName,
            display: remoteVideo
        }).on(STREAM_STATUS.PLAYING, function (previewStream) {
            //enable stop button
        }).on(STREAM_STATUS.STOPPED, function () {
            publishStream.stop();
        }).on(STREAM_STATUS.FAILED, function () {
            //preview failed, stop publishStream
            if (publishStream.status() == STREAM_STATUS.PUBLISHING) {
                setStatus(STREAM_STATUS.FAILED);
                publishStream.stop();
            }
        }).play();
    }).on(STREAM_STATUS.UNPUBLISHED, function () {
        setStatus(STREAM_STATUS.UNPUBLISHED);
        //enable start button
    }).on(STREAM_STATUS.FAILED, function () {
        setStatus(STREAM_STATUS.FAILED);
    }).publish();
}

//show connection or local stream status
function setStatus(status) {
    var statusField = document.getElementById("status");
    statusField.innerHTML = status;
}

//install extension
function installExtension() {
    var params = {
        "Flashphoner Screen Sharing": { URL: "../../dependencies/screen-sharing/firefox-extension/flashphoner_screen_sharing-0.0.9-an+fx.xpi",
            IconURL: "../../dependencies/screen-sharing/firefox-extension/icon.png",
            Hash: "sha1:96699c6536de455cdc5c7705f5b24fae28931605",
            toString: function () { return this.URL; }
        }
    };
    InstallTrigger.install(params);
}
The operation of this script is thoroughly described in the previous article that covered screencasting in Google Chrome.
Hence, we simply focus on differences specific to Firefox. There are three of them:
- We don’t pass anything during initialization here, while for Chrome we passed the ID of the extension. For FF we pass it in another part of the script.
Flashphoner.init();
- Checking if the extension is installed is also slightly different from how it’s done in Chrome. We check the Flashphoner.firefoxScreenSharingExtensionInstalled flag.
var interval = setInterval(function() { if (Flashphoner.firefoxScreenSharingExtensionInstalled) { document.getElementById("installExtensionButton").disabled = true; clearInterval(interval); localVideo = document.getElementById("localVideo"); remoteVideo = document.getElementById("remoteVideo"); }else{ document.getElementById("installExtensionButton").disabled = false; } }, 500); - The extension installation code executed on clicking the installExtensionButton button is also different from the extension installation code in Chrome. Specifically, it uses the XPI-file of the extension directly, while in Chrome we placed a link to Chrome Store. Please note that instead of Flashphoner Screen Sharing your own name of the extension must be specified, the one you specified earlier in package.json when you packed the extension.
function installExtension() {
    var params = {
        "Flashphoner Screen Sharing": { URL: "../../dependencies/screen-sharing/firefox-extension/flashphoner_screen_sharing-0.0.9-an+fx.xpi",
            IconURL: "../../dependencies/screen-sharing/firefox-extension/icon.png",
            Hash: "sha1:96699c6536de455cdc5c7705f5b24fae28931605",
            toString: function () { return this.URL; }
        }
    };
    InstallTrigger.install(params);
}
As a result, taken into account these three differences, we’ve got a working script screen-sharing-ff.js that is ready to install the extension and run screencasting in FireFox.
Preparing to test WebRTC screensharing in FF
To test our setup, you need to upload these scripts to your server:
- screen-sharing-ff.html
- screen-sharing-ff.js
- flashphoner.js
- flashphoner_screen_sharing-0.0.9-an+fx.xpi
The script should use your own XPI-file.
Everywhere on the hosting and in the scripts you should use your domain name (remember, in our example we specified mymegacat.com when packed the extension).
As a WebRTC platform to run screencasting, we use Web Call Server 5 that accepts Websockets connections and can be installed both on an individual VPS / VDS, and on the same server with the website.
To connect to the server we need a Websocket address in the following form:
wss://wcs5-eu.flashphoner.com:8443
In the screen-sharing-ff.js script this address is hard-coded. This is a demo server.
You can setup your own server or run a pre-configured instance on Amazon EC2.
Testing screencasting from FF and broadcasting the stream via the server
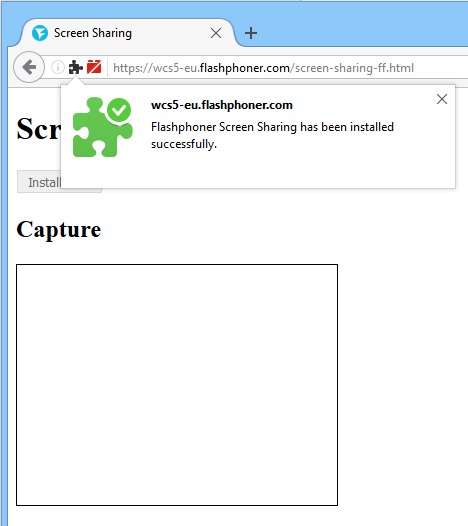
- Open the screen-sharing-ff.html page in the FireFox browser and click the Install Now button that is active unless the extension is installed.
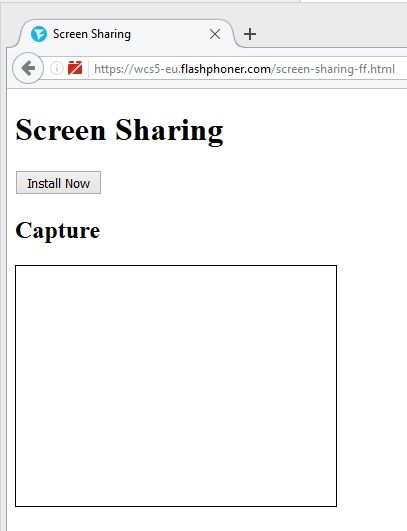
- Further, confirm installation of the extension. You should see a confirmation message. The Install Now button becomes disabled then, because our script screen-sharing-ff.js sees that the extension is already installed and there is no need in this button any more.
- Click the Connect and share screen button to start testing.
Firefox asks which window we would like to screencast, then it sends the video stream to Web Call Server and displays it in the localVideo div block of the HTML page.
Below the button, you will see the PUBLISHING status. This means the video is captured from the screen and the video traffic goes to the server.
In a few seconds, the video received from the server starts playing in the player – the remoteVideo block. This is a video that passed to the server, and returned for playback. The same way you can play a live video on other pages ending up with a one-to-many broadcasting or screencasting.
References
Screensharing on a website from the Google Chrome browser via WebRTC
Packing the extension for Firefox using JPM
Firefox Accounts – create an account
Mozilla Add-ons – publish your extension
Source code of the extension to pack in JPM
Node.js – quick installation of NPM and JPM
Information about distribution and signing of extensions on the Mozilla official website
Web Call Server 5 – a platform for rebroadcasting of video streams using WebRTC
Web SDK – a set of API scripts including flashphoner.js to work with the server
Installing WCS5 to your own server
How to run an instance of Web Call Server in the Amazon EC2 cloud
Download the source code of the test page screen-sharing-ff.html and screen-sharing-ff.js