First of all, a few words about Amazon AWS Marketplace. Unlike Google Play and App Store, where mobile applications are published, AWS is a store where developers publish server-side solutions. There’s a lot of interesting here starting from free stack LAMP to server Enterprise solutions like SAP.
The berries in working with the market is simplicity and convenience of deployment. The required application server is most often already configured and will be started with the EC2 instance (a virtual Amazon EC2 server) itself. The instance start from the web interface and does not require any additional administration knowledge or skills.
Linux administration skills may be required later, though, during the operation. But nevertheless, you must admit there is some pleasure in just going right to the start skipping all the installing and configuring completely and saving a few hours for troubleshooting and possible tinkering and walking on rakes. As a result, we receive a live server with all required functionality already set up and working.

Later, we can login to the server via SSH to check settings, file system and so on. As a result, we have full control over the server and a bunch of saved time.
Of course, to work with AWS Marketplace you need an account at Amazon Web Services. Luckily, many developers and IT specialists already have one. And if no, you can get it right on the AWS website.
WebRTC media server
As you know, WebRTC is a technology to capture, play and transmit audio and video data on browsers and mobile platforms. With WebRTC you can implement online broadcasts, video chats, video calls, conferences, internet radio and many other projects where you need RTC – real-time communication with low latency.

WebRTC media servers further extend possibilities of the WebRTC technology that normally works as Peer-to-Peer and have some technical limitations.
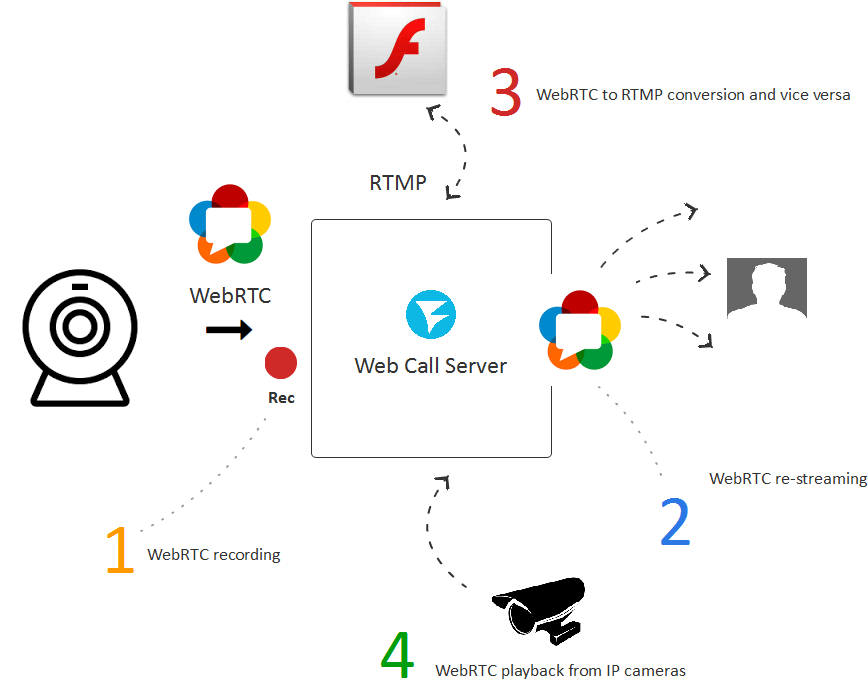
The media server can be used for:
- Record a WebRTC video stream on the server
- Rebroadcast a video stream
- Transcode a video stream
- Convert the format of a stream, for example, from WebRTC to RTMP or HLS
- Make snaphots from a video stream
- Play a WebRTC video stream from IP cameras
- and more
In this article we show how to run a WebRTC server on the Amazon AWS platform in literally two clicks and how to test several examples of processing video received via WebRTC.
Web Call Server
We will test Web Call Server. This WebRTC media server supports WebRTC, RTMP, RTSP and other protocols to work with real-time video.
Directly upon startup, we try to test several intrinsic media server functions such as recording, rebroadcasting, conversion to RTMP and playing from the IP camera.
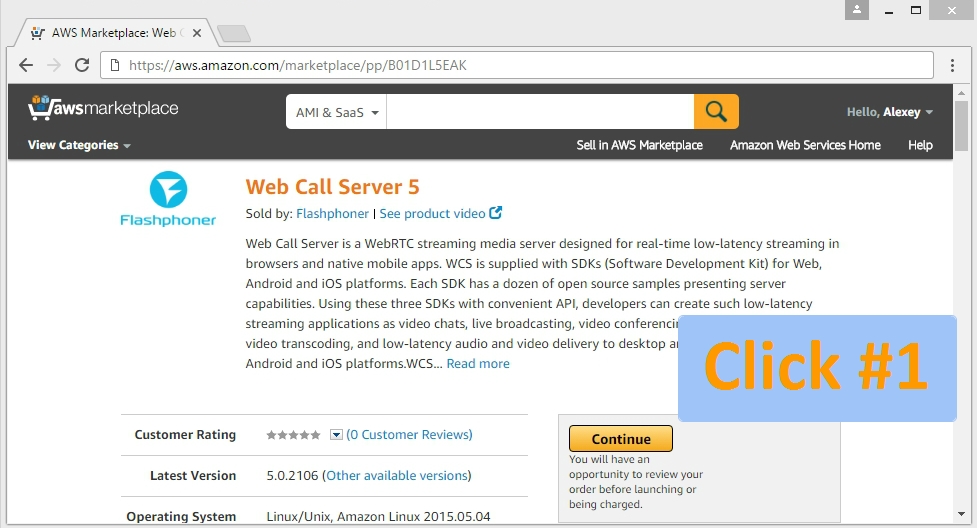
AWS Marketplace listing
Above, we mentioned that we need a login to the AWS service. Listing is a server application page on the market.
Listing of Web Call Server is available at this link and looks as follows. Note the yellow button Continue – this is out first click.
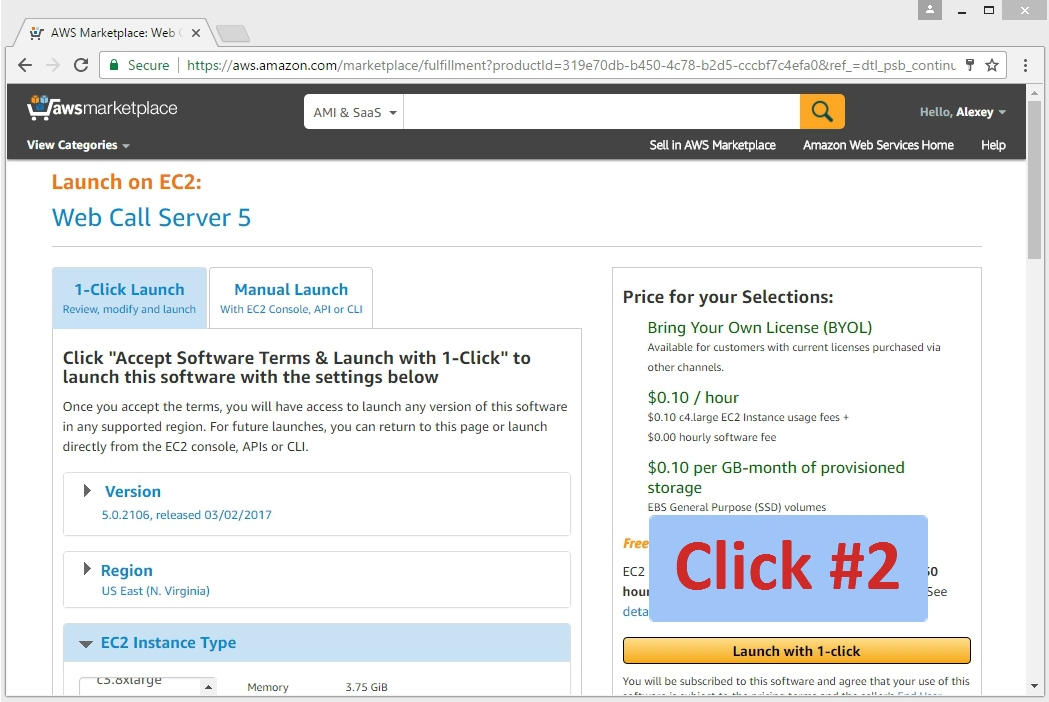
The next page provides a full description of the service and allows selecting appropriate CPU and memory resources for the instance and adjust the list of opened ports.
Or you can leave everything unchanged and simply click Launch with 1 click.
Amazon instances are well-known for one-click creating and terminating. So, even if you configured something wrong, or selected a wrong instance size, you simply terminate it and create it from scratch. This is a routine procedure that requires a couple of minutes.
Done
After the second click you will see a message indicating successful launch. Then, you have to wait a little while the instance is being set up, and all the required initialization procedures are running.

If you open EC2 Management Console and see the Instances section, you can find the below table:

This is our starting EC2 instance that has these addresses asigned to it:
DNS:	ec2-34-207-147-235.compute-1.amazonaws.com
IP:	34.207.147.235
Open the initial setup of the server in the Google Chrome browser:
https://ec2-34-207-147-235.compute-1.amazonaws.com:8888
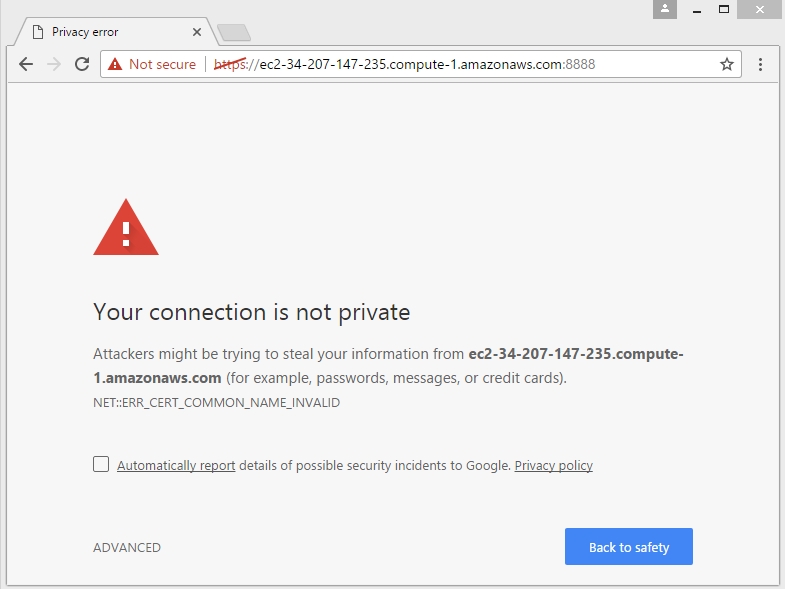
Chrome displays an unfriendly welcome and complains about SSL certificates. Indeed, only you can install certificates, and you must use your own domain for installing.
So we simply click ADVANCED / PROCEED and effectively tell Chrome browser to use certificates offered by the server.
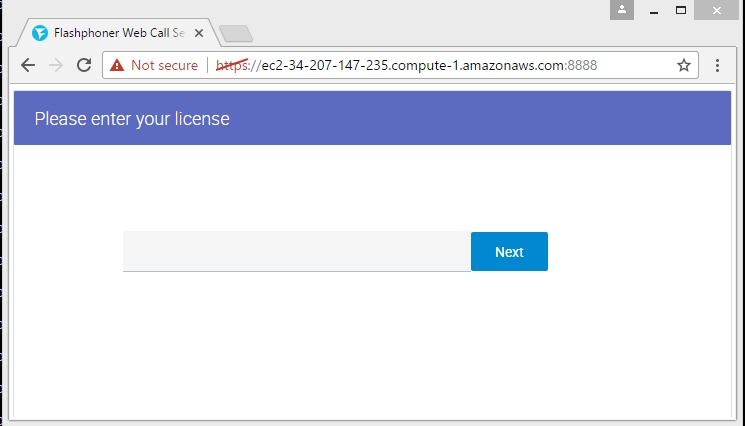
The next step is to enter the number of the free license for Web Call Server, you can receive here.
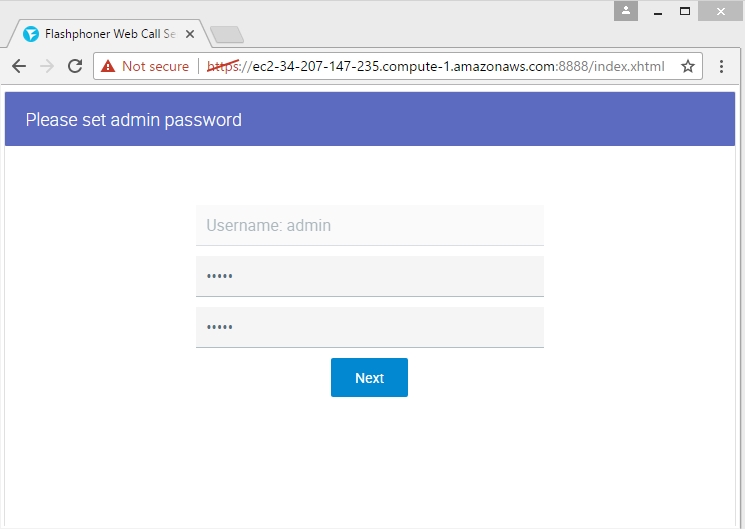
Then, you need to install the administrator password to enter the Dashboard of the server and authorize with the login and password.
Testing WebRTC recording
The initial setup of the server is finished, so we can start testing. To do this, log in to the Dashboard and open the test example.
For instance, WebRTC broadcasting with recording of a video stream looks as follows:
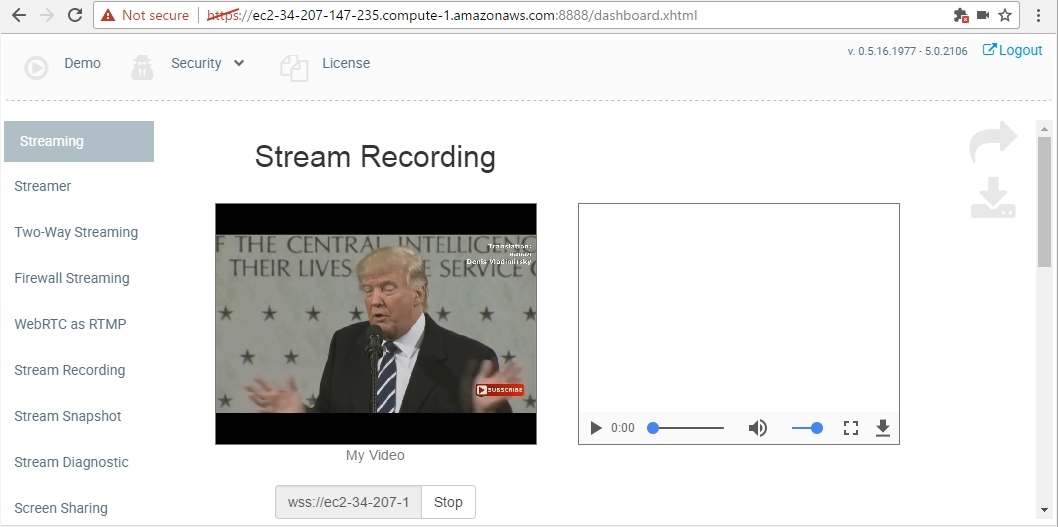
In the left part we capture the video from the web camera. The video is being recorded to the server and rebroadcast simultaneously. When the broadcast is stopped with the Stop button, the stream transmission to the server stops, and so does recording. In the right part, a link to download the file in the mp4 format appears.
Testing WebRTC rebroadcasting
Another useful application of the WebRTC media server is one-to-many rebroadcasting of a WebRTC stream. There’s a convenient Two Way Streaming for that.
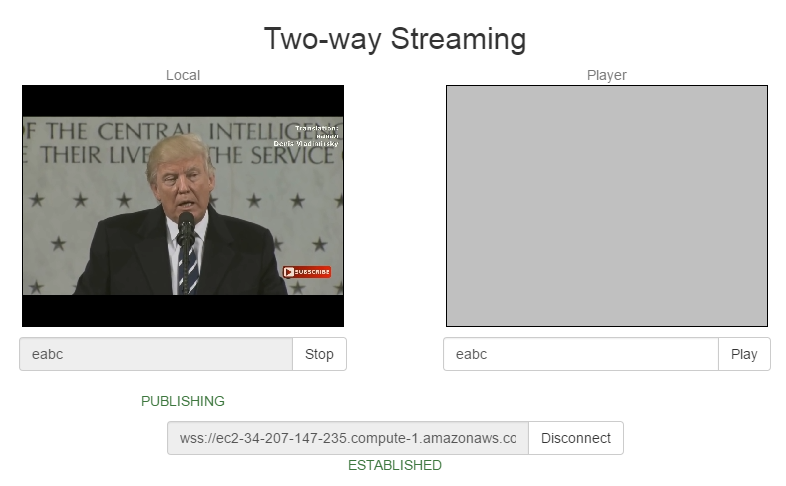
The screenshot above illustrates sending a video stream named eabc to the Amazon EC2 server via the WebRTC technology. This way you can specify the name of a video stream and play the stream by this name on the same page, in the right part by clicking the Play button, or Player in another example, such as this:

Since this is a rebroadcasting, you can open many player windows each of them playing the same WebRTC video stream.
WebRTC broadcasting from RTSP cameras
The server can take a stream from the IP camera and share it via WebRTC. To do this you need that the IP camera was accessible via the RTSP and supported H.264 and AAC codecs.
You can test this using the same Player except for the name of the video stream which should be the RTSP URL in this case.
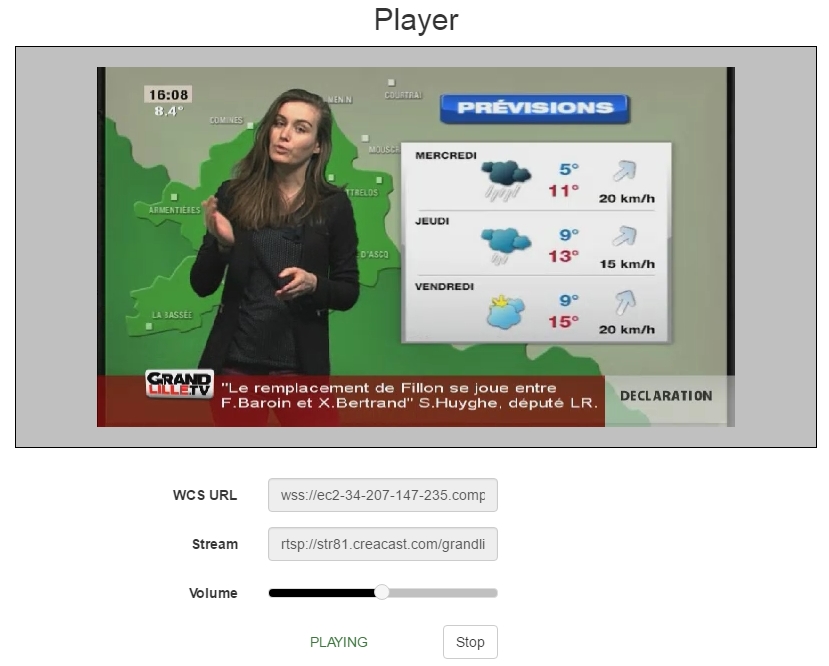
This example uses an RTSP stream fromn the source at: rtsp://str81.creacast.com/grandlilletv/high
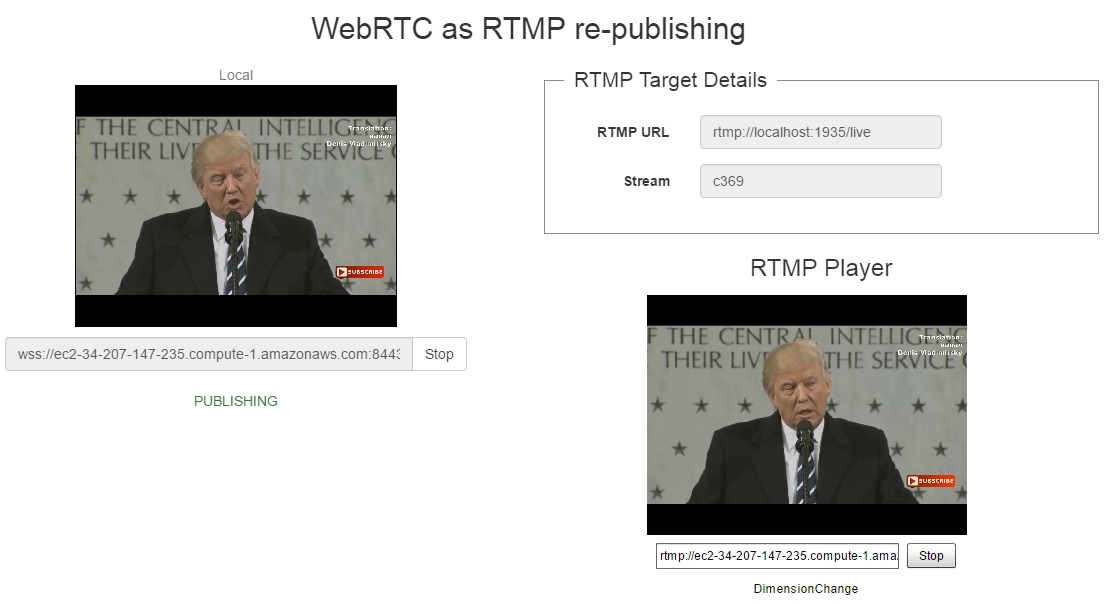
WebRTC rebroadcasting to RTMP
The final fourth example is rebroadcasting of a WebRTC stream with subsequent republishing via RTMP. It’s a well-known fact that despite widespread development of the WebRTC technology many online services still work on Flash, and the purpose of this conversion is to make a WebRTc stream available for Flash platforms and servers that does not support WebRTC.
The example is called WebRTC as RTMP re-publishing and it shows how you can send a stream on the server via WebRTC (left part), redirect it to the same server as RTMP and play it in Flash Player via RTMP (right part). All on the same page.
Therefore, we displayed such capabilities of the WebRTC media server as:
- WebRTC recording
- Rebroadcasting from a web camera
- Rebroadcasting from RTSP IP camera
- Broadcasting with conversion to RTMP
Web development
All examples we executed in the Dashboard are simple JavaScript + HTMLwith open source.
For instance, the source code of the Player is available here.
Operation of all of the above examples can be reduced down to three simple JavaScript functions.
1. Establishing connection.
This code establishes connection to the server via the Websocket protocol. As soon as the ESTABLISHED status is received, the session object allows invoking createStream() to send a video stream or play it.
Flashphoner.createSession({urlServer: "wss://ec2-34-207-147-235.compute-1.amazonaws.com:8443"}).on(Flashphoner.constants.SESSION_STATUS.ESTABLISHED, function (session) {
   //session connected, start streaming
}).on(Flashphoner.constants.SESSION_STATUS.DISCONNECTED, function () {
   //display status
}).on(Flashphoner.constants.SESSION_STATUS.FAILED, function () {
   //display status
});
2. Sending a video stream
To send a video stream to the server, use the stream.publish() method. As you can see from the code, at first we add event handlers to the newly created Stream, and then we invoke publish().
session.createStream({
name: "eabcd",
display: localVideo,
cacheLocalResources: true,
receiveVideo: false,
receiveAudio: false
}).on(Flashphoner.constants.STREAM_STATUS.PUBLISHING, function (publishStream) {
//display status
}).on(Flashphoner.constants.STREAM_STATUS.UNPUBLISHED, function () {
//display status
}).on(Flashphoner.constants.STREAM_STATUS.FAILED, function () {
//display status
}).publish();
3. Playing a video stream
To play a video stream invoke play(). The stream is played in the div-element with id=remoteVideo.
session.createStream({
name: "stream222",
display: remoteVideo,
cacheLocalResources: true,
receiveVideo: true,
receiveAudio: true
}).on(Flashphoner.constants.STREAM_STATUS.PLAYING, function (playStream) {
//display status
}).on(Flashphoner.constants.STREAM_STATUS.STOPPED, function () {
//display status
}).on(Flashphoner.constants.STREAM_STATUS.FAILED, function () {
//display status
}).play();
Therefore, to develop and adjust these examples you need a firm knowledge of JavaScript and HTML to embed these functions in the existing code of the page and to scripts.
You can find thorough documentation on web development of scripts to play and send video streams at this page: Web SDK for Web Call Server.
Administration
The instance received on AWS Marketplace is a simple Amazon EC2 instance, and it can be administered as standard via SSH.
To enter the server console via SSH, we can use Putty, for example.
1. Enter the IP address or the domain of the EC2 server to the Session menu.
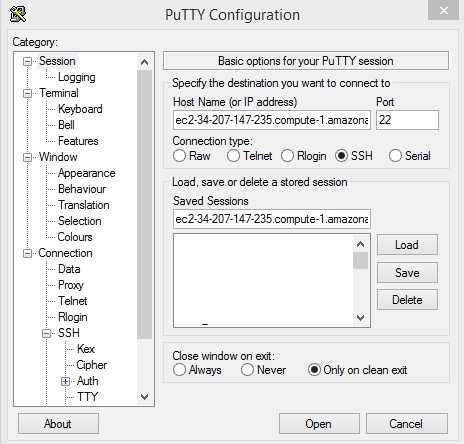
2. Set the standard user name ec2-user in the Connection / Data menu
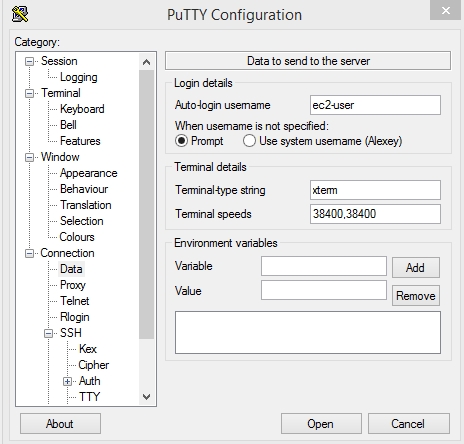
3. Specify the path to the private key file.
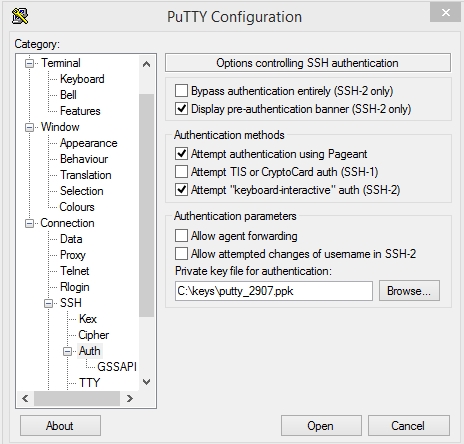
You can manage keys in the Amazon AWS account, in the Security settings. Most likely, since you already have an account, you already has at least one Security group and downloaded keys. If that is not so, refer to the Amazon AWS documentation to create or download your Private Key.
Then, we are in the Linux server console and can administer it.

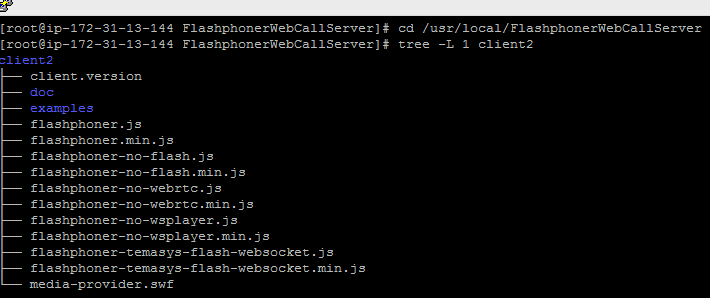
For exmaple, we can enter the folder with examples shown above and view files there. In particular, the Two Way Streaming example is located at:
/usr/local/FlashphonerWebCallServer/client2/examples/demo/streaming/two_way_streaming
And the whole tree of example files looks as follows:
cd /usr/local/FlashphonerWebCallServer
tree -L 1 client2
You can pack this examples and send to your web server, Apache or Nginx.
For example:
cd /usr/local/FlashphonerWebCallServer
tar -czf client2.tar.gz client2

It is worth reminding again that run tests via HTTPS, because in Chrome WebRTC does not work from unprotected pages (HTTP). Therefore, when you transfer examples to Apache or Nginx ensure these pages are available via HTTPS.
References
- AWS Web Services – Amazon AWS servers
- AWS Marketplace – Amazon AWS market
- Web Call Server – official website of the WebRTC media server Web Call Server
- Web Call Server Listing on Amazon Marketplace – Web Call Server listing on AWS
- Player – example of JavaScript / HTML code of the Player to play WebRTC
- Web SDK – JavaScript API to develop WebRTC web applications
- Putty – SSH client for Windows.
- AWS Security and key management – key management in AWS Marketplace