
Amazon S3 is a cloud file storage that many popular online services like Dropbox and Trello use. Even though there was a downtime in February 28, 2017 resulting in massive outages of online services even including fridges somewhere, S3 is, arguably, the most popular cloud-based storage today and millions of users, both individuals and businesses store their images, video, backups and other content there.
Web Call Server is a media server that supports the WebRTC technology and can record video streams from browsers and mobile devices. And HTML page in the browser or a mobile app can capture a video stream from the web camera and send it to the server for rebroadcasting and recording.
In this article we describe how you can record a video stream on a page opened in Google Chrome followed by sending the resulting mp4 file to the Amazon S3 storage.
Preparing S3 storage
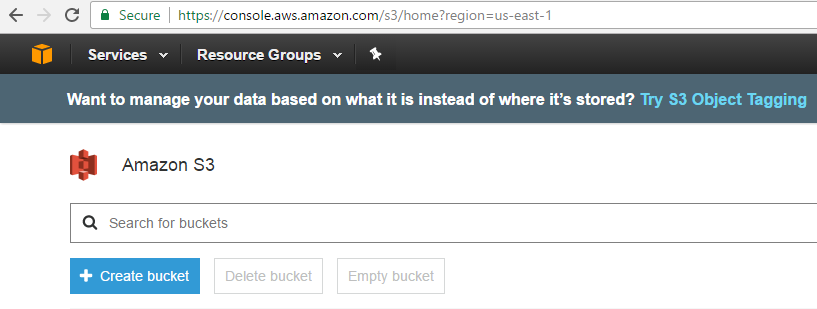
It took no time to prepare the S3 storage, because we already had an AWS account. To start working with the storage, we create a Bucket – it is a virtual folder where the files are stored to.
Login to S3 and click Create Bucket
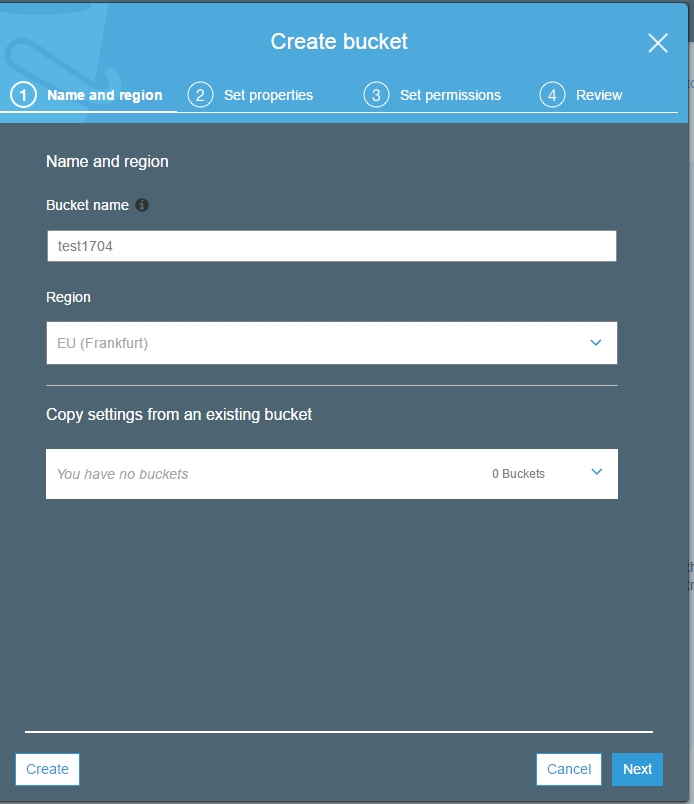
Select the EU region (Frankfurt) and one user (yourself) with permissions to read and write.
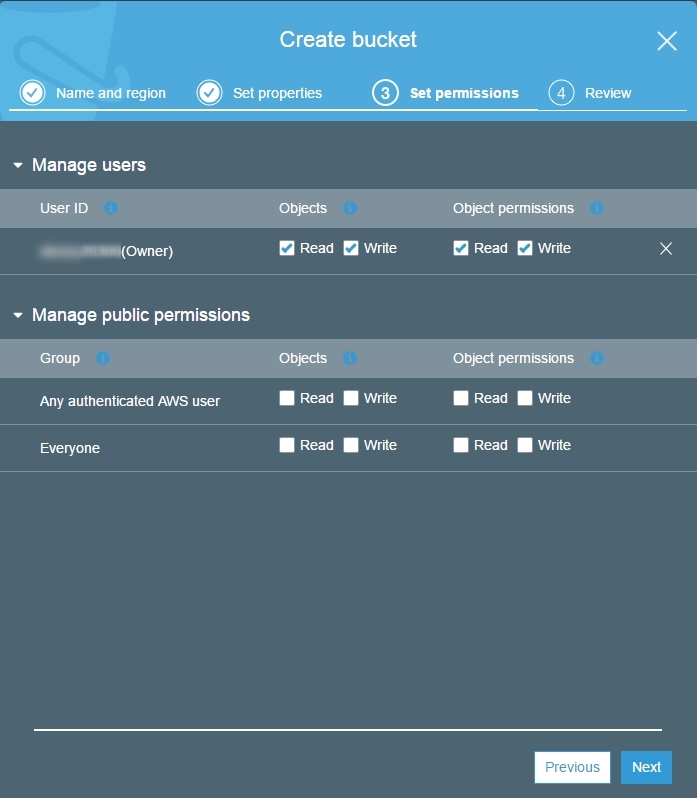
Then we can turn on various options. Here, we simply need recording, so all options are Disabled.

Further, we need to assign permissions. In our case they stay default too.
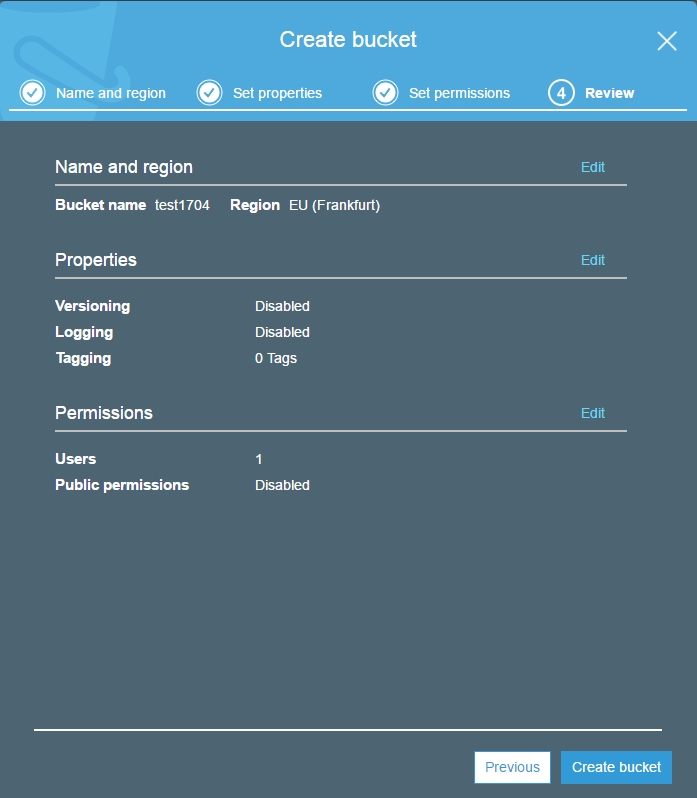
Done. We should verify information and click Next to proceed.
Therefore, in 4 steaps we created a cloud S3 storage where you can upload photos, backups and whatnot.
Recording a video stream from the browser
The video stream is broadcasted to the server from an HTML / JavaScript page and is recorded to the server as mp4.
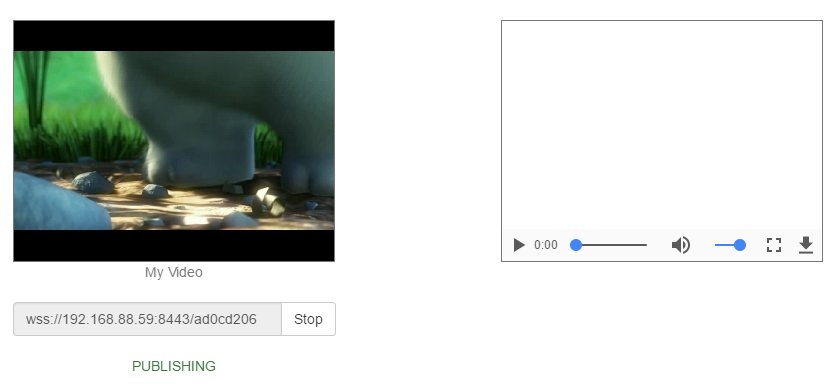
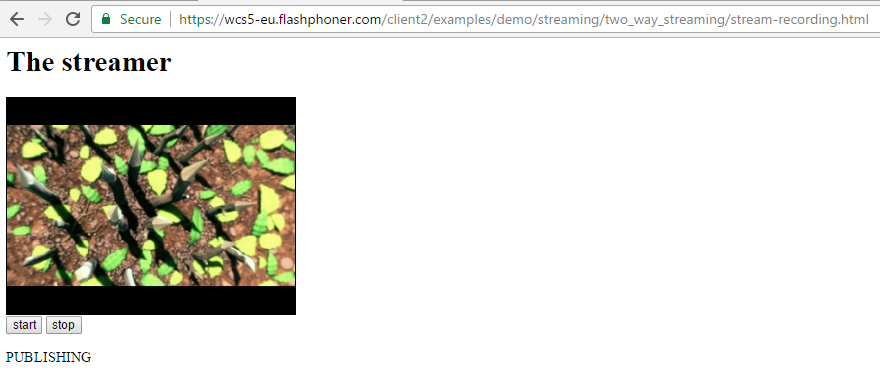
The screenshot below illustrates connection to the server via the wss (Websockets SSL) protocol, then the WebRTc video stream is sent to the server, and the PUBLISHING status is displayed.
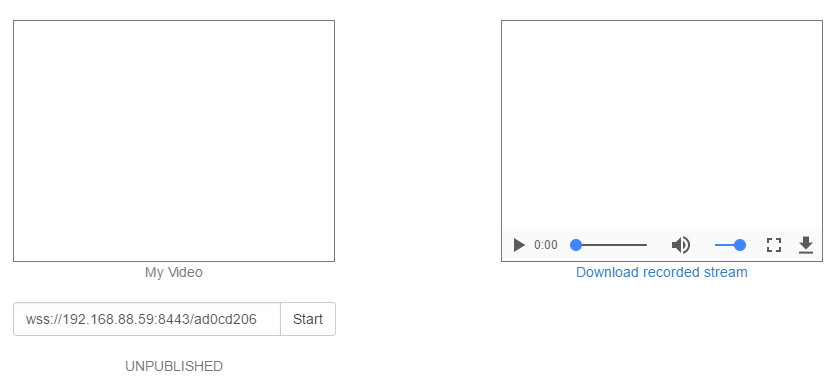
If you click Stop, broadcasting of the stream stops, and the server will records an mp4-file that you can instantly download using the link Download recorded stream.
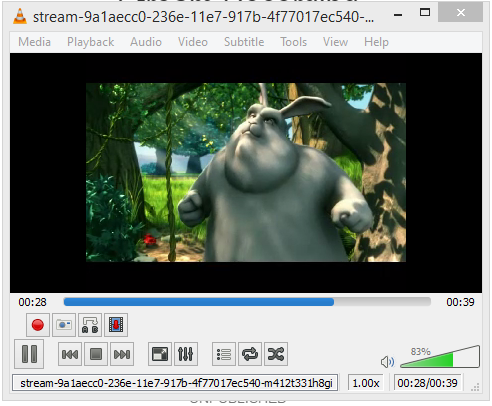
The downloaded file can be played in any media player. For instance, in VLC.
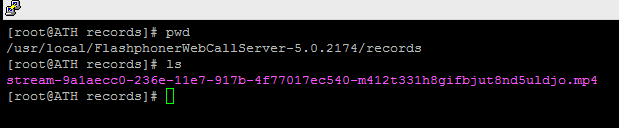
Also, the file can be found on the server in the /usr/local/FlashphonerWebCallServer/records folder.
Testing uploading to S3
First, let’s try uploading files to S3 with a simple bash script. Down the line you can pick any other suitable way or use specialized tools provided y AWS.
With quick googling we were able to find two scripts to upload files to Amazon S3: one and two.
The first one had problems, specifically:
The authorization mechanism you have provided is not supported. Please use AWS4-HMAC-SHA256.
The second script deals with the authentication problem, so we settled on it. We had to modify the script a little bit, and the modified version is here.
The modified script wotks as follows:
./S3-AWS4-Upload.sh /tmp/11/hellos3.txt
That is, it simply sends the specified file to the storage.
Modifications we made to the script:
1. We made it accept the path to the file as an argument
FILE_TO_UPLOAD=$1
STARTS_WITH=$(basename $FILE_TO_UPLOAD)
2. Set the working directory and take ACCESS KEY and SECRET KEY from that directory
WORK_DIR=/tmp/11
AWS_SECRET_KEY=$(cat $WORK_DIR/AWS_SECRET_KEY)
AWS_ACCESS_KEY=$(cat $WORK_DIR/AWS_ACCESS_KEY)
3. Moved the expiration date far to the future
EXPIRE="2018-01-01T00:00:00.000Z"
4. Added the .$REQUEST_REGION region to the path
-F "file=@"$FILE_TO_UPLOAD http://$BUCKET.s3.$REQUEST_REGION.amazonaws.com/
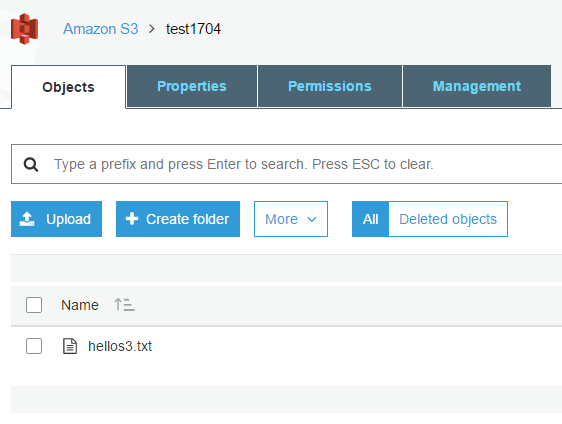
Hence, our working folder now has 4 files. Two of them are keys, and one more is the hellos3.txt file to test uploading.
/tmp/11
├── AWS_ACCESS_KEY
├── AWS_SECRET_KEY
├── hellos3.txt
└── S3-AWS4-Upload.sh
The key is generated in Account – My Security Credentials
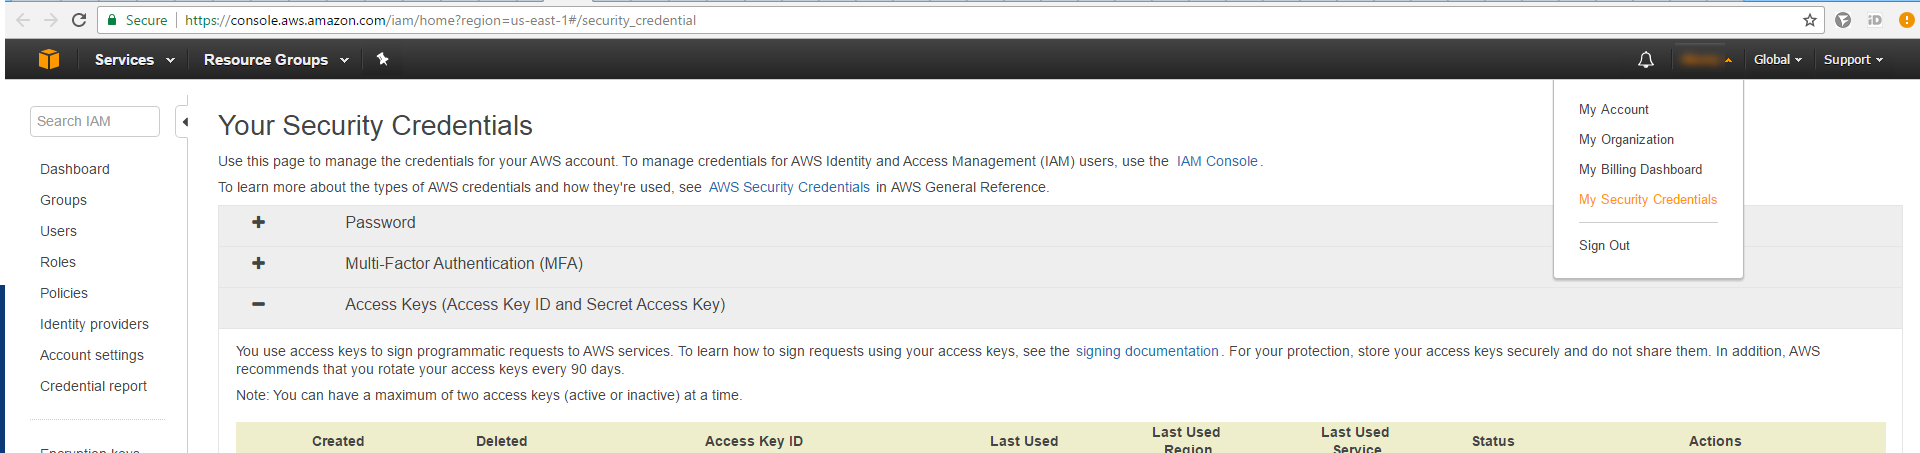
The keys look as follows:
Access Key ID:
BPIAI3TGFDI3ZPTABBIA
Secret Access Key:
RPnmmrUf5FOPs2as4XghOMfsbkatqSdUO16Um91r
When the script successfully finishes its work, we end up with hellos3.txt uploaded to S3. Then, it can be downloaded from here, shared and so on.
As a result we have successfully tested uploading a file to S3 using a simply bash script, so now we can send to S3 any other file if we know its full path.
Use hook to send the recorded video stream to Amazon S3
After the Stop button is clicked, sending of the video stream to the server stops, and an mp4 file is created on the server.

Then, the server invokes the bash script on_record_hook.sh and passes the path to the file to this script as the second parameter.
/usr/local/FlashphonerWebCallServer/bin/on_record_hook.sh
We change the script so that it would send the recorded file to Amazon S3 and added the corresponding message to the debug log:
STREAM_NAME=$1
FILE_PATH=$2

cd /tmp/11
./S3-AWS4-Upload.sh $FILE_PATH &&

echo "Record complete. Sent to S3. $FILE_PATH" >> /tmp/log.txt
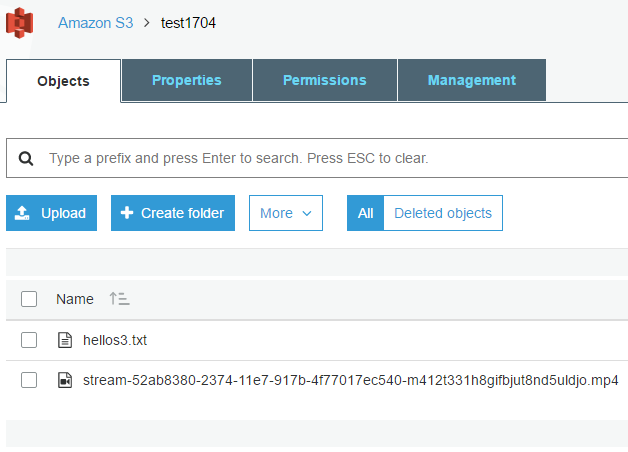
As a result, the list of files now contains the mp4 file, that is ready to download from S3 and watch.
Minimum HTML / JS code to record a video stream
The main element on the HTML page is the video capturing element localVideo. This is a simple div block that displays the video captured from the web camera.
stream-recording.html page
<html>
<head>
    <script language="javascript" src="https://flashphoner.com/downloads/builds/flashphoner_client/wcs_api-2.0/current/flashphoner.js"></script>
    <script language="javascript" src="stream-recording.js"></script>
</head>
<body onLoad="init()">
<h1>The streamer</h1>
<div id="localVideo" style="width:320px;height:240px;border: 1px solid"></div>
<input type="button" value="start" onClick="start()"/>
<input type="button" value="stop" onClick="stop()"/>
<p id="status"></p>
</body>
</html>
The stream-recording.js script consists of 48 lines.
var localVideo;
var stream;

function init(){
    Flashphoner.init();
    localVideo = document.getElementById("localVideo");
}

function stop(){
    stream.stop();
}

function start() {
    Flashphoner.createSession({urlServer: "wss://wcs5-eu.flashphoner.com:8443"}).on(Flashphoner.constants.SESSION_STATUS.ESTABLISHED, function (session) {
        //session connected, start streaming
        startStreaming(session);
    }).on(Flashphoner.constants.SESSION_STATUS.DISCONNECTED, function () {
        setStatus("DISCONNECTED");
    }).on(Flashphoner.constants.SESSION_STATUS.FAILED, function () {
        setStatus("FAILED");
    });
}

function startStreaming(session) {

    stream = session.createStream({
        name: "stream222",
        display: localVideo,
        cacheLocalResources: true,
        receiveVideo: false,
        receiveAudio: false,
        record: true
    });

    stream.on(Flashphoner.constants.STREAM_STATUS.PUBLISHING, function (publishStream) {
        setStatus(Flashphoner.constants.STREAM_STATUS.PUBLISHING);
    }).on(Flashphoner.constants.STREAM_STATUS.UNPUBLISHED, function (stream) {
        setStatus(Flashphoner.constants.STREAM_STATUS.UNPUBLISHED + " " + stream.getRecordInfo());
    }).on(Flashphoner.constants.STREAM_STATUS.FAILED, function () {
        setStatus(Flashphoner.constants.STREAM_STATUS.FAILED);
    });

    stream.publish();
}

function setStatus(status) {
    document.getElementById("status").innerHTML = status;
}
The script established a connection to the server and starts capturing video from the web camera and publishing the stream to the server when the Start button is clicked. When the Stop button is clicked, the stream finishes publishing and displays the name of the recorded file.
1. Establish a connection to the server using Flashphoner.createSession()
Flashphoner.createSession({urlServer: "wss://wcs5-eu.flashphoner.com:8443"});
2. Create a video stream with recording enabled: record: true and send the stream to the server using the stream.publish() method.
session.createStream({
        name: "stream222",
        display: localVideo,
        cacheLocalResources: true,
        receiveVideo: false,
        receiveAudio: false,
        record: true
    }).publish();
3. Display the name of the mp4 file when the broadcast stops and change the status to UNPUBLISHED
stream.on(Flashphoner.constants.STREAM_STATUS.UNPUBLISHED, function (stream) {
        setStatus(Flashphoner.constants.STREAM_STATUS.UNPUBLISHED + " " + stream.getRecordInfo());
    });
Overall, we need three files for successful streaming and recording of a video stream:
- stream-recording.html
- stream-recording.js
- flashphoner.js
Scripts can be downloaded here.
The flashphoner.js file is a part of the Web SDK for WCS.
Testing the video stream recording code
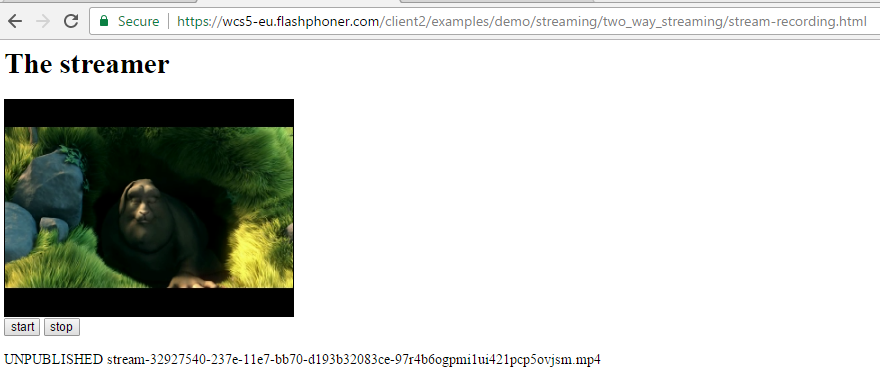
The recording process in the Google Chrome browser on the stream-recording.html page looks as follows:
After the video stream stops, we receive the name of the recorded file in the mp4 format.
This file is available on the server in the /usr/local/FlashphonerWebCallServer/records folder.
Besides, if the on_record_hook.sh script is correct, the same file is uploaded to Amazon S3.
In conclusion, we created am Amazon S3 storage, tested a simple bash script to upload files to that storage, and wrote HTML + JS code that captures a video stream from the camera and records it to the server, followed by uploading it to S3.
References
Amazon S3 – cloud file storage.
S3-AWS4-Upload.sh – the original bash script to upload a file to the storage.
S3 full – a full set of modified files to upload to Amazon S3.
Stream recording – html and js scripts for broadcasting to the server and recording from a browser.
Web SDK – a set of js scripts to work with video streams. Includes flashphoner.js used in this example.
Web Call Server – a WebRTC media server that supports recording video streams from a browser.