Embedding a browser-based SIP phone to a web page
To embed a browser phone to a website or project we need the simple HTML code and special dependence scripts that provide connection to Web Call Server and operation of the microphone.
Preparing to embedding the web phone to a web page
In order to embed the browser phone you need to prepare Web Call server and all necessary files and scripts
- Install Web Call Server to your hosting and import SSL certificates required to work with the WebRTC technology.
- If you experience difficulties installing the server, you can run a preconfigured one at virtual Web Call Server on Amazon Cloud and import the SSL certificate.
- Alternatively, you can connect to our demo servers: wss://wcs5-eu.flashphoner.com:8443 or wss://wcs5-us.flashphoner.com:8443
- Download the latest build with all necessary HTML and JavaScript code
- Unpack the build on your web server and open the files
- examples/min/phone/Phone-min.html See on Github
- examples/min/phone/Phone-min.js See on Github
These files do not require any changes and are the minimum code required to make an audio call. Below is the detail description of these files.
HTML and JavaScript code to make an audio call from a web page to SIP
Here are the main elements of the Phone-min.html and Phone-min.js scripts we use for a SIP call.
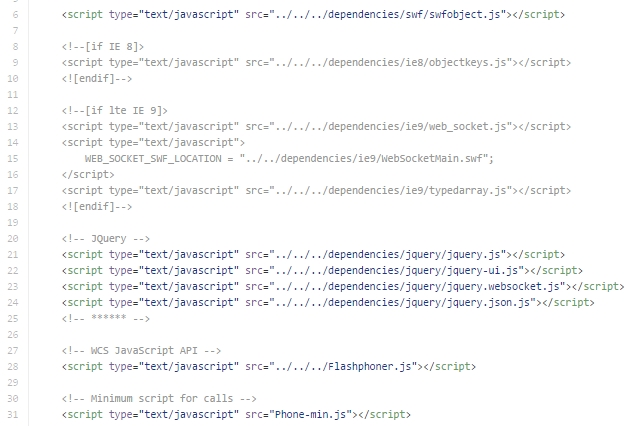
Phone-min.html
For correct work in all browsers including Chrome, Firefox,IE, Edge and other we need to add all required dependencies.
For example, dependencies on lines 8-18 allows audio calls to operate form IE8 and IE9 browsers using Flash.
The main API file is Flashphoner.js. This is a script that implements all server interaction.
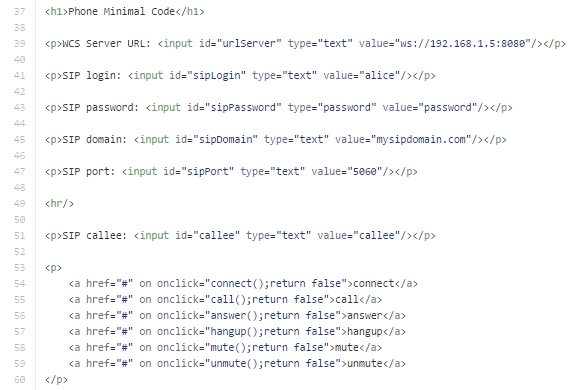
Below are the text fields containing minimum required data to connect to the SIP gateway: sipLogin, sipPassword, sipDomain, sipPort. The link block contains simple commands to control the connection and calls:
| connect | Establish connection to the server |
| call | Make a call |
| answer | Answer a call |
| hangup | Hang up a call |
| mute / unmute | Turn off/on the microphone |
These functions are implemented in the Phone-min.js script.
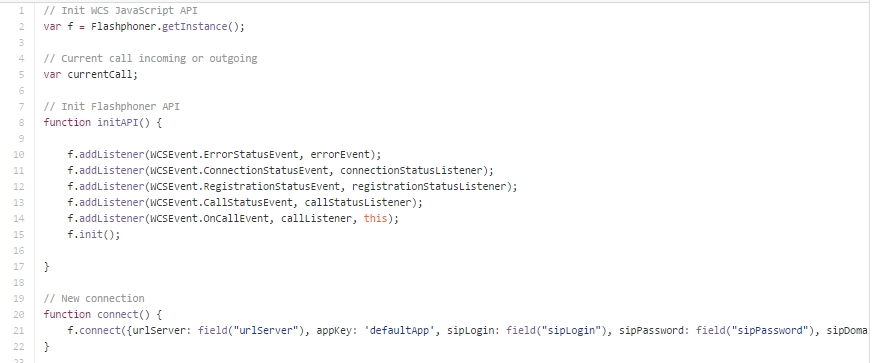
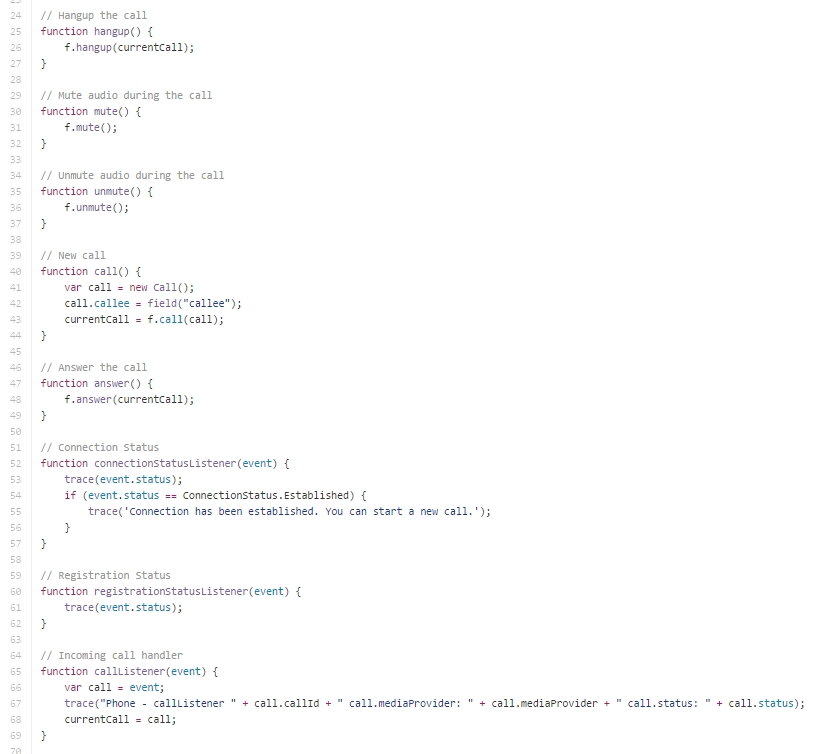
Phone-min.js
Initialization is a crucial part of the script. Here, we initialize the Flashphoner API abd main status handlers.
The connect function establishes connection to the server and sends all SIP data required for authorization on the SIP gateway.
Then, we see functions to manage the call and server connection state:
- Hangup
- Mute
- Unmute
- Call
- Answer
- connectionStatusListener
- registrationStatusListener
- callListener
The script is simplified as much as possible, so it doesn’t output any data on the screen. To learn about similar products, visit this website. Use Developer Tools / Console in the Google Chrome browser to see logs and obtain more information on script work.
The more complex script that includes handling of statuses and buttons of the web interface can be found here: examples/demo/phone. You can test this script in the Demo / Phone Min section at https://wcs5-us.flashphoner.com:8888
The minimalistic script is available at examples/demo/phone-ui. Testing of this script is described in the Testing section.
This page is out of date
Please visit the actual page describing integration of a web-SIP phone into your HTML-code
Download Web Call Server 5
System requirements: Linux x86_64, 1 core CPU, 2 Gb RAM, Java
Installation:
- wget https://flashphoner.com/download-wcs5.2-server.tar.gz
- Unpack and install using 'install.sh'
- Launch server using command 'service webcallserver start'
- Open the web interface https://host:8444 and activate your license
If you are using Amazon EC2, you don't need to download anything.