Внедрение микширования потоков
Для внедрения микширования потоков вам нужно встроить HTML код и зависимые скрипты API в ваш сайт
Для быстрой установки и настройки WCS сервера воспользуйтесь этой инструкцией. Кроме этого, для тестирования вы можете подключиться к нашему демо-серверу demo.flashphoner.com.
Пошаговая инструкция по внедрению микширования потоков
Для внедрения микширования потоков с воспроизведением создадим два пустых файла mixer-min.html и mixer-min.js. В этом случае на Web-странице будет размещен минимальный REST API клиент и минимальный плеер.
Разберем содержимое файлов
HTML
Разместим в файле mixer-min.html необходимые элементы:
1. Подключаем скрипт основного API
<script type="text/javascript" src="https://flashphoner.com/downloads/builds/flashphoner_client/wcs_api-2.0/current/flashphoner.js"></script>
2. Подключаем скрипт плеера:
<script type="text/javascript" src="mixer-min.js"></script>
3. Добавляем стили для правильного отображения видео в div-элементах:
<style>
        .fp-Video {
            border: 1px double black;
            width: 322px;
            height: 242px;
        }
        .display {
            width: 100%;
            height: 100%;
            display: inline-block;
        }
        .display > video,
        object {
            width: 100%;
            height: 100%;
        }
</style>
4. Инициализируем API на загрузку страницы:
<body onload="init_api()">
5. Добавляем поле для ввода имени потока, который будет добавлен в микшер:
<input id="stream" type="text" placeholder="Stream Name"/>
6. Добавляем кнопку «Add Stream» для добавления потока в микшер:
<button id="addBtn">Add Stream</button>
7. Добавляем кнопку для удаления потока из микшера:
<button id="removeBtn">Remove Stream</button>
8. Добавляем кнопку для удаления микшера:
<button id="terminateBtn">Delete Mixer</button>
9. Добавляем div-элемент для вывода информации о текущем действии:
<div id="status"></div>
10. Добавляем div-элемент в котором будет проигрываться микшированный видеопоток:
   <div class="fp-Video">
      <div id="myVideo" class="display"></div>
   </div>
11. Добавляем кнопку для запуска воспроизведения микшированного видеопотока:
<button id="playBtn">Play Mixed Stream</button>
Полный код HTML — страницы (файл «mixer-min.html») выглядит так:
<!DOCTYPE html>
<html lang="en">
    <head>
        <script type="text/javascript" src="https://flashphoner.com/downloads/builds/flashphoner_client/wcs_api-2.0/current/flashphoner.js"></script>
        <script type="text/javascript" src="mixer-min.js"></script>
    </head>
    <style>
        .fp-Video {
            border: 1px double black;
            width: 322px;
            height: 242px;
        }
        .display {
            width: 100%;
            height: 100%;
            display: inline-block;
        }
        .display > video,
        object {
            width: 100%;
            height: 100%;
        }
    </style>
    <body onload="init_api()">
        <input id="stream" type="text" placeholder="Stream Name" />
        <br />
        <button id="addBtn">Add Stream</button>
        <button id="removeBtn">Remove Stream</button>
        <button id="terminateBtn">Delete Mixer</button>
        <br />
        <div id="status"></div>
        <br />
        <div class="fp-Video">
            <div id="myVideo" class="display"></div>
        </div>
        <button id="playBtn">Play Mixed Stream</button>
    </body>
</html>
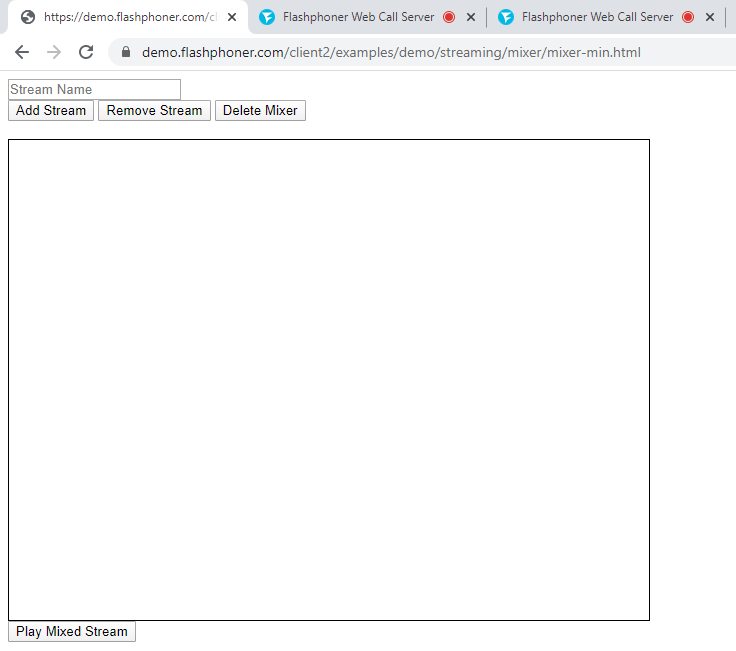
Общий вид получившейся web страницы на скриншоте ниже

JavaScript
1. Создаем константы и переменные для статуса работы сервера, WebSocket сессии и URL для REST запроса. Для обеспечения работы с браузером iOS Safari нам потребуется прелоадер, который можно скачать с GitHub:
var SESSION_STATUS = Flashphoner.constants.SESSION_STATUS;
var STREAM_STATUS = Flashphoner.constants.STREAM_STATUS;
var session;
var url = "https://demo.flashphoner.com/rest-api/mixer";
var PRELOADER_URL = "https://github.com/flashphoner/flashphoner_client/raw/wcs_api-2.0/examples/demo/dependencies/media/preloader.mp4";
2. Инициализируем API при загрузке HTML страницы и подключаемся к WCS серверу через WebSocket. В этом примере мы используем наш демо-сервер. Для тестирования собственного сервера замените «wss://demo.flashphoner.com» на адрес своего WCS. Так же привязываем функции к событиям нажатия на соответствующие кнопки и создаем микшер при помощи REST вызова:
function init_api() {
    Flashphoner.init({});
    //Connect to WCS server over websockets
    session = Flashphoner.createSession({
        urlServer: "wss://demo.flashphoner.com" //specify the address of your WCS
    }).on(SESSION_STATUS.ESTABLISHED, function(session) {
        console.log("ESTABLISHED");
    });

    addBtn.onclick = addStream;
    removeBtn.onclick = removeStream;
    terminateBtn.onclick = terminateMixer;
    playBtn.onclick = playClick;

    fetchUrl = url + "/startup";
    const options = {
        method: "POST",
        headers: {
            "Content-Type": "application/json"
        },
        body: JSON.stringify({
            "uri": "mixer://mixer1",
            "localStreamName": "mixedstream"
        }),
    }
    fetch(fetchUrl, options)
}
3. Функция «addStream()» формирует и отправляет REST запрос для добавления потока, имя которого мы указываем в поле для ввода, к микшеру:
   function addStream() {
       fetchUrl = url + "/add";
       const options = {
           method: "POST",
           headers: {
               "Content-Type": "application/json"
           },
           body: JSON.stringify({
               "uri": "mixer://mixer1",
               "remoteStreamName": document.getElementById("stream").value
           }),
       }
       fetch(fetchUrl, options);
       document.getElementById("status").textContent = document.getElementById("stream").value + " added";
       document.getElementById("stream").value = null
   }
4. Функция «removeStream()» формирует REST вызов для удаления потока, имя которого указано в поле для ввода, из микшера:
   function removeStream() {
       fetchUrl = url + "/remove";
       const options = {
           method: "POST",
           headers: {
               "Content-Type": "application/json"
           },
           body: JSON.stringify({
               "uri": "mixer://mixer1",
               "remoteStreamName": document.getElementById("stream").value
           }),
       }
       fetch(fetchUrl, options)
       document.getElementById("status").textContent = document.getElementById("stream").value + " removed";
       document.getElementById("stream").value = null
   }
5. Функция «terminateMixer()» формирует REST вызов для удаления текущего микшера:
   function terminateMixer() {
       fetchUrl = url + "/terminate";
       const options = {
           method: "POST",
           headers: {
               "Content-Type": "application/json"
           },
           body: JSON.stringify({
               "uri": "mixer://mixer1"
           }),
       }
       fetch(fetchUrl, options)
   }
6. Определяем браузер, и, если браузер это Сафари, запускаем прелоадер. Воспроизведение должно начинаться строго по жесту пользователя (т. е. По нажатию кнопки). Это ограничение мобильных браузеров Safari. (Подробнее здесь):
var Browser = {
    isSafari: function() {
        return /^((?!chrome|android).)*safari/i.test(navigator.userAgent);
    },
}

function playClick() {
    if (Browser.isSafari()) {
        Flashphoner.playFirstVideo(document.getElementById("myVideo"), true, PRELOADER_URL).then(function() {
            playStream();
        });
    } else {
        playStream();
    }
}
7. Функция «playStream()» проигрывает поток с микшера в div элементе на HTML странице:
function playStream() {
    var options = {
        name: "mixedstream",
        display: document.getElementById("myVideo")
    };
    var stream = session.createStream(options).on(STREAM_STATUS.PLAYING, function(stream) {});
    stream.play();
}
Полный код JavaScript (файл «mixer-min.js») выглядит так:
var SESSION_STATUS = Flashphoner.constants.SESSION_STATUS;
var STREAM_STATUS = Flashphoner.constants.STREAM_STATUS;
var session;
var url = "https://demo.flashphoner.com/rest-api/mixer";
var PRELOADER_URL = "https://github.com/flashphoner/flashphoner_client/raw/wcs_api-2.0/examples/demo/dependencies/media/preloader.mp4";

//Init Flashphoner API & create Mixer
function init_api() {
    Flashphoner.init({});
    //Connect to WCS server over websockets
    session = Flashphoner.createSession({
        urlServer: "wss://demo.flashphoner.com" //specify the address of your WCS
    }).on(SESSION_STATUS.ESTABLISHED, function(session) {
        console.log("ESTABLISHED");
    });

    addBtn.onclick = addStream;
    removeBtn.onclick = removeStream;
    terminateBtn.onclick = terminateMixer;
    playBtn.onclick = playClick;

    fetchUrl = url + "/startup";
    const options = {
        method: "POST",
        headers: {
            "Content-Type": "application/json"
        },
        body: JSON.stringify({
            "uri": "mixer://mixer1",
            "localStreamName": "mixedstream"
        }),
    }
    fetch(fetchUrl, options)
}

function addStream() {
    fetchUrl = url + "/add";
    const options = {
        method: "POST",
        headers: {
            "Content-Type": "application/json"
        },
        body: JSON.stringify({
            "uri": "mixer://mixer1",
            "remoteStreamName": document.getElementById("stream").value
        }),
    }
    fetch(fetchUrl, options);
    document.getElementById("status").textContent = document.getElementById("stream").value + " added";
    document.getElementById("stream").value = null
}

function removeStream() {
    fetchUrl = url + "/remove";
    const options = {
        method: "POST",
        headers: {
            "Content-Type": "application/json"
        },
        body: JSON.stringify({
            "uri": "mixer://mixer1",
            "remoteStreamName": document.getElementById("stream").value
        }),
    }
    fetch(fetchUrl, options)
    document.getElementById("status").textContent = document.getElementById("stream").value + " removed";
    document.getElementById("stream").value = null
}

function terminateMixer() {
    fetchUrl = url + "/terminate";
    const options = {
        method: "POST",
        headers: {
            "Content-Type": "application/json"
        },
        body: JSON.stringify({
            "uri": "mixer://mixer1"
        }),
    }
    fetch(fetchUrl, options)
}

//Player
//Detect browser
var Browser = {
    isSafari: function() {
        return /^((?!chrome|android).)*safari/i.test(navigator.userAgent);
    },
}

function playClick() {
    if (Browser.isSafari()) {
        Flashphoner.playFirstVideo(document.getElementById("myVideo"), true, PRELOADER_URL).then(function() {
            playStream();
        });
    } else {
        playStream();
    }
}

function playStream() {
    var options = {
        name: "mixedstream",
        display: document.getElementById("myVideo")
    };
    var stream = session.createStream(options).on(STREAM_STATUS.PLAYING, function(stream) {});
    stream.play();
}

function playStream() {
    var options = {
        name: "stream1",
        display: document.getElementById("play")
    };
    var stream = session.createStream(options).on(STREAM_STATUS.PLAYING, function(stream) {
        console.log("playing");
    });
    stream.play();
}
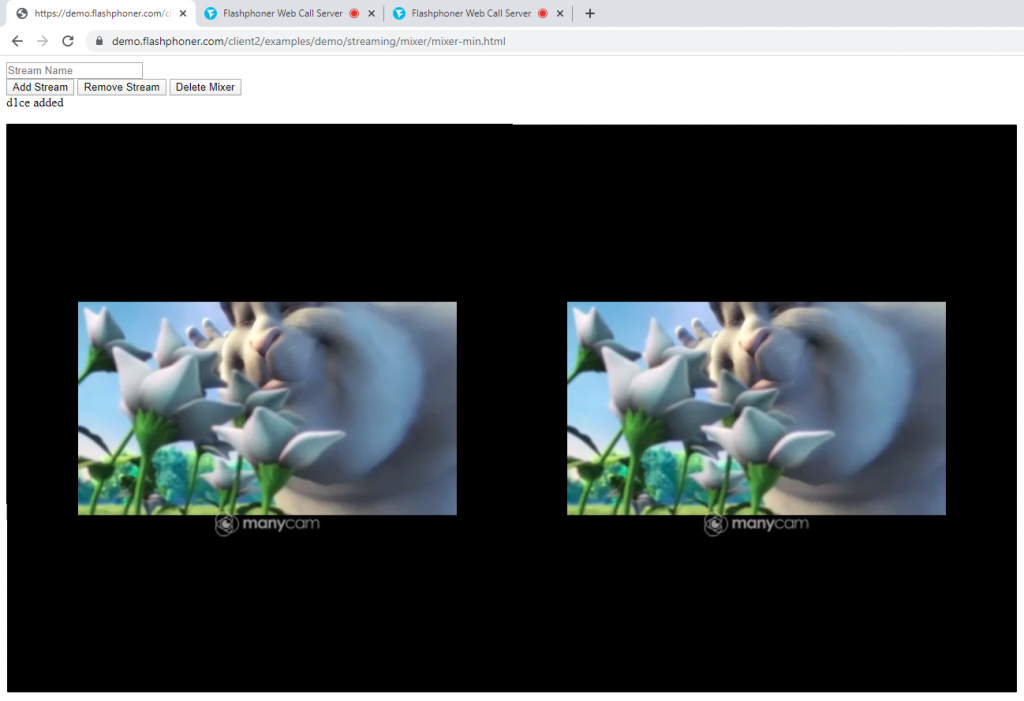
Вид web страницы во время работы микшера с двумя добавленными видеопотоками.

Таким образом можно внедрить в свой web-проект микширование видеопотоков с использованием минимального кода.
Загрузить минимальные примеры
1. Скачать архив 2. Распаковать файлы примеров на свой Web-сервер. Каталог по умолчанию для Apache: для Nginx: или смотрите документацию на свой Web-сервер. 3. Запустите минимальный пример в браузере с помощью ссылки вида Внимание! Чтобы примеры работали корректно веб-страница должна быть открыта через https/var/www/html
/usr/local/nginx/html
https://your.web.server/min-example-file-name.html
Загрузить Web Call Server 5
Системные требования: Linux x86_64, 1 core CPU, 2 Gb RAM, Java
Установка:
- wget https://flashphoner.com/download-wcs5.2-server.tar.gz
- Распаковать и установить с помощью скрипта 'install.sh'
- Запустить сервер с помощью команды 'service webcallserver start'
- Открыть веб-интерфейс https://host:8444 и активировать вашу лицензию
Если вы используете серверы Amazon EC2, то скачивать ничего не нужно.

