Running a broadcasting of a SIP call to RTMP CDN
Existing services, such as IP PBX, online meeting services and so on, as well as various hardware and software solutions and products by other vendors do not offer ways to convert a SIP conference to wide broadcasting via Internet. Streaming server, audio/video traffic source and interconnection server (i.e. Web Call Server) are necessary for conducting traffic from SIP source into RTMP CDN network. Although it is mandatory to have some kind of instrument for managing Web Call Server.
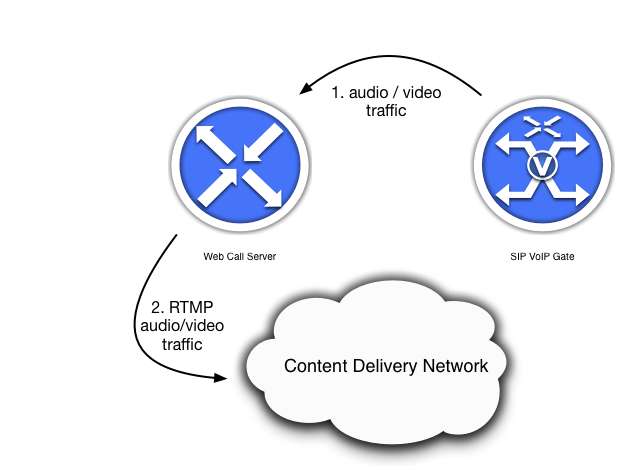
Below we review possible ways to integrate two stream video servers, namely Adobe Media Server and Wowza Streaming Engine, and popular online meeting services with Web Call Server platform in different combinations..
Content
- Principal scheme
- REST client
- Web Call Server configuring
- Analyzing possible integration problems
- Testing of RTMP server
- Web Call Server integration with IP PBX
- Sources
Principal scheme
When we decided to test Web Call Server capabilities of integration with traffic source and redirect that traffic to an RTMP server. Same time SIP will be used for collaboration between Web Call Server and traffic source.
Formally following steps is necessary:
- Web Call Server managing interface testing
- Web Call Server proper configuration testing
- Problem analyzes while testing Web Call Server
- RTMP server capabilities testing
- Web Call Server connecting with an IP PBX
- Summary
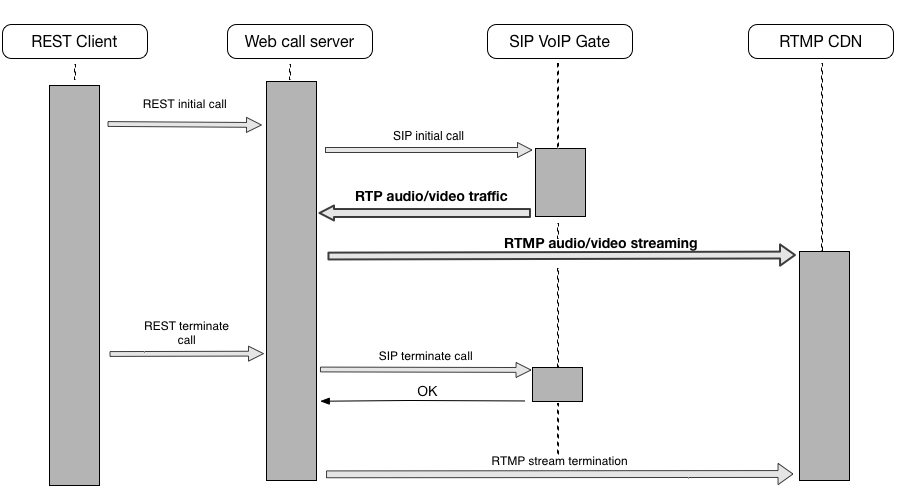
Below is the sequence diagram that shows the step-by-step sequence of the software interaction:
Creating and configuration of the REST client
An original code samples could show simple way which can help you manage out one of the known integration software – Web Call Server. It is important key moment of having useful code with proven functionality in case that you need to embed this code into your application. In the purpose of the further simple and clear explanations in this article we will show how to use above code in a few examples with different services and cases in ‘manual’ mode, but you can embed this code into your applications and use it in an automatic mode.
Functions below could collect all necessary data for the further REST query, which is in particular, URL (of the Web Call Server), data (command parameters for the server):
function sendREST(url, data) {
console.info("url: " + url);
console.info("data: " + data);
$.ajax({
url: url,
type: 'POST',
contentType: 'application/json',
data: data,
success: function () {
alert('REST request has been sent. Please check Developer Tools > Console output.');
console.info("REST successfully done");
}
});
}
Function above will return ‘REST successfully done’ in case of success.
Next key function help you establishing call between Web Call Server and any content source (like online meeting service, softphone etc) with mandatory parameters (usually provided by the content sources):
//Star a new call based on call details and connection details in the RESTCallForm and ConnectionDetailsForm
function startCall() {
var url = document.getElementById("resturl").value + "/call";
var connectionDetailsFormObject = $('#ConnectionDetailsForm').serializeObject();
var RESTCallFormObject = $('#RESTCallForm').serializeObject();
RESTCallFormObject.connection = connectionDetailsFormObject;
var data = JSON.stringify(RESTCallFormObject);
sendREST(url, data);
}
Pay attention that URL should not have ./call part at the end, because this part of URL will be added automatically by the function.
Whole original code are available for downloading here
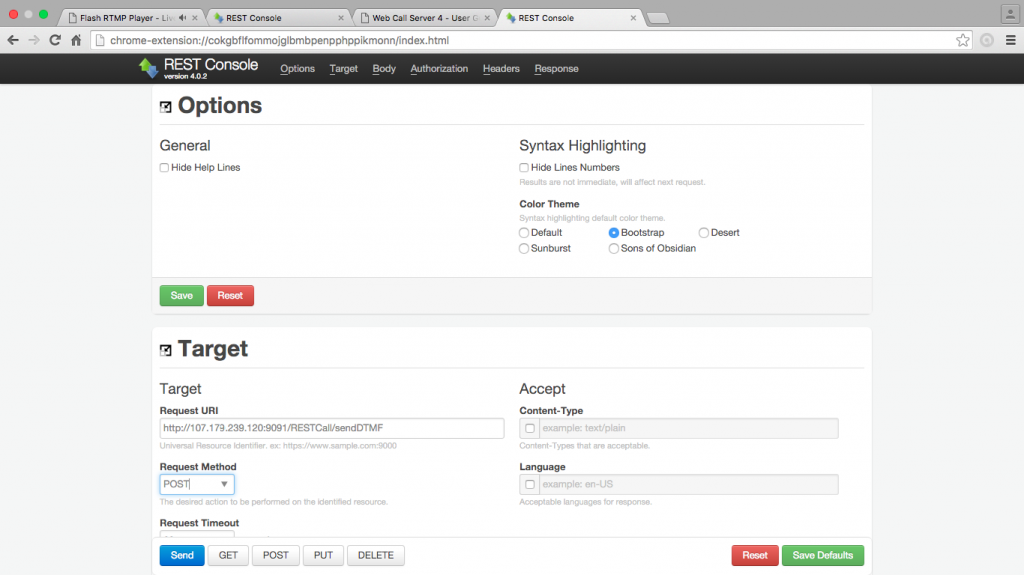
For the purpose of the further simple and clear explanations it will be shown how to use above code in ‘manual’ mode with usage of the Google Chrome REST console , through which Web Call Server can receive all necessary parameters for the further interrogation with third-part software. For initiation should be send next query:
| { | |
"callId":"Xq2tlLcX89tTjaji", |
# arbitrary unique call id |
"callee":"10000", |
# callee name (random example) |
"rtmpUrl":"rtmp://45.101.139.105:1935/live", |
# broadcast address (CDN platform) |
"rtmpStream":"lifestream1", |
# stream name |
"hasAudio":"true", |
# audio content attribute (has audio, yes/no) |
"hasVideo":"true", |
# video content attribute (has video, yes/no) |
"connection": |
# connection parameters |
| { |
|
"sipLogin":"10000", |
# login |
"sipPassword":"10000000", |
# password |
"sipAuthenticationName":"10000", |
# authentication name |
"sipDomain":"162.255.36.11", |
# IP address of the meeting (provided by |
"sipPort":"5060", |
# SIP server port number |
"sipRegisterRequired":"false", |
# domain registration attribute |
"appKey":"callApp" |
|
| } |
|
| } |
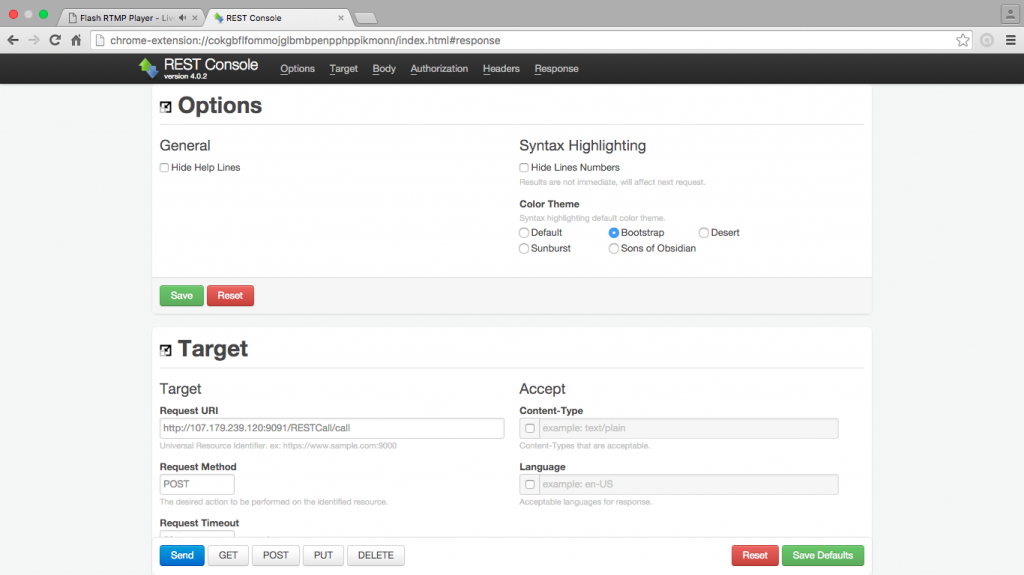
A request with the given parameters is sent to a special URI Web Call Server:
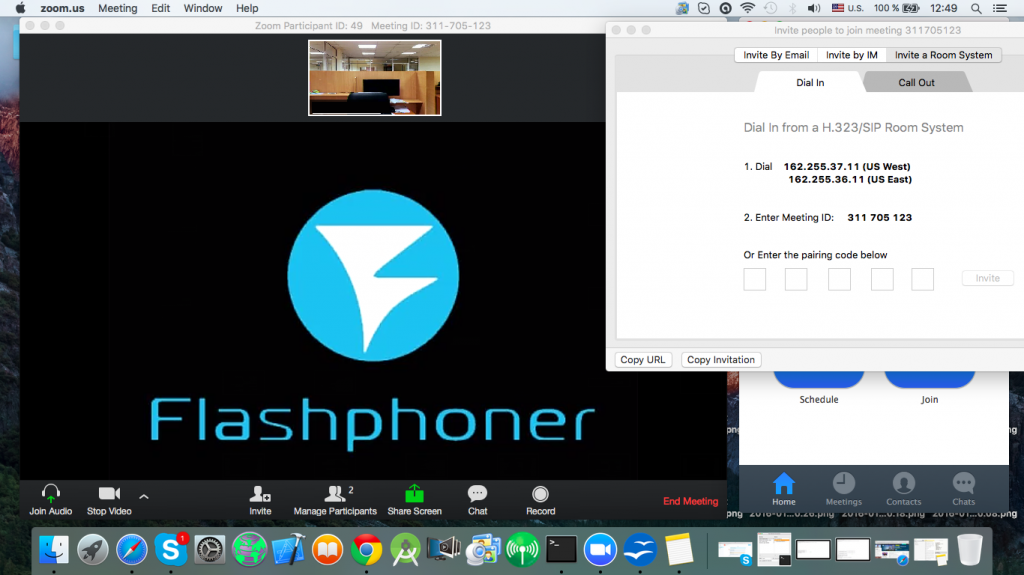
After the request is processed, Web Call Server connects to the meeting as one of listeners. Simultaneously, the response of the meeting service is received by Web Call Server and is redirected by it to streaing video servers. This is illustrated below:
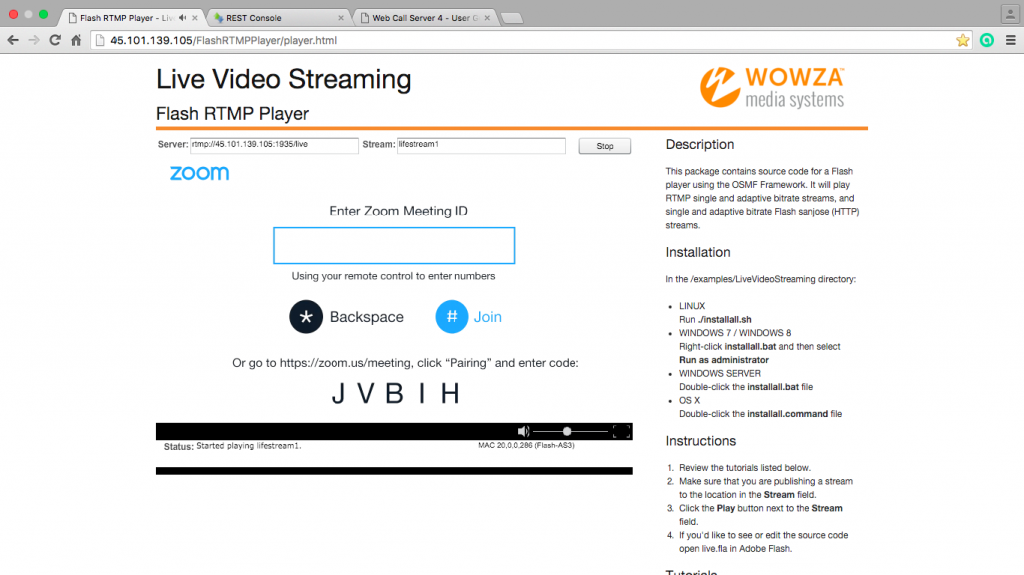
In this particular case, the given callee connects to the broadcasting with certain meeting ID (which is 311 705 123) of the given meeting as shown below. As you see, interface shows Web Call Server logo, which is one of listeners of the running meeting.
Same request could be send through REST query:
{
“callId”:”Xq2tlLcX89tTjaji”, # same with previous request ID
“type”:”RFC2833″,
“dumf”:”311705123#” # here 311705123 is unique ID, provided by certain service
}
At the same time, in the Flash Player window we can see the broadcasting redirected through Web Call Server from the traffic source to the streaming server server.
Therefore, using only two commands send via the REST console on Web Call Server we were able to initiate participation in a meeting on the online meeting service and redirect content (both the picture and sound) to the streaming server for further broadcasting via the CDN network.
Web Call Server configuring
Inspite of Web Call Server is an integration tool to couple various content sources with streaming servers, each conference (or other source) can have individual settings, specifics and undocumented requirements to implementation of standard SIP and RTMP protocols.
In our reference case both streaming servers are installed on the same device, so first we need to make sure only one of them is working at a time (AMS or WSE). Otherwise, (if each server runs on its own device) the next step is not necessary.
We had to force one of the streaming servers to stop, as shown below:
[root@wowza ams]# ./amsmgr server ams stop
Server: ams command: stop
NPTL 2.12

Stopping Adobe Media Server (please check /var/log/messages)
Server has shutdown…

[root@wowza ams]# service WowzaStreamingEngine start
WowzaStreamingEngine: starting…

In this particular case, AMS is stopped (we know it worked on the port 1936), and Wowza Streaming Engine works on the port 1935 and IP 45.101.139.105.
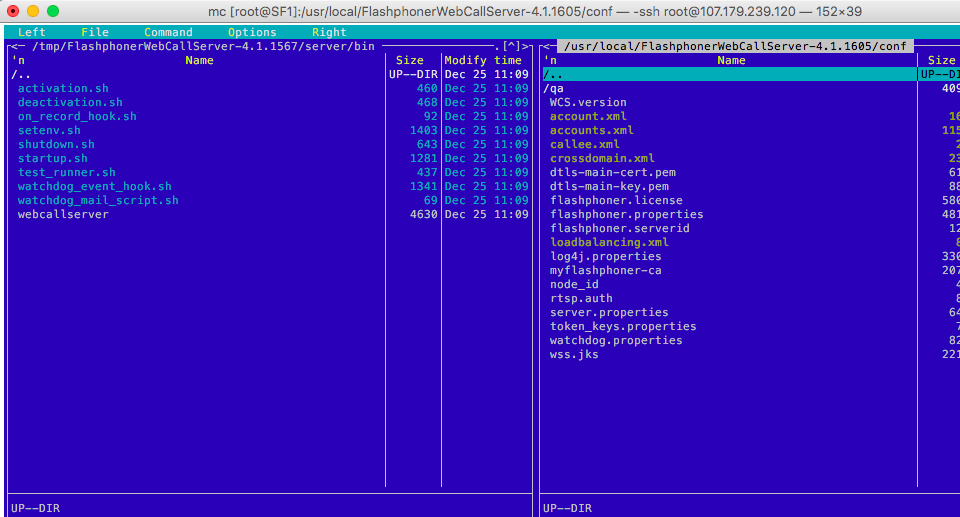
Then, we need to make sure Web Call Server server configuration matches parameters of the content source we use. To do this, we can ask the server where Web Call Serverv 4 is deployed via ssh and in the ./conf folder locate a configuration file, as it is shown below:
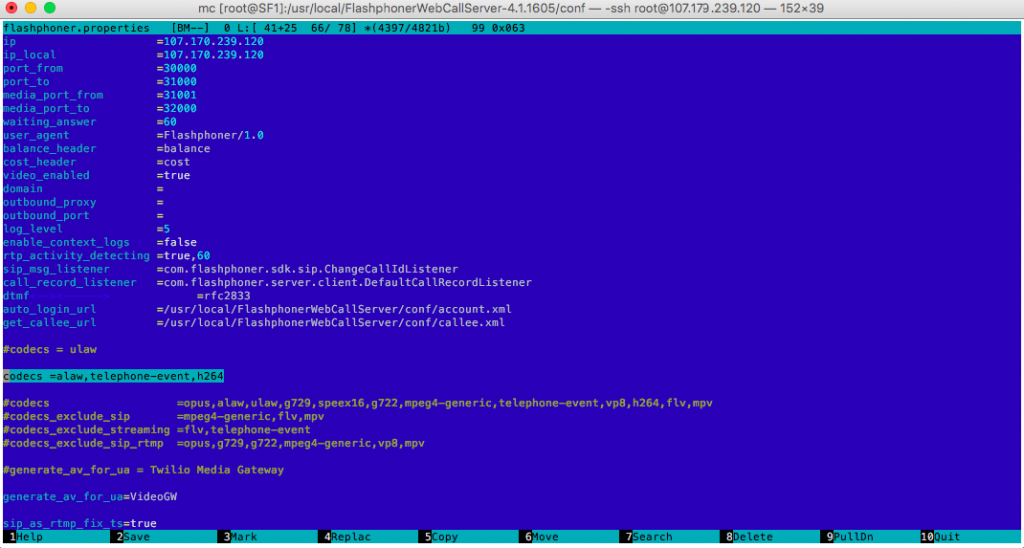
In the file, we need to adjust codecs parameters and some others as shown on the picture. Comment out parameters that should apply to other services:
As soon as all new parameters are saved in the configuration file, restart Web Call Server, as shown below:
[root@SF1 conf]# service webcallserver stop

FlashphonerWebCallServer: stopping [OK]

[root@SF1 conf]# service webcallserver start

FlashphonerWebCallServer: starting [OK]
As a result, we have correctly functioning streaming video server and Web Call Server, so we can start managing Web Call Server and the broadcast source.
Analyzing possible integration problems
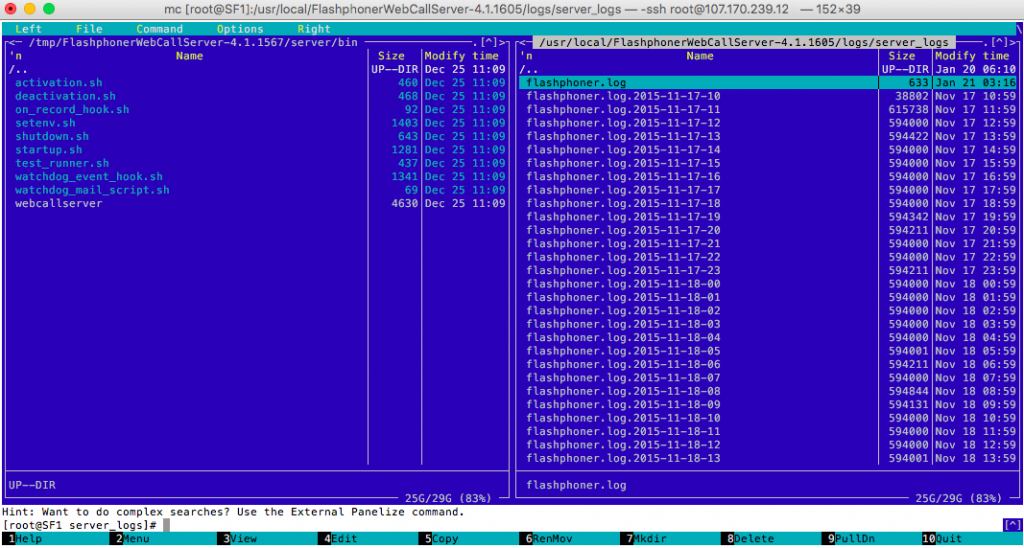
To find out possible reasons of errors an failures during cooperation between Web Call Server and other software and services, we recommend to take a look at log files on the Web Call Server installation server, as shown on the pictures below:
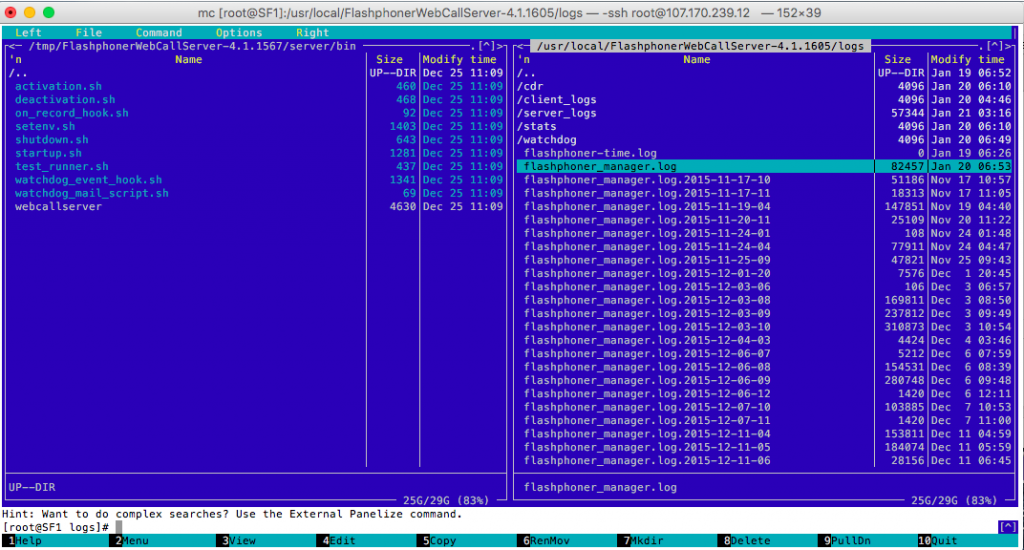
Some useful information can be found in flashphone_manager.log file too, which is shown below:
You can see results of your requests sent via the REST console, you can use Google Developer Tools as well.
Testing of RTMP server
We used Adobe Flash Media Live Encoder broadcast as a reference source of audio/video stream through the streaming video server.
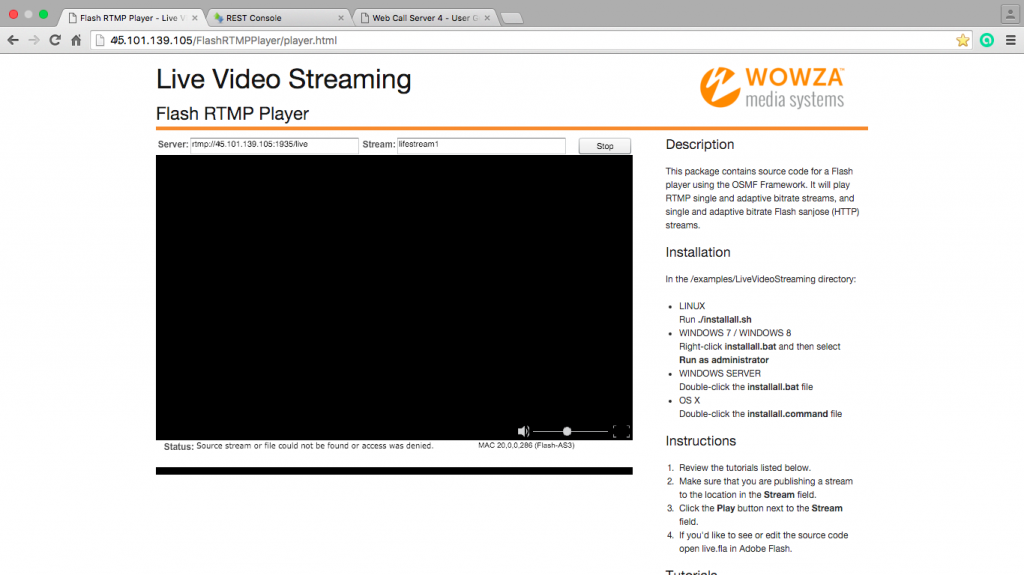
The resulting stream (past the streaming video server) was checked with Flash Player (shown on the screenshot below).
It is crucial to carefully configure stream settings (IP address, port, stream name) both of the source and of the recipient (player).
Broadcast testing diagram (or the streaming server operation diagram) is shown below:

The screenshot shows configuring Adobe Flash Media Live Encoder installed to a local client (outside of the local network where the CDN platforms run).
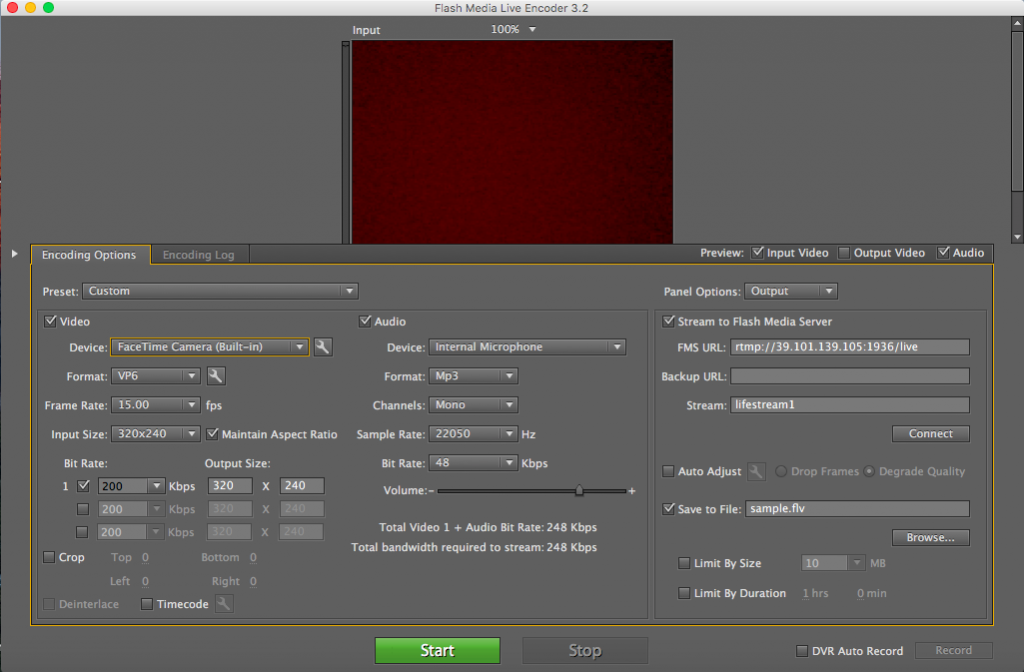
After we check the fact that the audio/video stream reaches the RTMP server (that’s basically what we see in the player), we can be sure that RTMP server is working properly and then start the tests.
Web Call Server integration with IP PBX
One of the most common ways of interaction between the source (on the right) and the recipient of the content (on the left) is displayed on the diagram below:
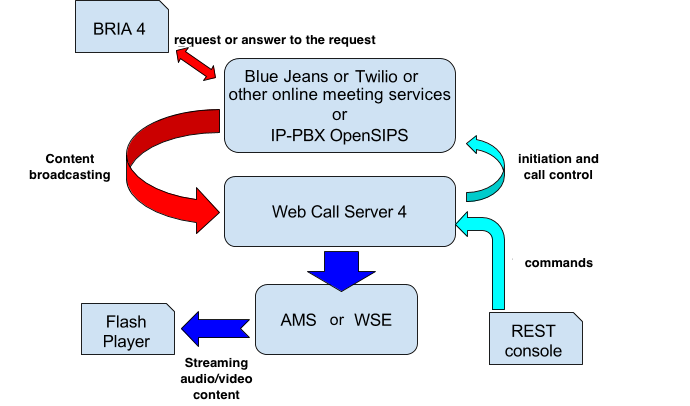
Note, that while testing various ways of interaction using the integration platform we modified the above diagram depending on requirements of the experiment.
For the purpose of further integration there were created virtual test environment, which included properly configured streaming servers, IP PBX and other software that is listed below:
Stream video servers used in the experiment:
- Wowza Streaming Engine
- Adobe Media Server
Integration platform:
- Flashphoner Web Call Server
- REST console (Google Chrome)
Broadcast sources:
- CounterPath Bria 4
- OpenSIPS
Software to view broadcast (or content):
- Flash Player
To test cooperation with IP-PBX solutions, we have conducted a test with IP-PBX Open SIPS.
Testing framework layout is shown below:
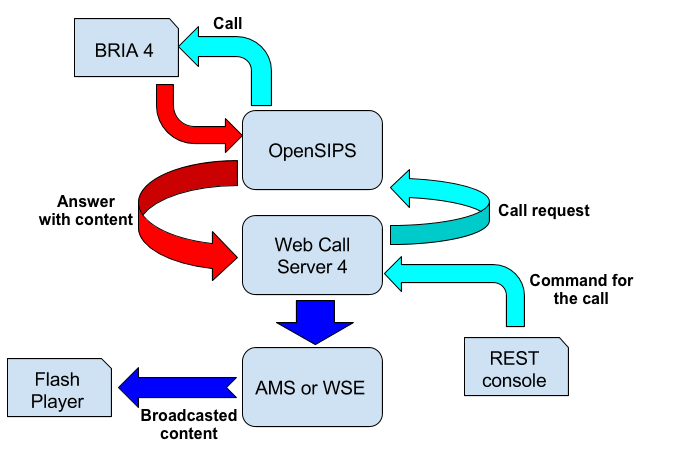
In this case, Bria works as a “service” accepting calls from third-party persons and responding with content. Due to the changed role of Bria, we need to change settings as shown on the screenshots below. In particular, we need to create an account for calls to IP-PBX OpenSIPS:
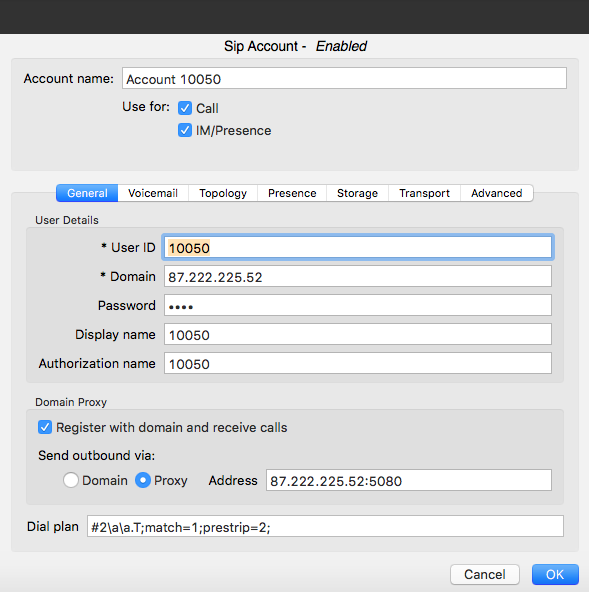
Like in all other cases, to control Web Call Server, we send a request:
{
"callId":"Xq2tlLcX89tTjaji",
"callee":"10050",
"rtmpUrl":"rtmp://45.101.139.105:1935/live",
"rtmpStream":"lifestream1",
"hasAudio":"true",
"hasVideo":"true",
"connection":{
"sipLogin":"10051",
"sipPassword":"15001",
"sipAuthenticationName":"10051",
"sipDomain":"87.222.225.52",
"sipPort":"5080",
"sipRegisterRequired":"false",
"appKey":"callApp"
}
}
Note, that the call goes through the account 10051 created on the OpenSIPS server, and the “number” of the callee is specified in the field of the same name.
As a result, the call made via Web Call Server to the “account” 10050 was redirected to the streaming server and played via Flash Player.
Test results with most popular online meeting services available here.
Download Web Call Server 5
System requirements: Linux x86_64, 1 core CPU, 2 Gb RAM, Java
Installation:
- wget https://flashphoner.com/download-wcs5.2-server.tar.gz
- Unpack and install using 'install.sh'
- Launch server using command 'service webcallserver start'
- Open the web interface https://host:8444 and activate your license
If you are using Amazon EC2, you don't need to download anything.

