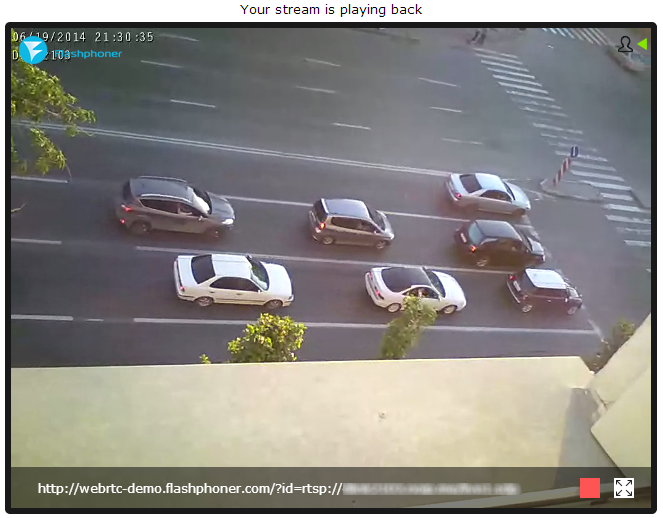
WebRTC Online Broadcasting from IP-Cameras and Video Surveillance Systems Using WebRTC & Broadcasting Server
IP-cameras, car dashboard cameras, video surveillance systems and other similar devices are widely used for self-contained video recording, that is when a video is recorded to a server or to a built-in storage of a dashboard camera itself. The same devices can also be used for real-time surveillance when the video signal is transmitted directly to operator’s monitor. IP-cameras are often used for public broadcasting from sports events, zoos, administration buildings or to control private areas.
The main difference of an IP-camera from a conventional web-camera we connect to our home PCs is that today’s IP-cameras are mini-computers too, with a built-in CPU and the support for a stack of network protocols, so they are capable of sending video and audio directly to the network not requiring connection to a computer or a notebook. IP-cameras usually have their own IP addresses either obtained via DHCP or prescribed in settings through a web-interface. Therefore, an IP-camera is a fully fledged network device just like a notebook or a smartphone that is able to connect to your router via wi-fi.
Although an IP-camera is capable to send the stream to multiple users, its capacity is usually not enough to transmit the video stream to a serious number of spectators. If an IP-camera is connected to a local network, spectators will most likely face with bandwidth shortage and, furthermore, with the lack of camera resources and delays.
The solution to this problem is using an Internet retranslator server that receives just one stream from the camera and broadcasts it to an unlimited number of users. Resources of a data-center server and communication channel capacity are incomparable with those offered by the camera, so wide broadcasting of a video stream becomes possible.
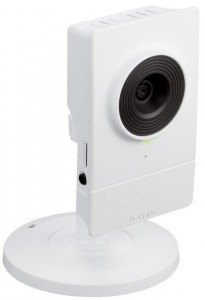
This article describes Flashphoner WebRTC Media & Broadcasting Server online broadcasting of the video stream obtained from Dlink 2103 web-camera.
Why WebRTC?
WebRTC is a trendy stream video technology that works in a user’s browser without any third-party software through the VP8 video codec specically optimized for Internet use. Today, every Android Chrome browser supports this technology, which means millions of “ready-to-watch” devices, no additional software or complex configuration needed.
We used the simplest testing camera among those that support the RTSP protocol and H.264 and G.711 codecs for compatibility with the WebRTC Media & Broadcasting Server.
Installation
At first, we installed the camera. The process was simple and neat: we connected the power and plugged the supplied 1m long RJ45 Internet wire to the router. The green light lit up.
The camera automatically retrieved its IP address via DHCP, and the web interface of the router displayed Dlink 2103 IP 192.168.1.35.
So, we logged to the web interface with administrator rights. The password wasn’t set.
http://192.168.1.35
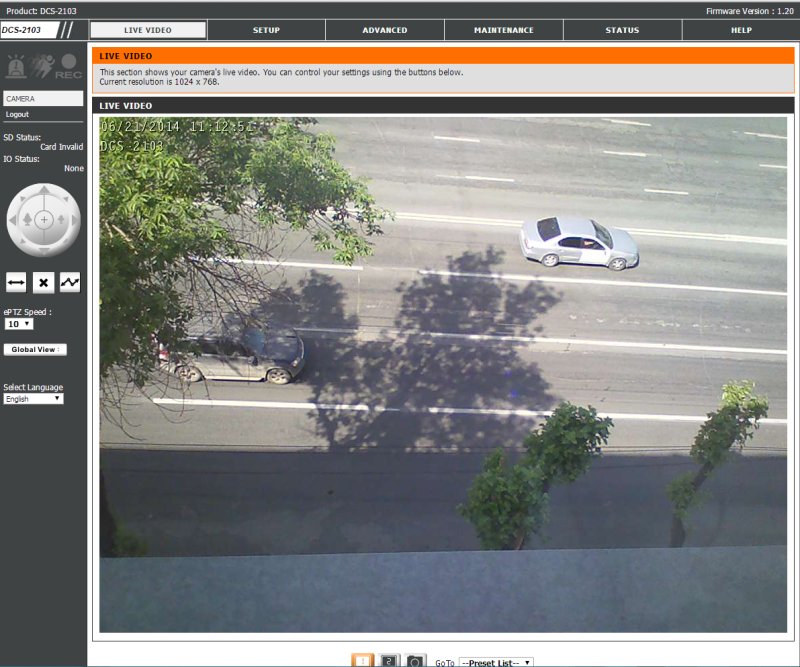
It became evident that the camera worked as it should and correctly displayed video in the administration interface; the sound was also transmitted ok.
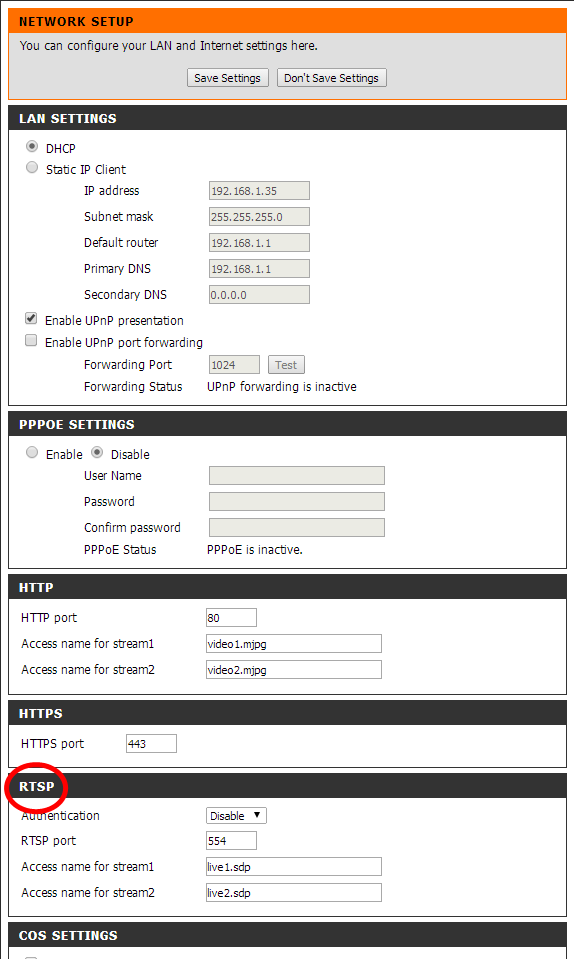
So, we entered Setup – Network and turned off Authentication, switching it to Disabled. Hence, we effectively made the system to not ask for a password when the camera is accessed. The RTSP port was the default 554, as seen on the settings screen below.
live1.sdp and live2.sdp are profiles, the predefined stream configs that specify the format of the output video. We used the default live1.sdp profile since it well matched our requirements: H.264 + G.711, 25 frames per second. The profile can be edited later if needed.
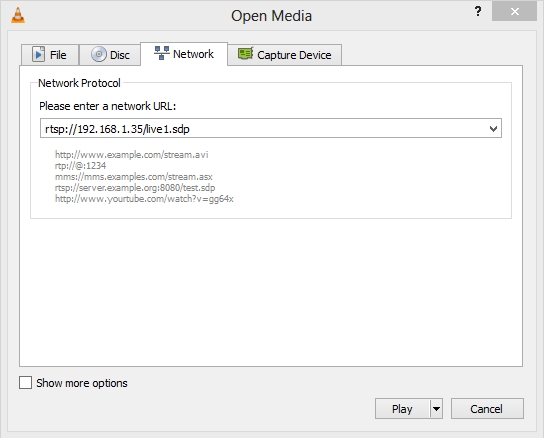
Then we conducted a simple test for our camera: we grabbed its video stream using VLC Player. For that, in VLC we clicked “Open URL” and typed the RTSP address of the camera: rtsp://192.168.1.35/live1.sdp
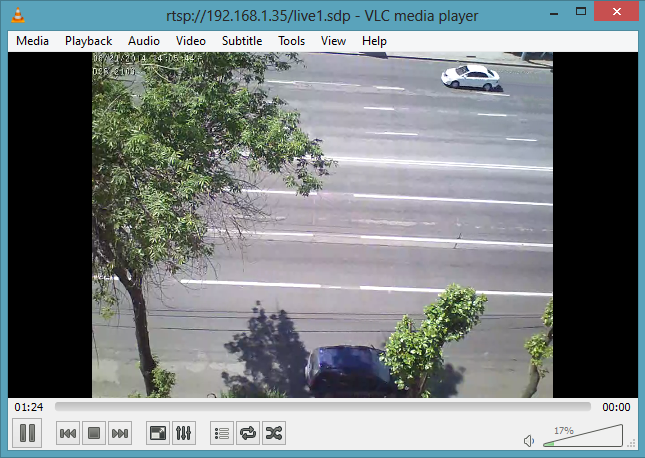
The stream was shown again, now in a third-party software, VLC Player, via RTSP.
All in all, this meant that the camera test was successful, and the device was ready to broadcast through our server.
In a local network it is easy to grab the stream if your VLC player is in the same network with the camera. However, in global networks there are NAT and firewalls, so in case of any network problems, make sure to contact your network administrator or ISP support.
In our case the ISP was Rostelecom. Everything started worked like a charm – either the IP address happened to be static, or NAT was more humane.
The external IP address was determined in few minutes as 177.41.122.23, thanks to a single request to https://www.whatismyip.com/.
Now we needed to tell the router to send inbound requests to the IP camera at 192.168.1.35 if queried via RTSP port 554. That’s what was done in its settings.

In order to make sure the port 554 does respond, we executed the command telnet 177.41.122.23 554 and found that some device already responds on that port. So nothing remained for us but to run the server and connect to the camera using it.
As a server we used a virtual Centos 64 bit server from digitalocean in one of European data-centers.
Purchasing a server resulted in obtaining access to the SSH console, so we logged in with the Putty SSH-client.
Installation of the mediaserver is thoroughly described in the WebRTC Media & Broadcasting Server manual and basically reduces to executing of several Linux commands in the command line.
1. Downloaded the installation package from the server:
$wget https://flashphoner.com/download-wcs5-server.tar.gz
2. Extracted gz contents:
$tar -xzf download-wcs5-server.tar.gz
3. Install:
$cd FlashphonerWebCallServer
$./install.sh
During the installation process we specified IP address of the server: XXX.XXX.XXX.XXX
4. Activated license:
$cd /usr/local/FlashphonerWebCallServer/bin
$./activation.sh
5. Started the server:
$service webcallserver start
6. Checked the logs:
$tail - f /usr/local/FlashphonerWebCallServer/logs/flashphoner_manager.log
7. Checked, if the server has started and is ready to work:
$ps aux | grep Flashphoner
Testing
As the installation process finished, we began testing.
Let us remind you that our test case was to connect multiple web-users to a video stream produced by the IP-camera using their browsers.
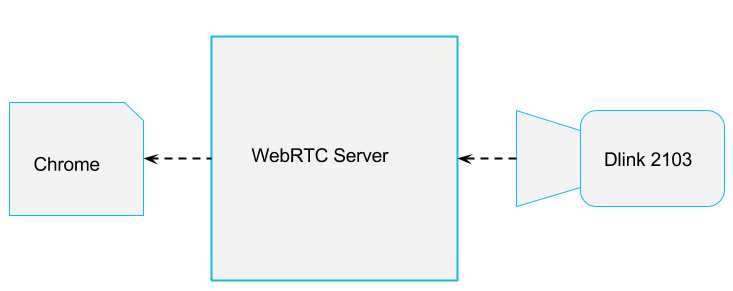
In addition to the server, we also had a web-client consisting of a dozen of Javascript, HTML and CSS files unpacked to /var/www/html during installation.
Then we opened http://host:9091 in the Chrome browser: http://192.168.1.3:9091 Demo / Streaming Min
To start playback, we needed simply open this link in a browser. WebRTC Media & Broadcasting Server queried streams from the camera, processed them and transmitted to a browser via WebRTC.
Please note, a user doesn’t need to do anything else. And the next user will connect faster, because the connection between the WebRTC server and the IP-camera is already established. So an application should merely open a WebRTC session and connect to the existing stream.
After the link was opened in a browser, we had to wait a little: few seconds were required to establish connection with the server via Websockets, create a WebRTC session and fetch the stream.
Ok, the connection is established, and a spectator can now see the stream on the screen as well as the unique link he can use to let other Internet users to watch the same video stream. A user can share the link with other people, stop the playback of the stream or turn on the fullscreen mode using the bottom right controls.
It is worth mentioning, the latency was nearly perfect. Ping to the data-center was about 100 ms and the delay wasn’t recognizable with a naked eye. Therefore, we can assume the real delay is the same 100 give or take few dozens of milliseconds for buffering.
In conclusion, we successfully set up online broadcasting between a single IP-camera and multiple browsers. Additional users connected to the stream using its identificator were not causing any problems too.
The server is quite easy in installing and configuring and doesn’t require any serious skills except for knowledge of Linux on the advanced user level, ability to execute ssh command in the console and work with a text editor.
This ends up configuration works on the WebRTC server.
Also, we recommend taking a look at our article on configuration and testing of WebRTC & Broadcasting Server for running online broadcasting and webinars between browsers.
Video of RTSP-WebRTC and RTSP-Websocket player testing
RTSP-WebRTC player for Chrome and Firefox
RTSP-Websocket player for iOS Safari
Download Web Call Server 5
System requirements: Linux x86_64, 1 core CPU, 2 Gb RAM, Java
Installation:
- wget https://flashphoner.com/download-wcs5.2-server.tar.gz
- Unpack and install using 'install.sh'
- Launch server using command 'service webcallserver start'
- Open the web interface https://host:8444 and activate your license
If you are using Amazon EC2, you don't need to download anything.
Related articles
iOS Safari 11 now supports WebRTC
Embedding a WebRTC player for live broadcasts to a website
7 ways to stream RTSP on the page
Browser-based WebRTC stream from RTSP IP camera with low latency

